
Using Theme Options

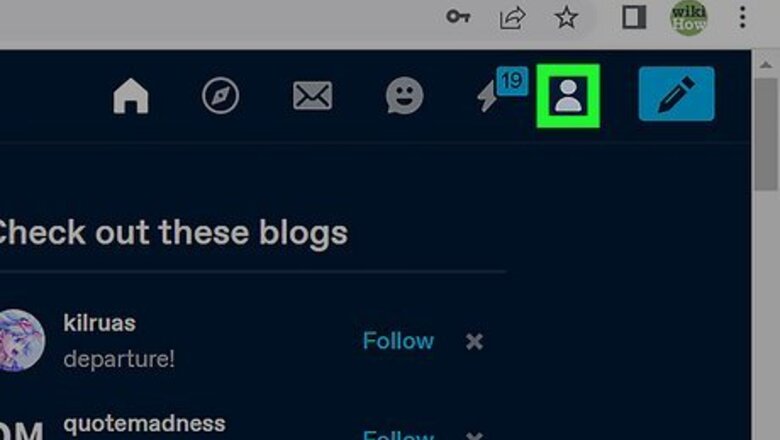
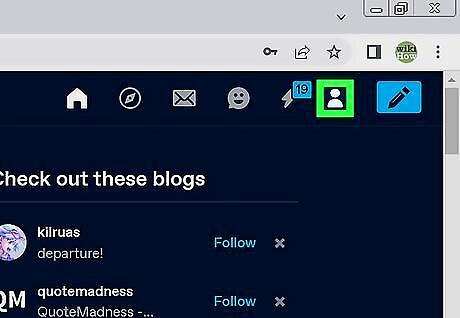
Click the Account icon in Tumblr. It's the outline of a person at the top-right corner of Tumblr. A menu will expand.

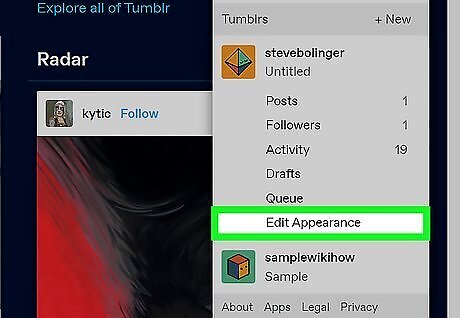
Click Edit Appearance under your blog's name. You'll see it on the account menu. If you have more than one blog connected to this account, click the name of the blog on the menu first. Then, click the Account icon again—you can now select Edit Appearance for that blog.

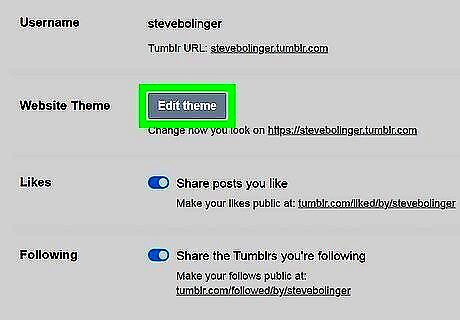
Click the Edit Theme. You'll see this next to "Website Theme" in the left panel. All of the options you can change for your blog theme appear here.
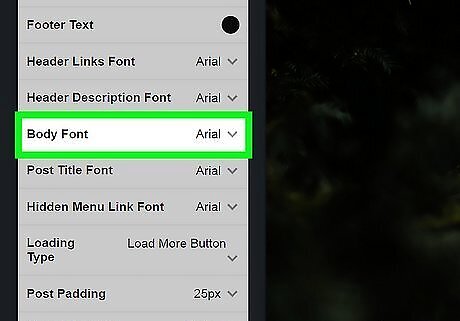
Find your theme's font options. Scroll down until you see your theme's font options in the left panel. The font options you can change here will depend on the theme you're using. For example, some themes have separate areas for font size and type. Others have one "Body" font that you can change. If the theme you're using doesn't have enough font options for you, click Browse themes at the top-left corner of the page to browse for and select a different theme.
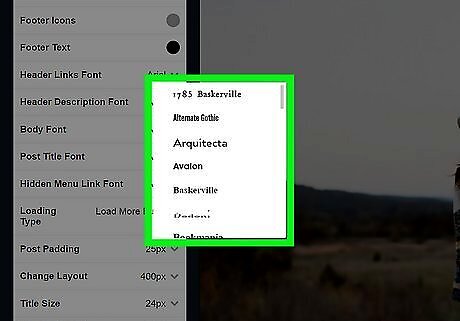
Select your new font preferences. You can now modify any of the font options in the left panel. If your theme doesn't have a drop-down menu with font names, you can list font by name into the field. For a full list of fonts you can safely use on Tumblr, check out https://www.cssfontstack.com/Web-Fonts. If you don't like the theme's font options but don't want to choose a different theme, you can edit the theme's HTML code to add and customize fonts.
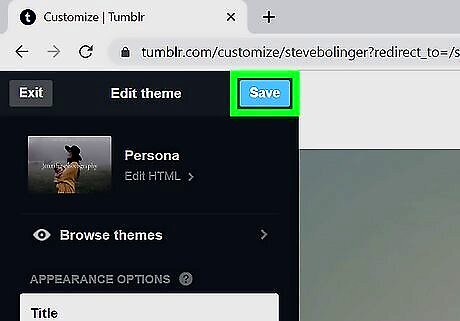
Click Save. You'll see it at the top of the left panel. Any font changes you've made are now live.
Editing HTML
Click the Account icon in Tumblr. It's the outline of a person at the top-right corner of Tumblr. A menu will expand. This method will show you how to customize the code of your Tumblr theme to add and edit fonts that you can't change with the theme editor. You'll need a basic understanding of HTML and CSS to use this method.
Click Edit Appearance under your blog's name. You'll see it on the account menu. If you have more than one blog connected to this account, click the name of the blog on the menu first. Then, click the Account icon again—you can now select Edit Appearance for that blog.
Click the Edit Theme. You'll see this next to "Website Theme" in the left panel. All of the options you can change for your blog theme appear here.
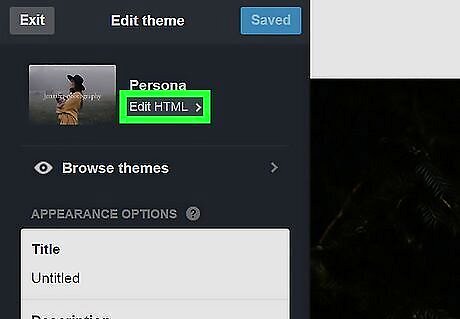
Click Edit HTML. This is at the top of the left menu, below your theme's title.
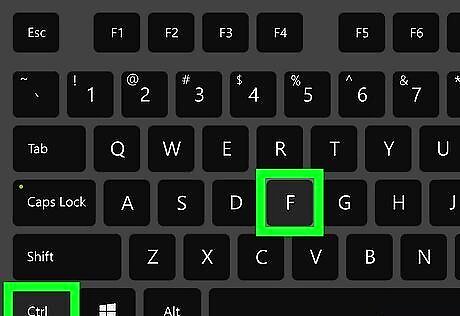
Press ⌘ Cmd+F (Mac) or Ctrl+F (PC). This opens the Find tool.
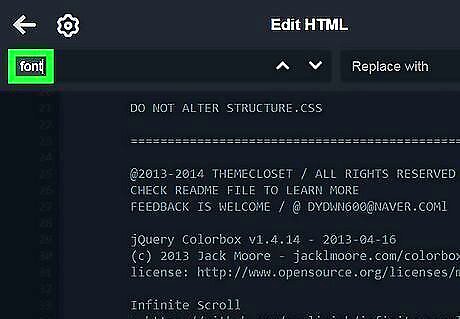
Type font into the search bar. Now you should see all of the places in the HTML editor that mention "font."
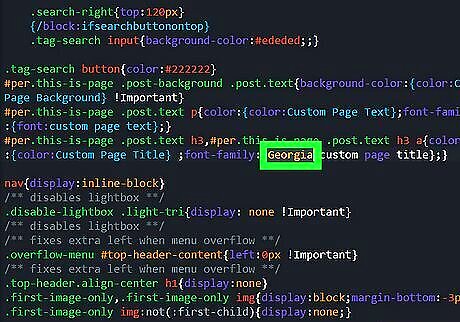
Go through each "font " section and type in a new font name. You'll want to look for all instances of "Font" that mention a font name, such as Georgia, Helvetica, or Arial. Any time you see a font name, you can swap it out with any of the fonts listed on this page: https://www.cssfontstack.com/Web-Fonts. You can also use Google Fonts on Tumblr. Just go to https://fonts.google.com. Click a font you like, highlight the code in the "Use on the web" area at the bottom right, then press Cmd + C (Mac) or Ctrl + C (PC) to copy it. Then, go back to the HTML code of your theme and paste the copied code after by pressing Cmd + V (Mac) or Ctrl + V (PC). If you add a Google font, you'll need to specify the font using the CSS "font family" property. For example, if you use the font Source Sans Pro, you'd use font-family: 'Source Sans Pro', sans-serif;. There might be multiple "font-family" or "font" sections because there can be multiple fonts in a given theme. You'll be able to tell which section correlates to which place in your theme by looking at the header above each mention of "font-family" or "font." For example, there may be one labeled "h1" that corresponds to the font of Header 1.
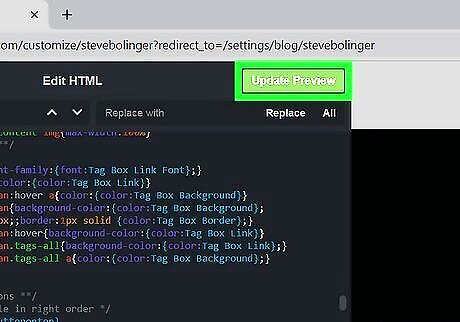
Click Update Preview. This is the green button in the top corner of the left panel. You should see the fonts change if you did it correctly.
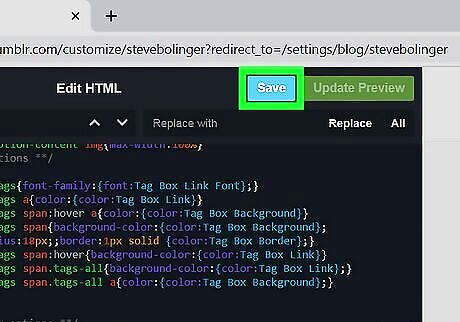
Click Save. Once you are happy with your results, click on this blue button in the top right corner. The font changes you made will now save.
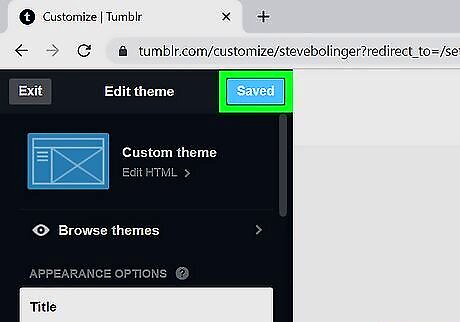
Click the back arrow and then click Save. It's at the top of the sidebar menu on the left. This saves all of your changes.
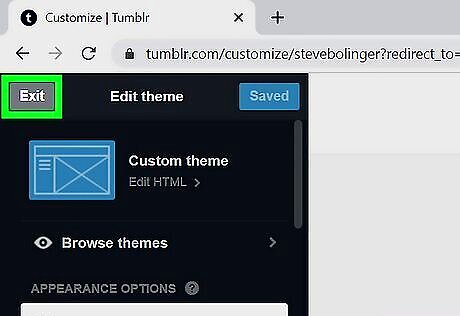
Click Exit. It's in the upper-left corner of the sidebar menu to the left. This takes you back to the Account Settings menu.


Comments
0 comment