

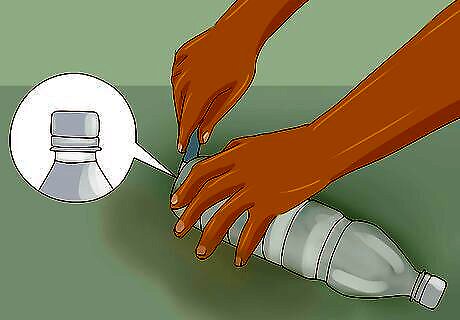
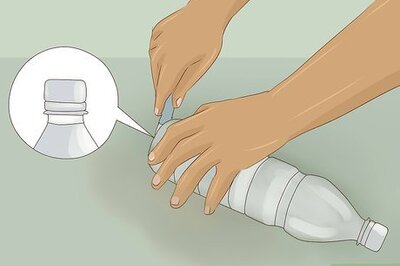
Cut a hole in the bottom of 36 (or 2/3) of your bottles. This is the size of the bottle cap. The idea is that the top of another bottle will snap right in and not fall out, so be careful that it is not too big or too small. It is easiest done with a very sharp knife, or by heating a knife in a candle for a few seconds then cutting the hole. (If you are doing this in a school it is good to bring a sample and show the kids the size of the hole. Ask them to have their parents/teacher help them cut holes before you come to construct the garbage can. This is the most time consuming part of the project and it’s much easier if they do the holes at home).
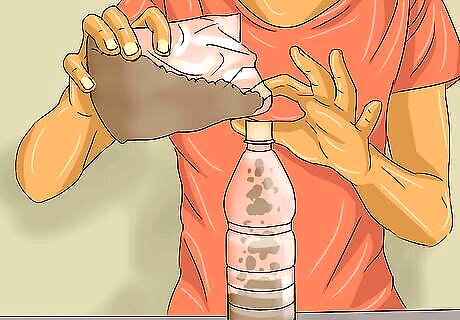
Fill 18 (or 1/3) of the bottles halfway with dirt (if there are a lot of stones or rocks in the dirt, filling the bottle ¼ of the way is fine). Variation: fill 18 bottles with trash. The idea is to fill the bottom bottles to give the garbage can some weight so it doesn’t blow away.
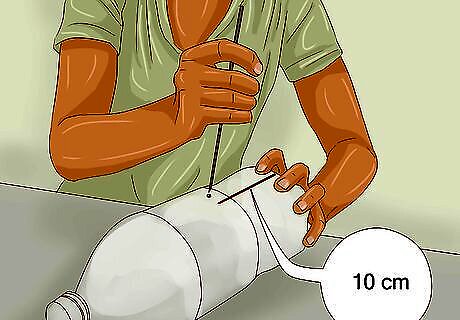
From the bottom of each bottle, measure up 10 centimeters (3.9 in) and mark it on two sides. Use a candle to heat a piece of wire and poke two holes through each bottle at the 10 centimeter (3.9 in) mark.
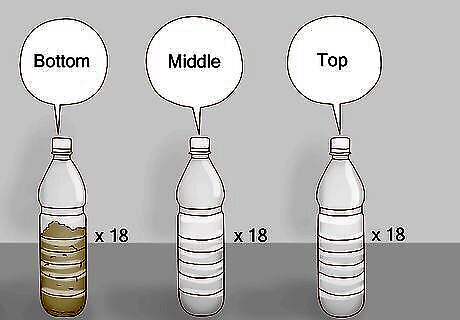
Make 18 columns of bottles with 3 bottles each. The bottle with dirt is on the bottom, an empty bottle is snapped on top of that one and another empty one snapped on top of that.
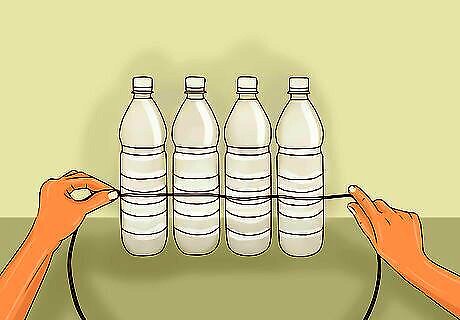
Line the columns of bottles in a row. Start with the bottom row of bottles and begin inserting the wire. Repeat for the middle row of bottles, and do the top row last. Keep the bottles in a line as you put the wire through. It's easier to form it into a garbage can when the wire is in.
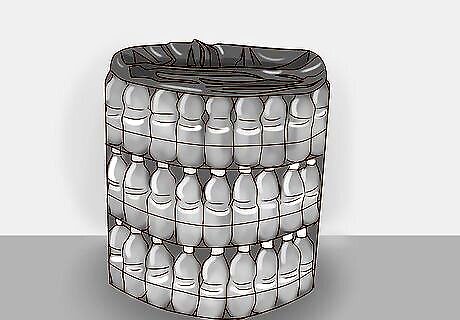
Bring the ends of wires together in each row and tie them together and close with wire cutters. Fix the bottles so that they are standing as straight up as possible. Put in your bag (or reusable fertilizer or chicken feed coastal) and start throwing away your trash.


Comments
0 comment