
Drawing the Basic Figure
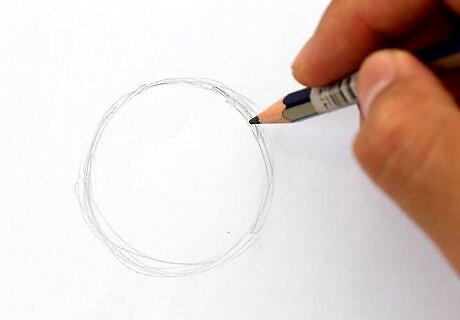
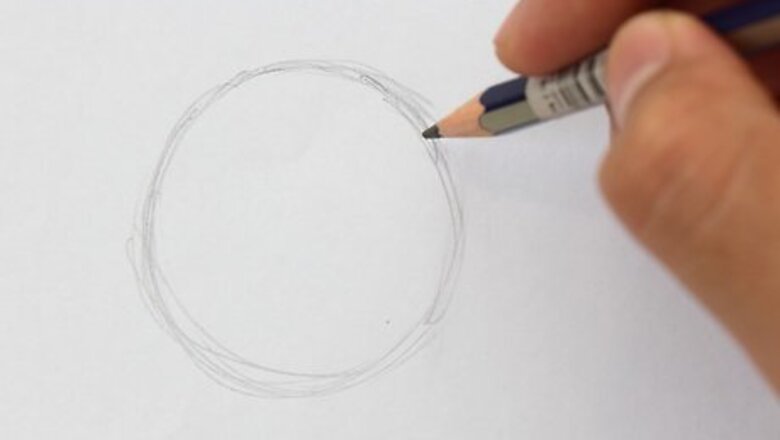
Draw a large circle. Sketch a large circle near the top of your paper. Keep the circle as evenly round as possible. This first circle will eventually become the outer perimeter of the astronaut's helmet.
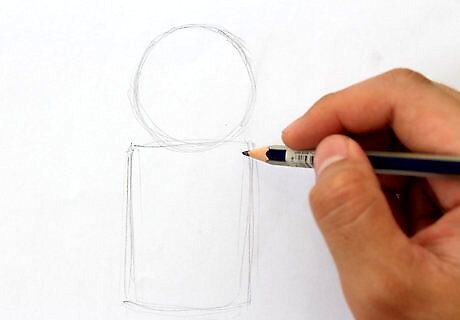
Place a rectangle beneath the circle. Draw a rectangle that overlaps the bottom fifth of the circle. The size of the rectangle should be similar to the size of the shape. Also note that the height of the rectangle should be only slightly longer than its width, making it just a little too long to consider it a square. This portion will eventually become the astronaut's torso.
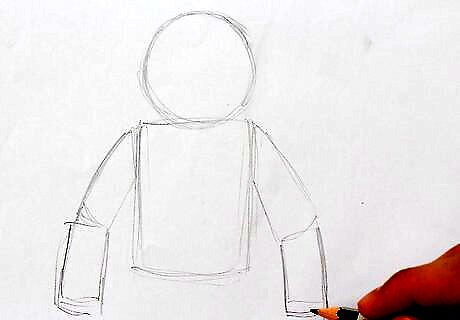
Connect two sets of smaller quadrilaterals to the rectangle. Draw one square-like shape coming off from the top right side of the rectangle, then connect a second similar shape to the far side of the first. Repeat on the top left side of the rectangle, as well. These will become the arms of the astronaut. The total length of both quadrilaterals in one set should roughly match the height of the original rectangle, and the width of each one should be close to its height. The exact placement and direction of these quadrilaterals will vary based on personal choice, though. If you want the arm to be straight, draw the set pointing outward and at a slight downward angle. If you want the arm to be straight up, draw the set pointing outward and at a slight upward angle. If you want the arm to curve, draw the first quadrilateral pointing outward, but slant the sides of the second quadrilateral so that bends in the appropriate direction.
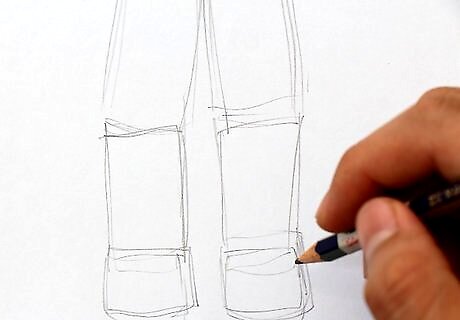
Place two more quadrilateral sets beneath the rectangle. Draw a series of three quadrilaterals beneath the rectangle on the right side. Draw another series of three quadrilaterals on the left side, too. These will become the legs. The first quadrilateral should connect to the bottom of the rectangle, and it should also be the largest. The second in the set should angle slightly inward and be two-thirds the size of the first. The final in the set should angle slightly outward and match the size of the second. These will become the astronaut's boots.
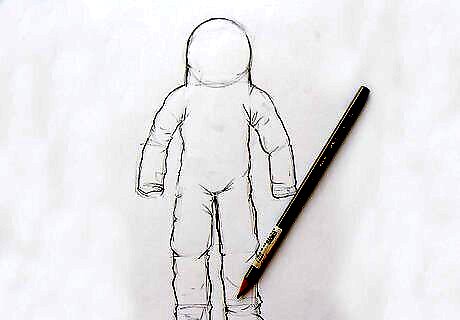
Smooth out the lines of the body. Trace over any sharp corners to create a more rounded figure, then erase any pencil lines that do not belong. Flatten the bottom of your starting circle, giving it rounded corners. Erase most of the connecting lines between the quadrilaterals in the arms and legs. The only connecting lines you should leave are those between the torso and upper legs, and those between the lower legs and boots; make these connecting lines rounded instead of sharp.
Expanding the Figure

Create a visor in the helmet. Draw a horizontal oval in the large beginning circle. The sides and bottom of this visor oval should be close to the perimeter of the outer helmet, but they shouldn't touch. Furthermore, there should be about twice as much space between the top of the visor and the top of the helmet.
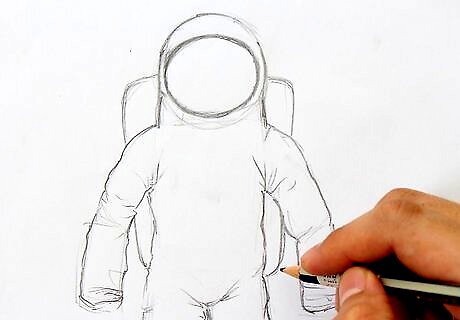
Give the astronaut a backpack. Draw a large rectangle behind the astronaut. This backpack rectangle should start just beneath the top of the helmet and end slightly above the astronaut's waistline. Depending on the angle of the astronaut, you may need to add dimension to the backpack by adding sides or a top that point toward an invisible vanishing point. Note that the lines of the backpack should all remain behind the figure of the astronaut; do not overlap them.
Add hands. Draw one hand on the end of each arm. Astronauts wear gloves (not mittens), so you'll need to draw the fingers of each hand, too. If you're viewing the astronaut from the front and viewing his hands from their sides, however, you can simplify the shape of each hand into an "L" shape, with the thumb facing down for each one. This should mimic the side view of the hand well enough.
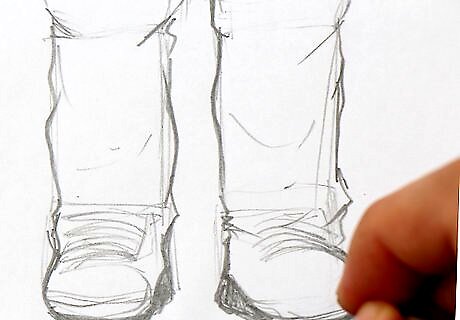
Define the boots. Sketch a line beneath each boot. This line should run parallel to the bottom of the boot. It should also connect the inner back corner to the outer from corner. Essentially, this is the sole of the boot. When viewed from the top, the sole should be a solid shape. If viewed from the bottom, it needs to have parallel rows of "grip" lines.
Adding the Fine Details
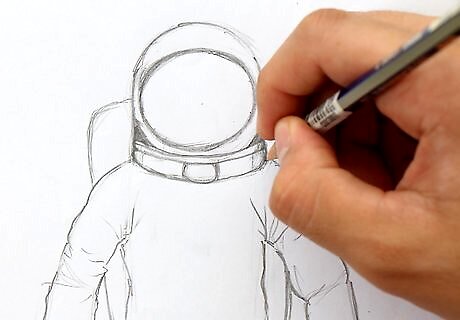
Define the helmet. Draw a parallel line beneath the bottom of the helmet. Connect this line to the bottom of the helmet using two short perpendicular lines, keeping the corners rounded. This portion represents the helmet ring. When locked into place, the astronaut's helmet will stay on. When unlocked, the astronaut can remove his helmet. You can leave the ring as it is or add another small rectangle in the center of it for further detail.

Place an antenna on the backpack. Draw a short, curved line poking up from one top corner of the backpack. Add a small circle to the top of this line. The overall length of the antenna should be no longer than one-third to one-half the height of the backpack itself.
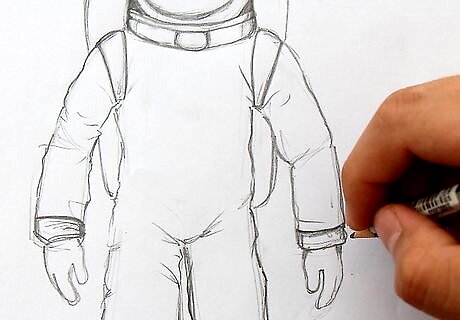
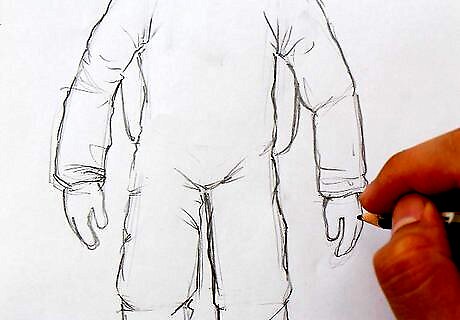
Add bands and cuffs. Create bands around both sleeve cuffs and both shoulders. To create the cuff bands, simply draw a parallel line to the inside of each sleeve line. To create a shoulder band, draw two parallel lines that extend from one bottom corner of the helmet down to the armpit of the same side. Repeat on both sides. Note that the shoulder bands are actually the bands of the backpack.
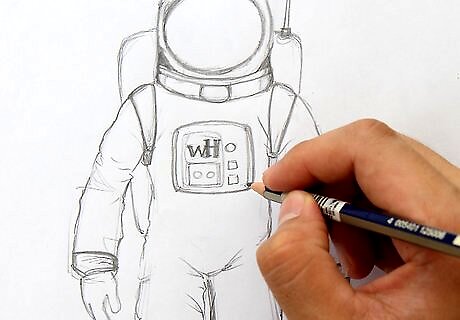
Draw panels on the suit. At minimum, you should draw one panel on the center of the astronaut's torso. You may also draw a second panel on the upper portion of one arm. The panels do not need to be complex. Simply draw a square or rectangle in the appropriate spot, then accent the rectangle with smaller rectangles or circles to represent buttons.
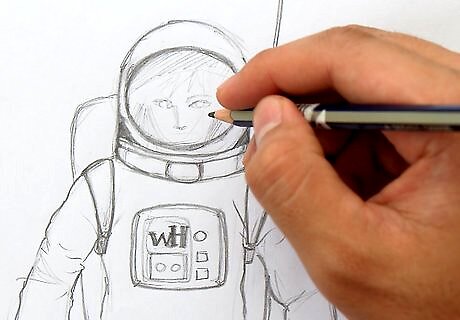
Sketch the face, if desired. Since the sun visor of the helmet is usually difficult to see through, you do not need to add a face. You can still do so if you'd like to, though. Gauge the size of the visor in comparison to the rest of the body to determine how large the face should be. If you have a relatively small visor space to work with, simply draw the eyes and nose of the astronaut. If you have a large visor space, define the shape of the head inside the visor and add a full face (eyes, nose, mouth, and ears).
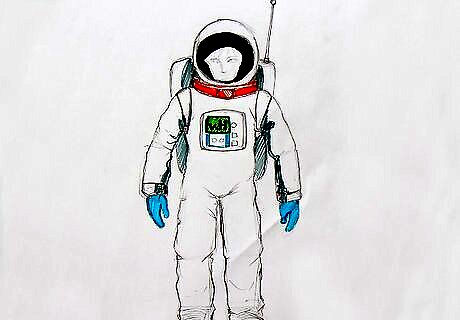
Color the drawing. The sketch itself is done at this point, but you can make it more vibrant by adding color. Use any coloring medium you feel comfortable with. Have fun with this part of the drawing, but keep in mind a few points: Most suits are light and plain colored, so opt for a white, light blue, or light gray when coloring the body of the suit. The visor should be dark. If you did not draw a face, consider using dark blue or black. If you did draw a face, tint the visor glass with a light blue that's slightly darker than the shade of the overall suit. Most of the equipment will be plain in color, as well (blacks and grays), but you can add a small splash of brighter color to the control panel buttons and sleeve cuffs.
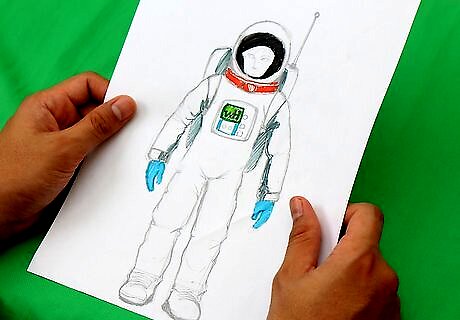
Admire your work. Assess the drawing and determine if there are any more changes you'd like to make or details you'd like to add. If everything looks the way you'd like it to look, the drawing is now finished.


Comments
0 comment