
Using a Compass
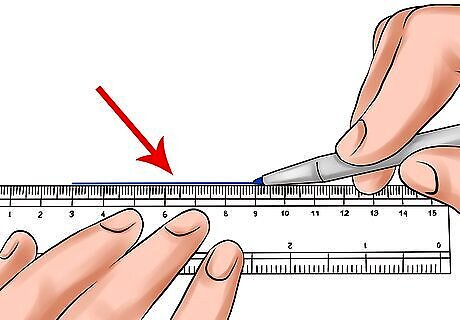
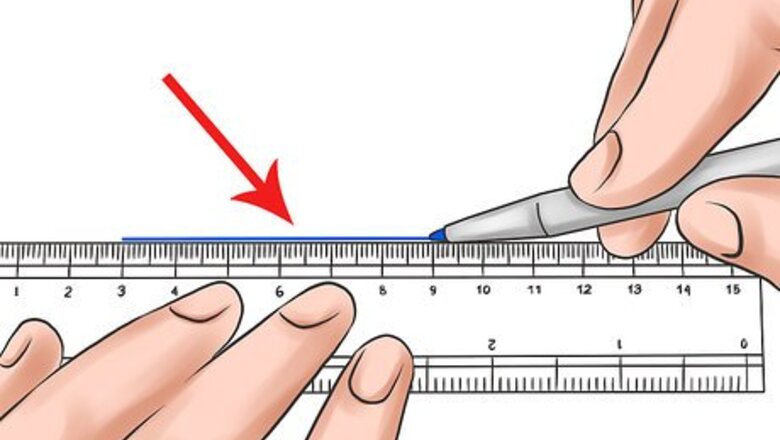
Draw a straight line. Lay your ruler on the paper, then trace a pencil along the straight edge. This line segment will form one side of your equilateral triangle, which means that you will need to draw two more lines of exactly the same length, each reaching toward a point at a 60° angle from the first line. Make sure that you have plenty of room to draw all three sides!
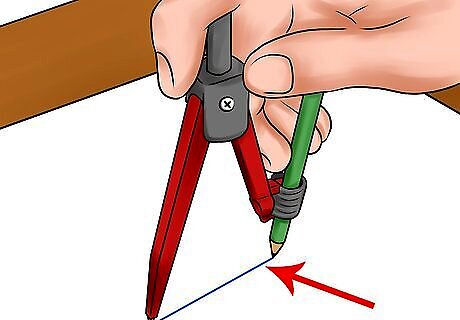
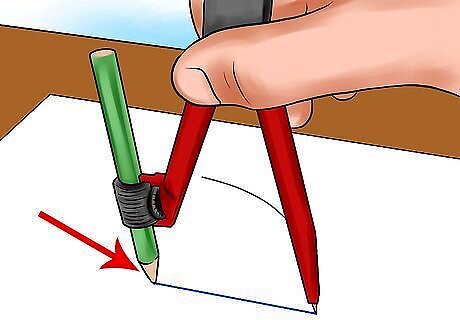
Span the segment with your compass. Slide a pencil into your compass, and make sure that it's sharp! Put the point of your compass at one end of the segment, and set the pencil point at the other.
Trace a quarter-circle arc. Do not adjust the point of the compass, and do not change the set "width" of the tool from the compass point to the pencil point. Swing the pencil-point of the compass in a quarter-circle up and away from the line segment.
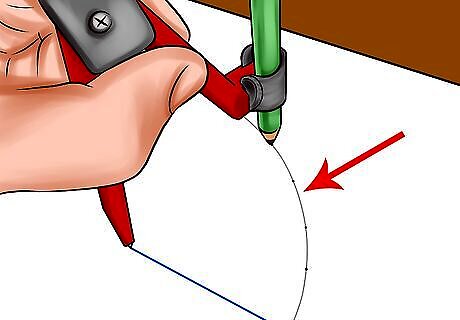
Switch the compass around. Without changing the width of the compass spread, move the point of the compass to the other end.
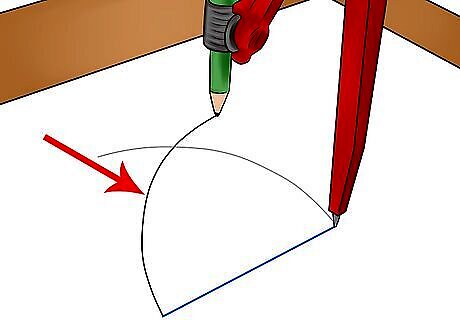
Draw a second arc. Carefully swing the pencil-point of the compass so that the new arc crosses over the first arc that you drew.
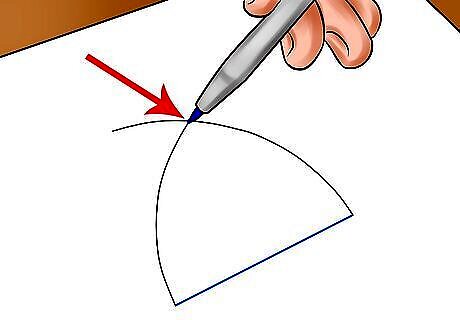
Mark the point where the two arcs cross. This is the apex (the "top" point) of your triangle. It should lie at the exact center of the line segment that you've drawn. You can now draw two straight lines leading to this point: one from each end of the "bottom" line segment.

Finish the triangle. Use a ruler to draw two more straight line segments: the remaining sides of the triangle. Connect each end of the original line segment to the point at which the arcs cross. Make sure that the lines are straight. To finish the job, erase the arcs that you drew so that only the triangle remains! Consider tracing this triangle onto another page. This way, you can start fresh with a clean shape. If you need a bigger or a smaller triangle, repeat the process but adjust the length of the original line segment. The longer the sides, the bigger the triangle!
Using an Object with a Circular Base
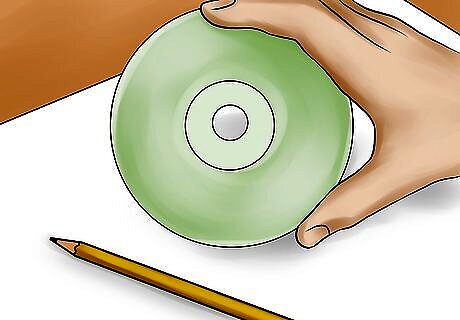
Choose your circular object. Use almost any cylindrical object with a circular base, like a bottle or a soup can. Try using a circular roll of tape or a CD. If you are going to substitute the arc of this object for the arc of a compass tracer, you'll need to choose an object of the right size. In this method, each side of the equilateral triangle will be as long as the radius (half the diameter) of the circular object. If you use a CD as your object: imagine an equilateral triangle that fits into the top-right quadrant of a CD. Complete geometry assignments with ease. "When I had homework constructing different shapes, the step-by-step pictures in this article saved me. Showing multiple techniques for making an equilateral triangle, from using compasses to stuff like water bottles or tape rolls, made the whole assignment a breeze to tackle. Big win!" - Ashley J. Discover foolproof methods for any classroom. "For a class experiment where we needed to build towers with equilateral triangle bases, I loved how this piece offered various approaches you could adjust to work with the random supplies available. Being able to MacGyver a solid game plan with my limited materials was so clutch!" - Cherie E. Gain geometric insight through experimentation. "Needing an equilateral triangle for a math project, I appreciated that they didn't just show you how to draw one but let you explore the logic behind the steps hands-on. Getting to actively test out examples myself gave me a deeper intuitive understanding of how shapes fit together. Mad helpful!" - Emily C. Internalize concepts through visual models. "I used to struggle picturing theoretical geometry rules until I followed this guide, constructing a test triangle step-by-step. Being able to physically walk through forming the shape brought the underlying concepts together for me. Having those interactive visuals made a world of difference in getting geometry to click!" - Mahirah M. Did you know that wikiHow has collected over 365,000 reader stories since it started in 2005? We’d love to hear from you! Share your story here.
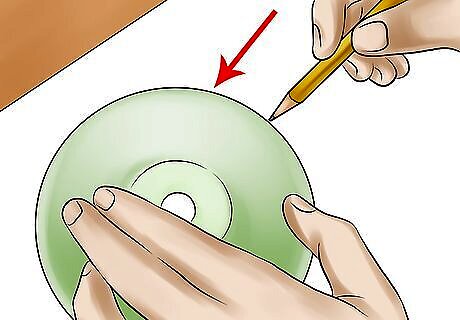
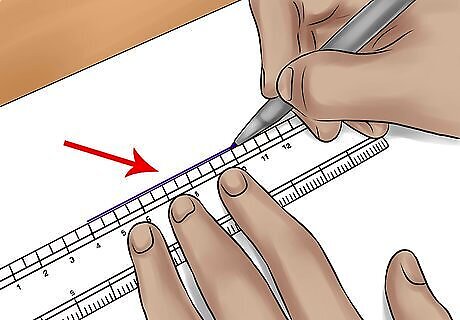
Draw the first side. It should be exactly as long as the radius of the circular object – the distance halfway across. Make sure that it is perfectly straight! If you have a ruler: simply measure the diameter of the object and draw a line that is half as long. If you don't have a ruler: place the circular object onto a sheet of paper, then carefully trace the circumference with your pencil. Remove the object, and you should have a perfect circle. Use a straight edge to draw a line across the exact center of the circle: the point that is completely equidistant from any point around the circumference of the circle.
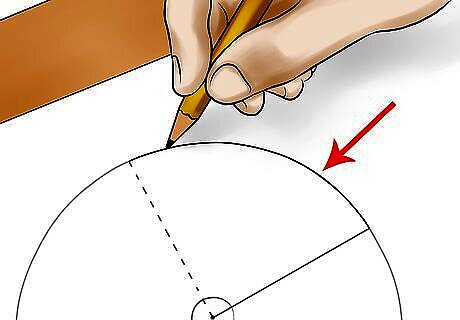
Use the circular object to trace an arc. Place the object over the line segment, with the edge of the circle resting at one end of the line. For accuracy, make sure that the line cleaves through the exact center of the circle. Use your pencil to trace an arc: roughly one-quarter of the way around the perimeter of the circle.
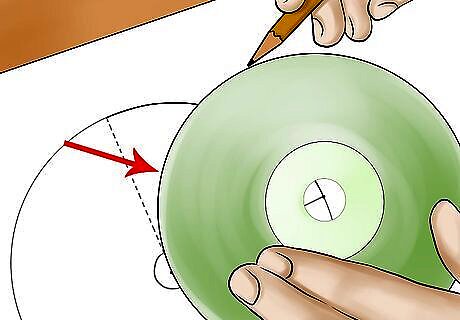
Trace another arc. Now, shift the circular object so that the edge touches the other end of the line segment. Make sure that the line segment runs through the exact center of the circle. Draw another quarter-arc that crosses the first arc at a point directly above the line segment. This point is the apex of your triangle.

Complete the triangle. Draw the remaining sides of the triangle: two more straight lines will connect the apex with the two open ends of the line segment. Now, you should have a perfectly equilateral triangle!
Using a Protractor
Draw the first side. Use a ruler or the straight edge of your protractor to trace a straight line segment of an appropriate length. This line segment will become the first side of your triangle, and each of the other sides will be just as long – so make sure that it's the right size!
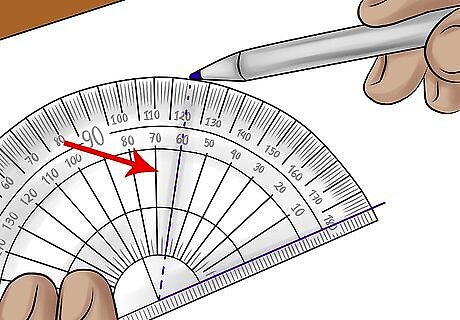
Use a protractor to measure a 60° angle at one end.
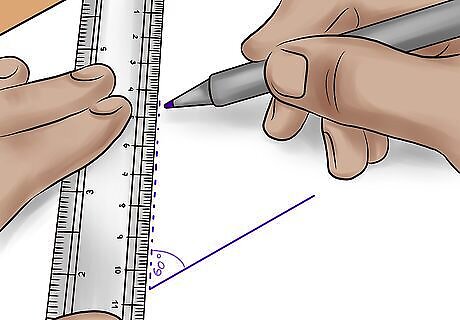
Trace the second side. Measure out a new line segment that is equal in length to the first. Start it at one end of the original line segment, where you measured the 60° angle. Start from the vertex (the point) of the angle, and trace the straight edge of the protractor until you reach the next "point."
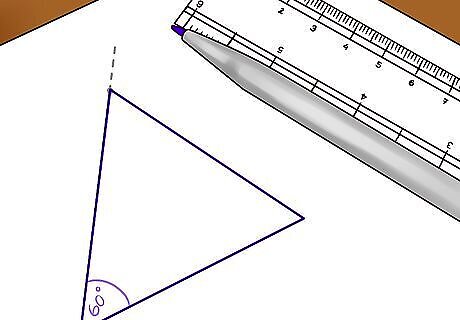
Finish the triangle. Use the straight edge of your protractor to trace out the final side of the triangle. Connect the point at the end of the second line segment to the unattached end of the first line segment. You should now have an equilateral triangle.


Comments
0 comment