views
Knitting the Legs and Body
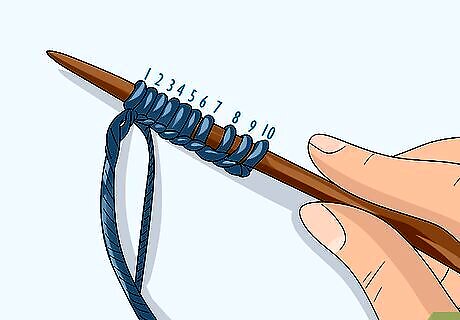
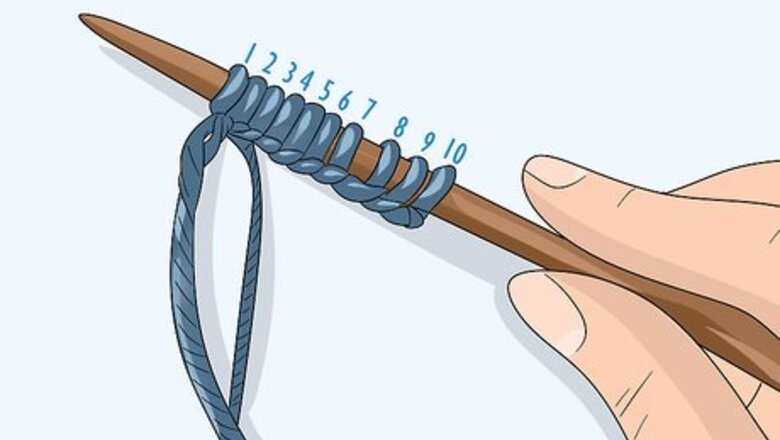
Cast on 10 stitches and leave a yarn tail that's 12 inches (30 cm). Get out 1 skein of yarn in the color you'd like the doll's legs and torso to be. Make a slip knot and cast 10 stitches onto size 6 (4 mm) needles. Leave a tail of yarn 12 inches (30 cm) long so you can use it to sew the doll's body. Most worsted weight skeins are around 364 y/333 m or 7 ounces/198 g. You can use acrylic or wool. Keep in mind that you won't need the entire skein, so you can use smaller balls of yarn.
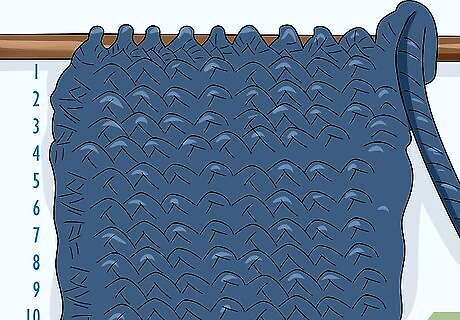
Knit 10 rows knitting every stitch. To make a garter stitch for the first leg, knit each stitch and make 10 rows. When you reach the end of the 10th row, don't cast off the stitches. Instead, cut the yarn and leave a 12 inches (30 cm) tail. If you would rather make a stockinette stitch, alternate rows of knitting and purling. For example, knit every stitch of row 1, then purl every stitch of row 2. Knit every stitch of row 3, and so on.
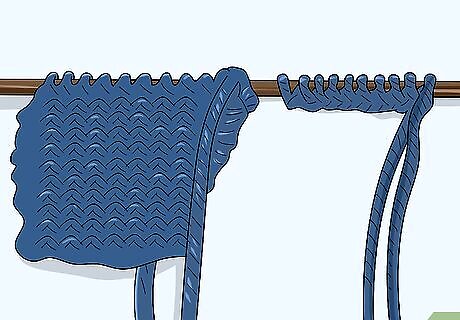
Keep the first leg on the needle and cast on another 10 stitches. Push the small patch you knitted for the first leg down on the needle towards the bottom. Then cast on another 10 stitches to the same needle. You'll be knitting the 2 legs at the same time which is why you'll keep them on the same needle.
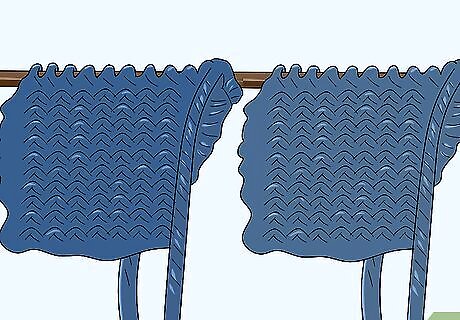
Knit every stitch for 10 rows on the second leg. Work the second leg just like you did for the first leg. If you chose to do a stockinette stitch, remember to alternate knitting and purling rows. Don't cut the yarn once you finish the beginning of the second leg. You'll need to use the working yarn to join the legs.
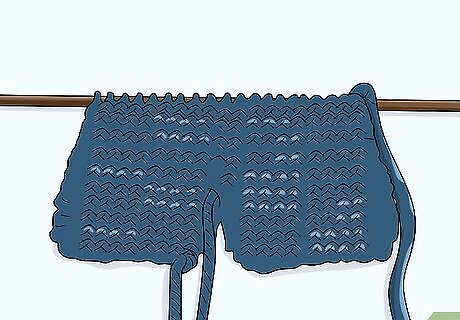
Slide the 2 leg pieces together and knit across the row. Slide the first leg back up the needle so it's right next to the second leg that you just worked. You'll now see 20 stitches on your needle. Knit each stitch across the row. Knitting straight across the row will join the 2 legs and become the start of the body.
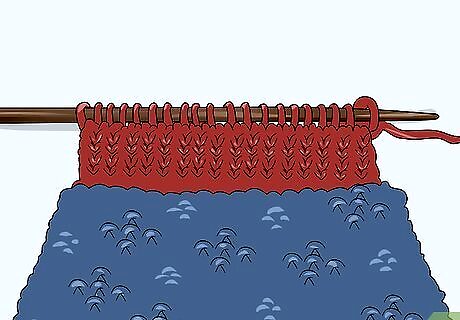
Knit 16 rows to make the body. Knit every stitch for each row. This means you'll be knitting 20 stitches to create the main body of the doll. Once you've finished the last row, cut the yarn to leave a 12 inches (30 cm) tail.
Knitting the Head
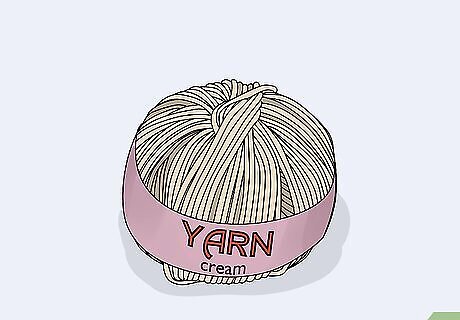
Switch to the color of yarn you'd like to use for the head. Get out the other skein of yarn in the color you want to use for the doll's head. Begin using this color when you start working on the base of the head. Keep in mind that since you'll only be using this yarn for the head, you'll need less of it than the other type of yarn.
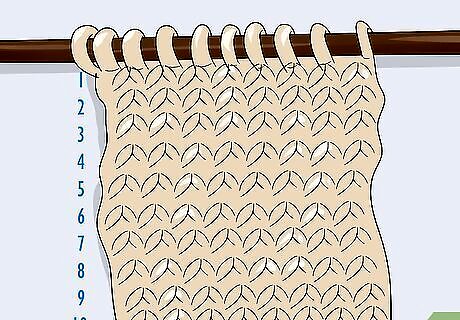
Stockinette stitch 10 rows to make the head. Knit every stitch for the first row and purl every stitch for the second row. Continue to alternate knitting a row and purling a row until you've made a total of 10 rows in the pattern.
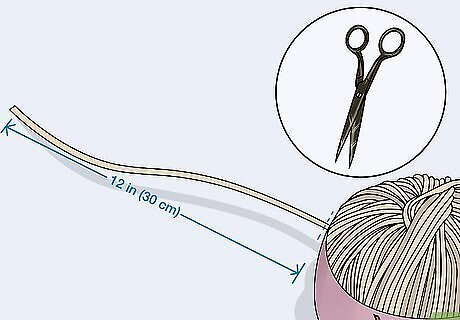
Cut the yarn and leave a 12 inches (30 cm) tail. Don't bind the stitches off before you cut the yarn. Instead, cut the yarn to leave the long tail and then thread the yarn through a large-eyed needle.
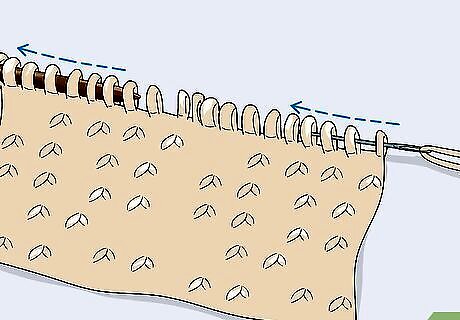
Slide the stitches off and through the large-eyed needle. Since you've finished the head, you'll need to take it off of the knitting needle. Bring the large-eyed needle through each of the 20 stitches moving right to left. Pull each stitch off of the knitting needle and slide the large-eyed needle through the stitches. You'll still have a long tail that you'll need to use later to pull the stitches together.
Sewing the Doll
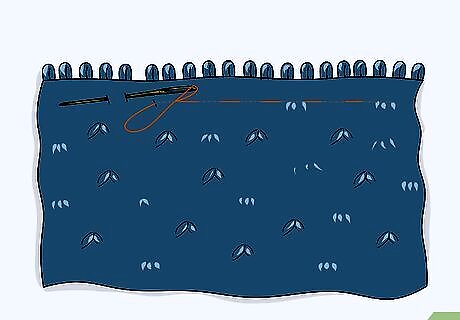
Thread a large-eyed needle with the leg tail and sew a running stitch. Take the yarn tail from the first leg you worked and thread it onto a large-eyed needle. To make the running stitch, sew a dashed line along the bottom of the first leg. Leave 1/8 in (3 mm) between each stitch and secure the stitches with a lock stitch when you reach the end of the first leg. To secure the stitch, make a backstitch and create a loop. Pull the yarn through the loop and pull it tight so it makes a knot. Don't cut the yarn tail once you've tied off the knot.
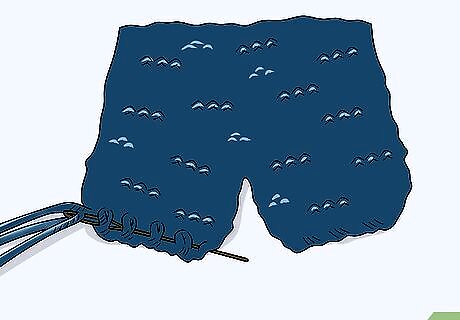
Fold the leg over and sew the inseam. Use the large-eyed needle to sew together the inseam of the first leg where it meets the center. Sew until you reach the crotch and then tie off the yarn. Avoid cutting the yarn, but weave the tail in. Repeat this for the other leg, but don't weave this yarn tail in.
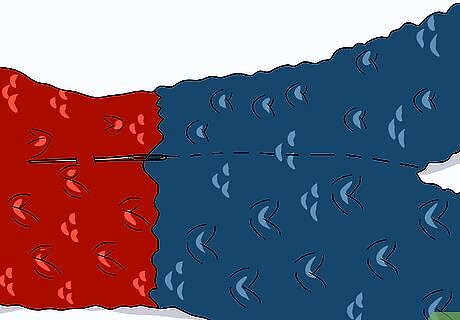
Sew together the back of the body. Use the yarn tail that was left from sewing the second leg to sew up the back of the doll's body. You should still have over 10 inches (25 cm) left on the tail. When you reach the top of the body where the main color stops, tie off the yarn and cut the tail short. You'll still have another tail left from when you originally stitched the main part of the body.
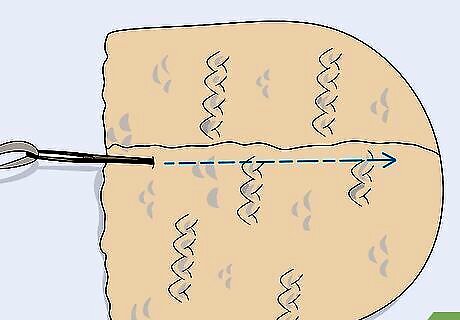
Sew the back of the head using the head yarn tail. Switch to the yarn tail that's near the base of the neck where it meets the body. Thread this yarn onto a large-eyed needle and sew the back of the head together. When you reach the top of the head, tie a knot in the yarn and weave in the tail.
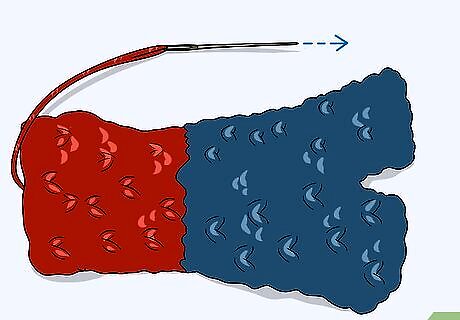
Flip the doll so the right side is facing out and pull the body yarn tail out. The knots and woven ends should now be inside the body of the doll instead of visible on the outside. Thread the remaining yarn tail from inside the body onto a large-eyed needle and push it through the doll so you can pull the tail out. You'll use the long tail to shape the doll's head.
Stuffing and Shaping the Doll
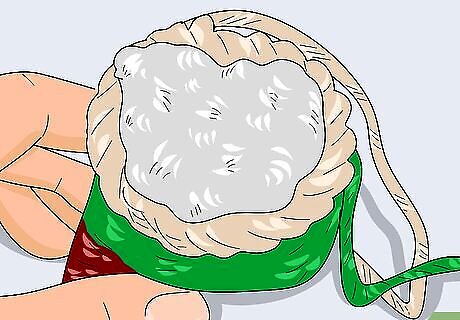
Stuff the doll's legs, body, and head with acrylic fiberfill. Insert as much acrylic fiberfill as you can fit into each of the doll's legs and the body. Continue to stuff so you fill the doll's head. If you prefer to use wool roving, the doll will flatten over time. Acrylic fiberfill will help the doll keep its shape.
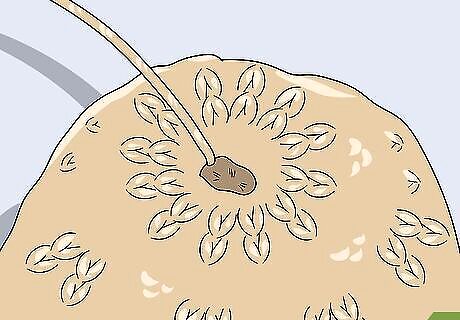
Pull the yarn tail at the top of the doll's head. Hold the yarn tail that you slipped through the stitches near the top of the doll's head. Pull on the tail tightly so the stitches come together and form a tight circle near the crown of the head. Tie off the yarn and cut it close to the top of the head. If you see wrinkles at the top of the head, stuff the head with more acrylic fiberfill. If there's still a tiny hole, you can stitch across the hole to close it.
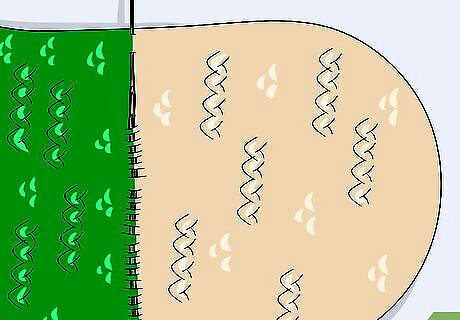
Use the body yarn tail to sew a running stitch around the neck. Thread the body yarn tail through a large-eyed needle and weave through the stitches around the neck. Make these running stitches where the body color meets the head color so it will make a distinctive head.
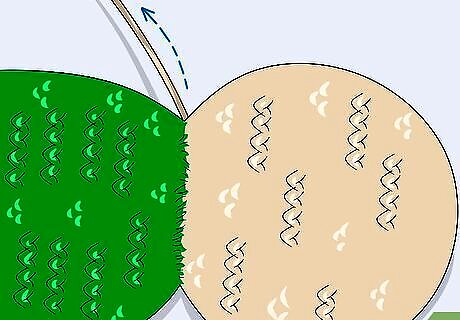
Pull the yarn tail to make the head and tie off the yarn. Once you've made a running stitch around the entire neck, pull the yarn tail firmly. You should now see a circular head form on top of the body of the doll. Tie off the yarn and cut it close to the doll.
Making the Arms
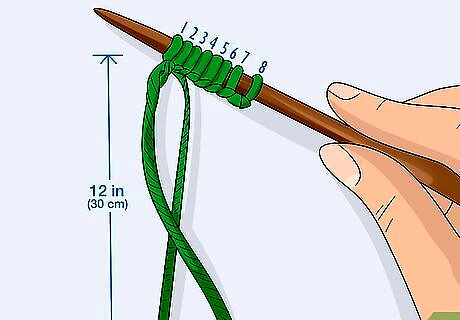
Cast on 8 stitches and leave a 12 inches (30 cm) yarn tail. Decide if you'd like to use the color of yarn you used for the main body or the head and cast on 8 stitches. Remember to leave a long tail.
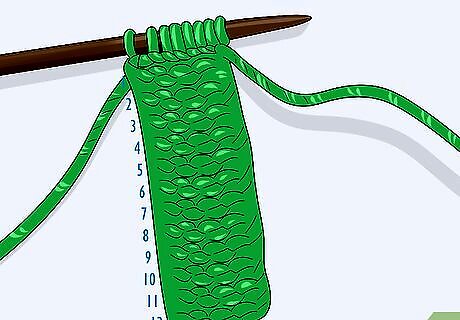
Garter stitch 12 rows to create 1 arm. To make the garter stitch, knit every stitch in the row. Continue to knit rows until you've made 12. If you prefer, you can make the stockinette stitch by alternating knit rows with purl rows.
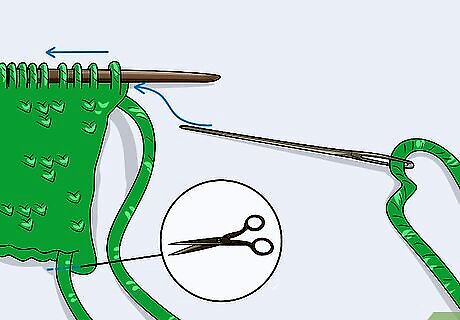
Cut the thread and slide a large-eyed needle through the stitches. Cut a 12 inches (30 cm) long yarn tail and thread it onto a large-eyed needle. Slide the needle through each of the 8 stitches moving from right to left. Move each stitch off of the knitting needle and bring the large-eyed needle through the stitches. Don't bind off before you do this since you'll need to tighten the arm stitches first.
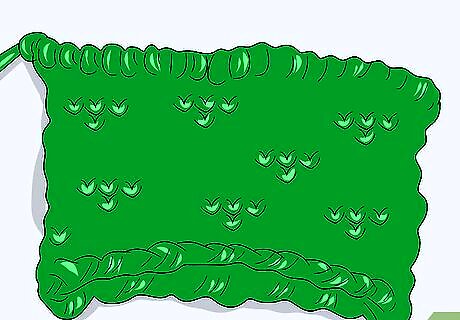
Pull the yarn and tie off the yarn. Pull the yarn tail tightly enough to bring the ends of the arm together. Then tie a knot at the end, but don't cut the yarn because you'll need it to sew the arm's inseam.
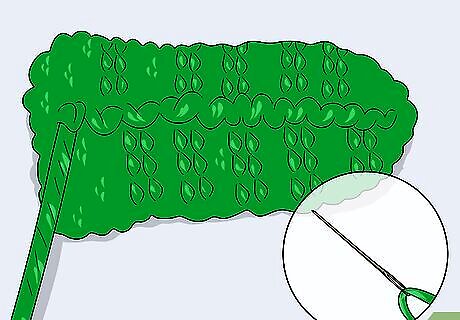
Sew the inseam of the yarn and tie off the yarn. Thread the yarn tail through a large-eyed needle and bring the 2 long sides of the arm together. Use the yarn to sew the inseam of the arm and then tie a knot near the top of the arm. Cut this yarn tail and weave in the end. Don't cut the arm tail that's still at the top of the arm. You'll need this to attach to the doll's body.
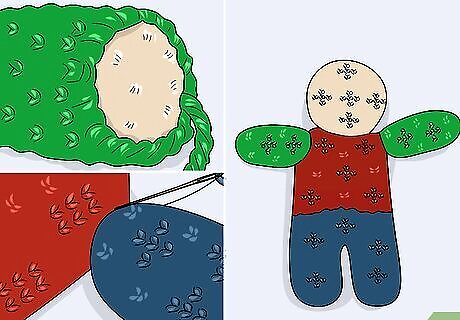
Stuff the arm and sew it to the body of the doll. Fill the arm with acrylic fiberfill and then place it 1 to 2 rows below the neck. Place the arm on the side of the body so the seam is facing the body. Use the yarn tail that's attached to the top of the arm to stitch the arm to the body. Now you can make another arm and sew it to the other side of the doll.






Comments
0 comment