
(Note that 鯱 鉾 can also be pronounced "shachi-hoko," and refers to a mythological animal which has the head of a dragon and the body of a carp. Temples and castles in Japan were commonly decorated with shachi-hoko ornaments, because it was believed that the mythical animal could elicit rain and would thus protect the building in case of a fire.

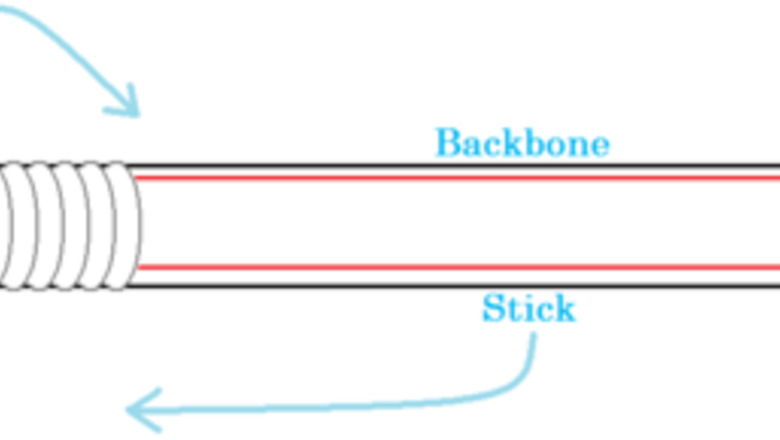
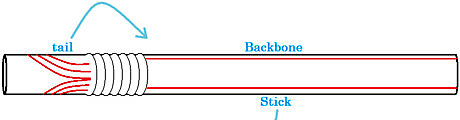
Note the terminology applying to each piece of the straw. This diagram shows how the pieces of the straw will be used to make the orca. The short end will be the tail, while the two long, thin pieces will be the stand (stick in the diagram) and the backbone. You'll fold the long, wide pieces to make the body of the orca. It might help you to print this off to follow. Additionally, you might want to use a straw with colored lines running down the side for your first try.
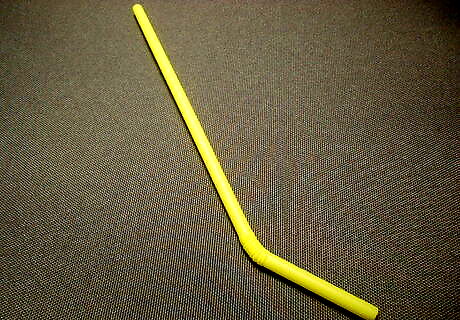
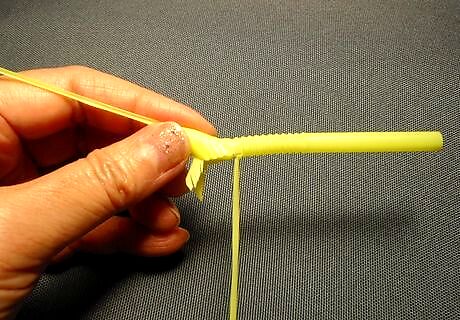
Locate the bend in the straw. For now, keep the bend in the closed position. Shachi2_122.JPGFlatten the straw. Press down on each side of the bend to flatten the straw, running your fingers over the bend a few times. Do not flatten the bend itself.
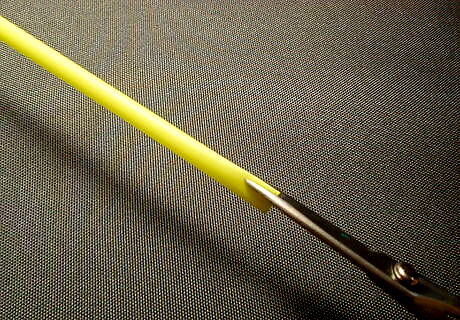
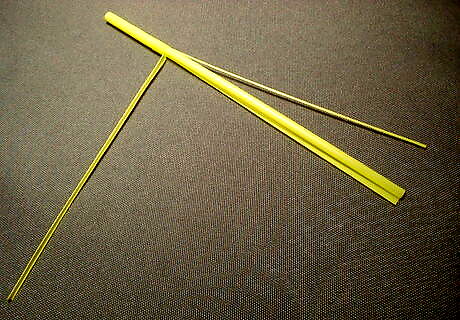
Cut out the backbone and stand. Pinch the straw flat between your thumb and forefinger with one hand. With the other hand, use scissors to cut out your first piece. With the straw flat, cut a thin strip off one side, making sure you cut both layers of the straw. (If you're using a lined straw, it might be useful to flatten the straw such that the thin backbone and stand pieces contain the lines.) Shachi4_183.JPGStop cutting when you reach the straw bend. Shachi5_450.JPGCut out another thin strip on the other side of the flattened straw. Shachi6_929.JPGAgain, don't cut along the edge itself but right next to it. You should be cutting two layers of straw, not one. Shachi7_204.JPGThere will be four "sticks" once you're done with cutting – two thin sticks and two wide sticks.
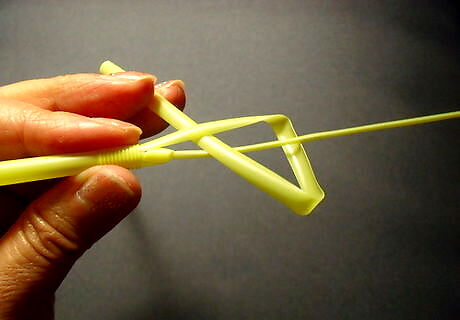
Begin tying the body of the orca. First, take one of the thin sticks and bend it so that it's at a 90-degree angle to the straw. This stick will be the stand. The other thin stick will be the backbone. Shachi9_933.JPG Grab one of the wide sticks and pull it under the backbone, then up and back down through the loop created. Shachi10_891.JPGPull the knot created by the wide stick all the way up to the bend in the straw. Tug gently on the bottom of the wide stick to tighten.
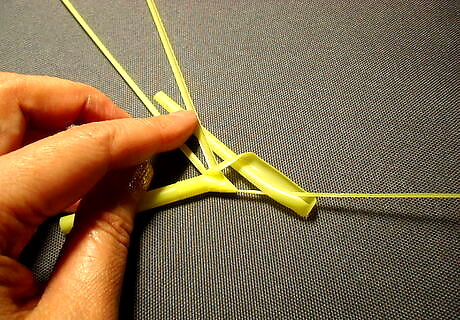
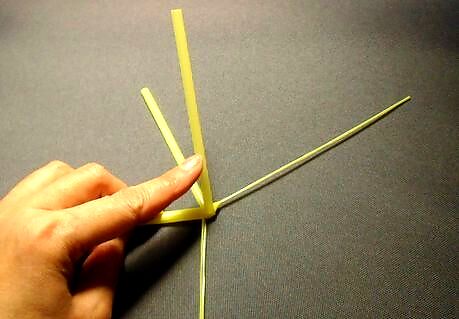
Tie the other wide stick. As with the first wide stick, pull it under the backbone, then up and back down through the loop created. Shachi12_837.JPG Move the knot up to the bend in the straw, layering on top of the first knot created with the other wide stick. Tug gently on the bottom of the wide stick to tighten the knot. Both wide sticks and the stand should be pointing in the same direction. Shachi13_596.JPGGently fold the wide sticks upward on their respective sides. This will position them away from the stand slightly, so that you can keep tying the body of the orca. Shachi15_11.JPGBegin tying again. Grab the first wide stick you tied. Pull it under the backbone, then pull up and draw back down through the loop created. Shachi16_834.JPGTug gently on the wide strip to tighten the knot once it's at the bend in the straw.
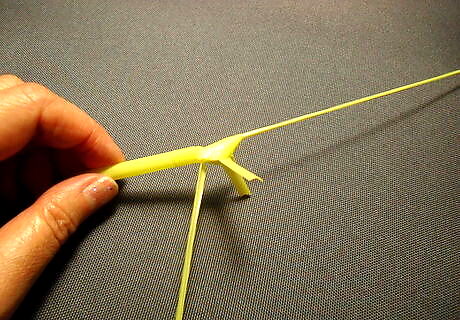
Tie the other wide strip again. Grab the second wide strip. Pull it under the backbone, then upward and back down through the loop created. Shachi18_664.JPGTug gently on the wide strip to tighten the knot once it's at the bend in the straw. Shachi19_671.jpgAgain, both wide strips and the stand should be facing the same direction.
Repeat the knotting and tightening process three to four times. Fold the two wide strips upward and away from the stand again. Shachi22_558.JPG Fold the first wide stick, then the other, in the same motion - looping under the backbone, then up and pulling down through the loop.
Create the pectoral fins. The fins on each side of the orca are called pectoral fins, or pec fins, and they're used for steering. Shachi25_811.JPG Shachi26_268.JPGPosition the orca standing on the two wide sticks left from folding and tying in the previous steps. You might have to bend the sticks a bit to get them into the right position. Shachi27_425.JPGCut a small curved half moon on one fin. Shachi28_63.JPGCut the same shape on the other side. Shachi29_776.JPGPull away the pieces around the curved cuts. Shachi30_821.JPGFeather cut down the length of each pectoral fin.
Create the bend in the body. Position the orca in your hands, with the short part of the straw away from your hold. Shachi32_817.JPGBend the short part of the straw around to mold the body shape.
Cut the tail fin. Shachi33_190.JPGCut a triangle into the short end of the straw. Remove the part that becomes unattached. Shachi34_815.JPGAs with the pectoral fin, feather cut the tail once it's in shape.
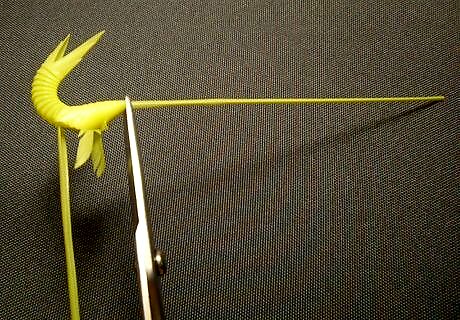
Cut the backbone. Remove the remaining backbone around which you folded the wide sticks by cutting. Shachi36_815.JPGAdmire your completed orca.
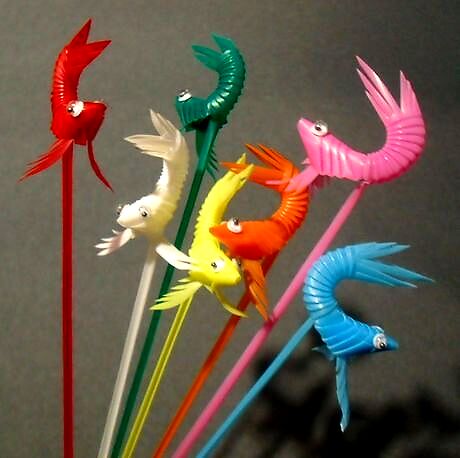
Add eyes. You can stick small googly eyes onto the head using a tiny drop of glue.


Comments
0 comment