
Cleaning and Protecting the Painting Area
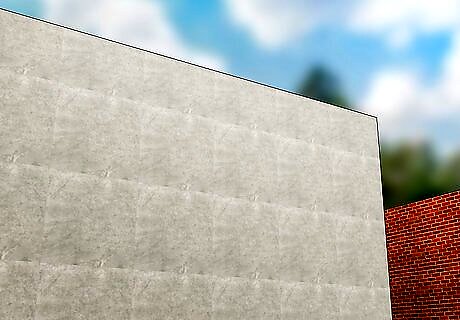
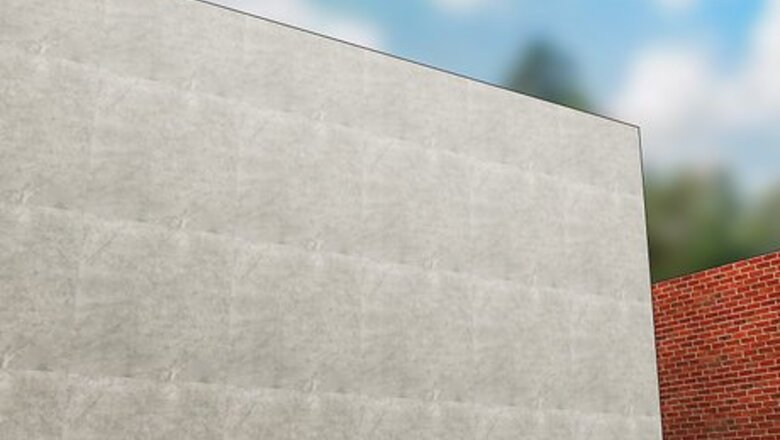
Choose a suitable location for your mural. Artists paint murals on large, visible surfaces. The easiest surface to work with is a flat wall without a lot of obstructions. The amount of wall space you need depends on the size of the mural you plan on creating. Factor in your ability to access higher parts of the surface you wish to paint. Dedicated painters make just about any surface work. Some painters prefer corrugated metal, brick, or even ceilings. A bumpy surface can give your mural a unique texture. Remember to get permission if you don’t own the wall space. You have free reign inside your home if you own it, but ask before you paint on someone else's property or a public space.
Set up scaffolding or a ladder if you can’t reach the entire wall. For most mural projects, you will need some sort of boost to reach high areas. Use a small stepladder to access areas you can't otherwise reach. If you need to go up high, set up scaffolding or rent an aerial lift. Check with local home improvement stores and construction supply companies. Many rent scaffolding that will allow you to paint high areas safely. If your painting surface is low enough, you don’t need scaffolding. Paint while standing.
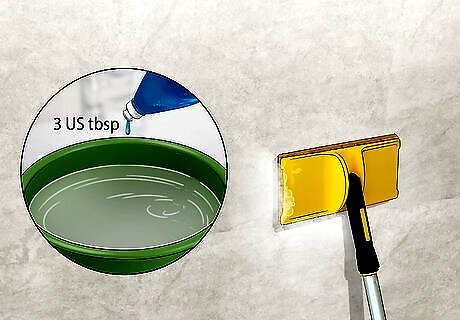
Clean the wall with soap and water to remove impurities. Check the wall over for signs of damage, difficult stains, and other issues you need to treat before you begin. Any debris on the wall will show up in your work. Mix about 3 US tbsp (44 mL) of a basic liquid laundry detergent or dish soap into a bucket of water, then scrub the wall with a rag. Let the wall dry before you start painting. For mold, grease, and other stubborn stains, get trisodium phosphate from a home improvement store. Mix it in water to create an effective cleaning solution. Repair damaged areas as needed. For example, fill in cracks with spackle. Paint over damaged areas you can’t repair or incorporate them into your design.
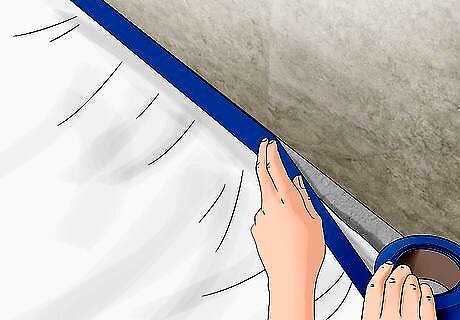
Protect adjacent surfaces with painter’s tape and a drop cloth if needed. Use blue painter’s tape to form a border around your mural surface. Set out a drop cloth underneath the wall to catch dripping paint. Painter’s tape and drop cloths are available at most home improvement stores.
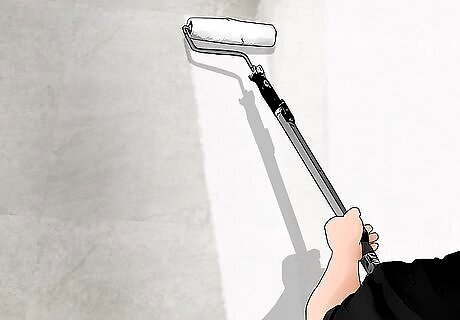
Pre-paint the wall a solid color if you need to make it uniform. This base layer of paint creates a background for your mural. It can be multiple colors if you have a design for your mural in mind. If not, try a light color like white that is easy to paint over later. For example, if you’re planning on painting a landscape, you might paint the sky a pale blue, then paint the foreground green. At this point, you’re only creating a background, so forget about adding small details. To cover a lot of space quickly, use tools like a paint roller, sprayer, or even a sponge.
Pre-Sketching Your Design
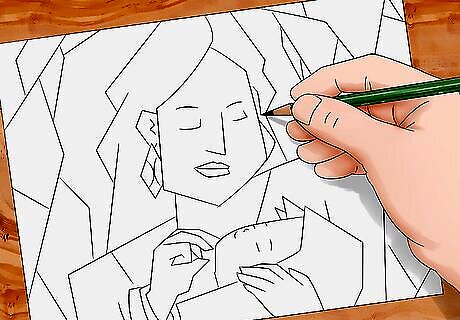
Draw your mural design on a piece of paper before painting it. Plan your mural design by making a basic mock-up. Use a pencil, pen, and any other tools you feel comfortable drawing with. Some common themes of murals include landscapes, fictional characters, sports, and cities. You don’t need to color the image or factor in the mural’s size yet. This is a template for your finished mural. You will need it if you plan on transferring the design to the mural using a grid. To come up with a mural theme, ask anyone you’re working with, including the building owner. If you’re working in your own home, think of what inspires or motivates you, what you enjoy drawing, and what you want to look at every day.
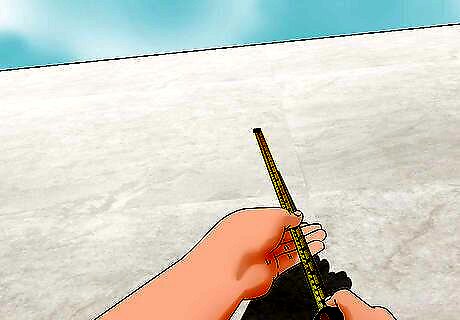
Measure the wall space you have available for your mural. Climb up your ladder or scaffolding to reach the top part of your mural. Using a tape measure, measure from the ceiling to the bottom edge of the wall. Also, measure across the wall to find out how much wall space you have to work with. If you are unable to measure a big wall, ask the property owner for a blueprint or other documents containing the measurements. You may need to estimate the wall’s dimensions.
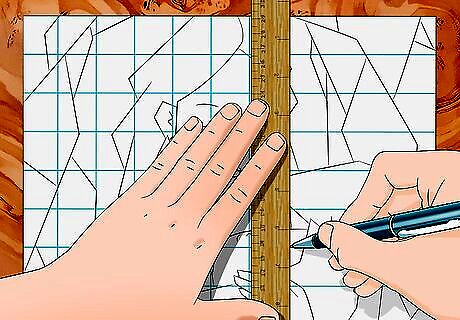
Create a grid over the design you drew on paper. Using a pencil and ruler, make a series of intersecting horizontal and vertical lines. Measure your template paper as needed to figure out its size and space the grid lines evenly.As a general rule of thumb, space the grid lines 1 in (2.5 cm) apart, since grids of this size work for just about any mural. Factor in the size of the wall when making the grid. For larger, more complex murals, divide up the sketch with more frequent grid lines. Each grid box contains a small part of your image that you will transfer to the finished mural later.
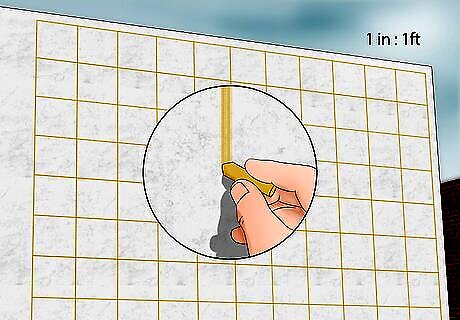
Draw a grid on the mural wall in chalk. Do a little math in order to transfer the grid properly from your paper to the wall. Multiply the reference drawing’s dimensions to blow them up to the size of the wall. The template grid and the wall grid need to be at a 1 to 1 ratio, having an equal number of lines spaced a proportionate distance apart. For example, if the wall is 10 ft × 10 ft (3.0 m × 3.0 m), break the paper down into a 1 in × 1 in (2.5 cm × 2.5 cm) squares. Every 1 in (2.5 cm) on the paper equals 1 ft (30 cm) of wall space. For instance, your reference image is 5 in × 7 in (13 cm × 18 cm). Your wall is 10 in × 14 in (25 cm × 36 cm). If you multiply the dimensions by 2, making each grid on the wall 2 in × 2 in (5.1 cm × 5.1 cm), you can easily transfer your design.
Transferring and Finalizing Your Design
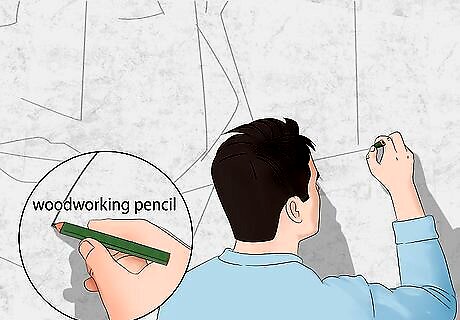
Outline your mural’s main features in pencil on the wall. Choose a quality woodworking pencil, then place details like trees, clouds, and characters on the wall. Follow the grid system to transfer your design to the wall. Look at your drawing to find out what cell the detail is in, then transfer it to the corresponding cell on the wall. For example, you might have a cloud in the upper left corner of your sketch. Draw it again in the upper left corner of the grid on the wall. Another way to do this is by projecting an image onto the wall. Use a digital projector to transfer images from your computer or another device. Then, sketch your outline over the projected image. If you’re working on a colored wall, use a permanent marker or chalk instead of a pencil.
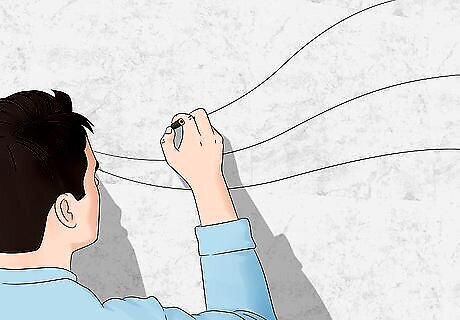
Draw fine details onto your sketch with an art pencil. Purchase a relatively dark pencil so your outlines show up on the wall. Choose a pencil based on its lead rating. A 2B pencil is often a great choice to create dark lines that don’t smudge easily. Continue filling in the mural grid according to the template you drew. Use the art pencil for facial features, individual tree branches, and other small details that emphasize your mural’s overall design. The complexity of your design influences how much time you spend sketching. If you’re doing characters, you’re probably better off sketching all of the fine details. If you’re confident in your abilities, you can even try sketching or painting details freehand. You could add new components to your work that you didn’t include in your initial design.
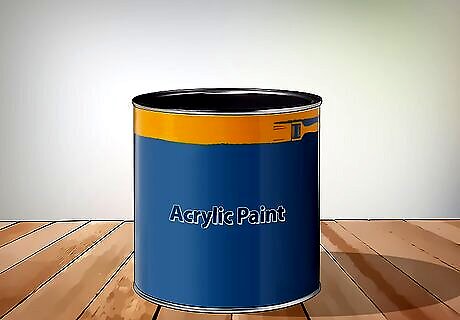
Pick an acrylic paint to resist tough outdoor weather. Try a 100% acrylic product with a high lightfastness rating. That way, your mural won’t fade or change colors over time. Basic outdoor wall paint with an eggshell finish is a great choice for most projects. Oil-based alkyd enamel or polyurethane enamel paints are also an option. Oil-based paints produce richer, darker colors, but tend to yellow as they age.
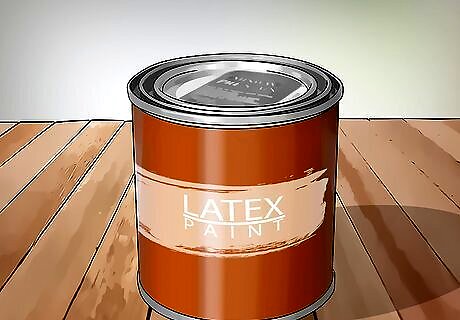
Choose latex paints for an inexpensive way to cover indoor wall space. Latex paints offer easier cleanup, lower costs, and less odor. Most household latex wall paints resist water and don’t crack easily over time. They also tend to mix well with acrylic paints to give you unique shades for your wall. Choose paint with an eggshell finish to avoid glare. Latex is an inexpensive option for covering large backgrounds. If you like acrylic paint, consider switching to acrylics for detailed work. Be aware of the ventilation in your home. Open up nearby windows and turn on fans to blow out paint fumes. Wear a dust mask as you work.
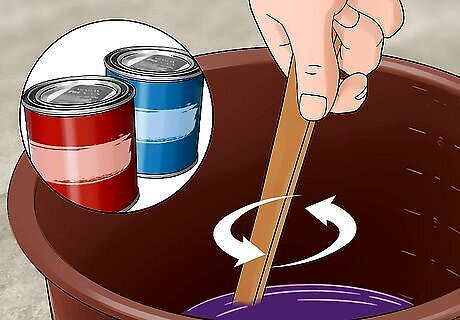
Mix your paint colors as needed while you paint. Although you need a lot of paint for a mural, don’t go overboard while mixing. To avoid wasted paint, focus on a single color at a time. Mix enough paint for the area you need to cover. That way, you create a consistent color that won’t dry out before you’re able to finish layering it on the mural. Start with the colors for the background, then move on to large shapes and details in your design. If you’re using a paint roller, mix paint in a paint roller tray. Bowls and even baking trays are great for mixing paint for brush painting. Use palettes, trays, or paper plates to mix multiple colors on a single surface.
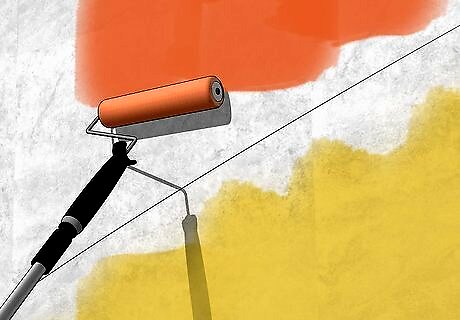
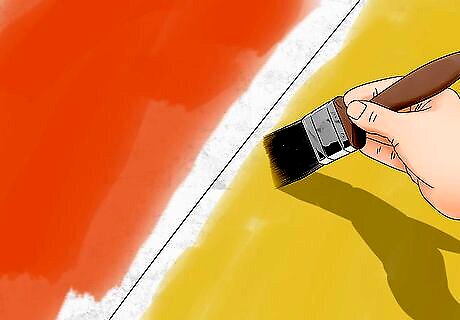
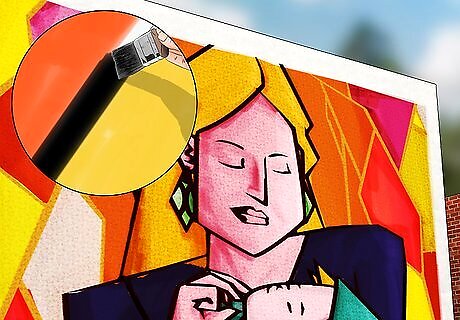
Paint over the largest areas in your design with a paint roller or sprayer. Work from the “back” of your picture to the front. Lay down the base colors in your design first, taking care to keep clean transition edges from one color to the next. Try to mix as much of a color as you need and apply it in a single go to prevent the paint from drying out before you’re done. Rollers and sprayers are best for covering large, wide areas. Use a paintbrush to color small and difficult areas, such as a character’s face or clothing. Always allow each color to dry before proceeding to the adjacent color unless you need to blend them together. Blending creates shading and intermediate colors for your design.
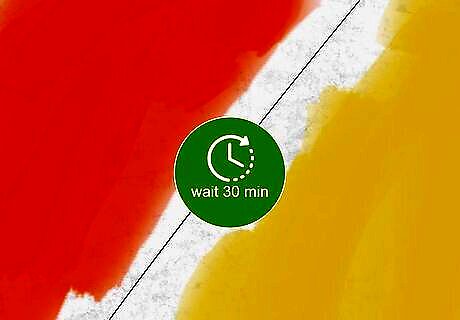
Wait at least 30 minutes before adding a fresh layer of paint. You probably will need to go over each layer of paint 2 to 3 more times to get it to look perfect. Quality acrylic and latex house paints dry within about an hour. The drying time varies depending on the paint you have, so consult the manufacturer’s recommendations if possible. Weather affects the time it takes for paint to dry. Set aside extra time for the paint to dry in cold or humid environments. Some oil paints require as long as 24 hours to cure before you are able to touch them up.
Paint in the remaining details with different brush sizes. Get a few different brushes to tackle all of the detail work your design calls for. Any brush you use to paint on paper or canvas will work. Synthetic brushes are usually a good choice if you need something that will last a while. Save the largest brush for coloring open spaces and the smallest brush for the most intricate details. For example, if you’re painting a tree, use a large brush, roller, or sprayer for the trunk and limbs. Switch to a smaller brush for tiny branches and twigs. Remember to wait at least 30 minutes for the previous paint layer to dry or else the colors will blend together.
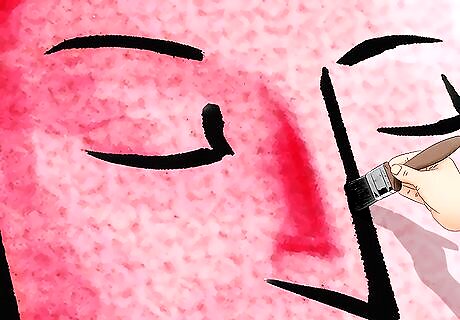
Add outlines, shadows, and other details with black paint. Choose an appropriate paintbrush, usually the smallest one. These details are usually fine, so they are tough to add on a large scale without mistakes. If you do make a mistake, wipe up the paint carefully with soap and water or paint over it again when it dries. For example, if you drew characters in your mural, adding outlines distinguishes them from the background colors.
Completing and Sealing the Mural
Clean up your work by painting over mistakes. Step back and take a look at your work. You will probably notice a few spots where the colors didn’t blend well, the paint ran, or some other issue. Most mistakes are pretty simple to fix. Let the mural dry, then go over the damaged spots with another layer of paint. Mix new paint as needed to match the color you need to fix. Mixing an exact match is very difficult. Blend the new paint in with the old as much as possible.

Wait about a week for the paint to dry completely. Paint feels dry to the touch within 24 hours or less, but that doesn’t mean its ready for varnishing. Moisture may still be underneath the top layer. As a rule of thumb, wait at least a week. Some artists like to wait as long as 6 weeks to ensure the paint seals correctly. The amount of time you need to wait varies depending on the paint you use and other factors. Thick coatings of paint take longer to dry out. Cold or damp environments also cause paint to dry more slowly. Oil-based paints can take 6 months to a year to dry completely. If the paint feels dry to the touch after about 1 week, put a layer of varnish on it. Cover it with a final varnish after the paint finishes curing.
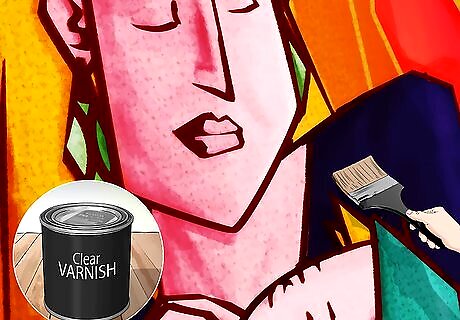
Seal the mural with a clear varnish to protect it. Choose a clear, water-based, non-yellowing paint varnish. Matte or even satin varnishes work best since glossy varnishes look a little too shiny on murals. Mix the varnish with water to turn in into a paint. Then, use a wide paintbrush to coat the entire mural. Add a second coating after the varnish dries within a day to finish your mural. Using a varnish protects the paint from debris and damage. Always use an acrylic varnish for outdoor murals. Make sure the varnish is removable. If it is, you can scrub it off when you need to touch up the paint underneath it.


Comments
0 comment