views
Removing a Garbage Disposal
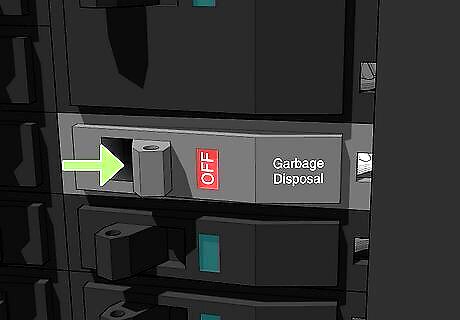
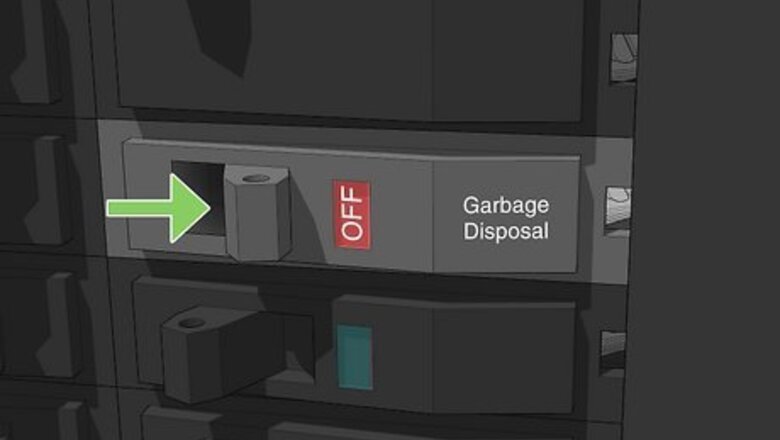
Shut off the power supply to the garbage disposal at the fuse box. Shut off the power supply from the circuit breaker or electrical service panel. Flip the switch controlling the electricity going to the garbage disposal on your circuit breaker. This will keep you safe as you work. Confirm that the power supply has been shut off by attempting to turn the garbage disposal on before proceeding.
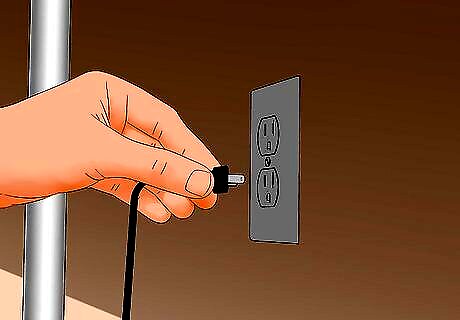
Unplug the garbage disposal and undo the wiring. Pull the plug of the garbage disposal out from the wall. Then, disconnect the wires using the following steps: Remove the plate covering the wire connections on the bottom of the disposal using a screwdriver. Disconnect the exposed wires by untwisting the wire nuts. Re-cap the wires that hook back into the wall and set them aside for later.
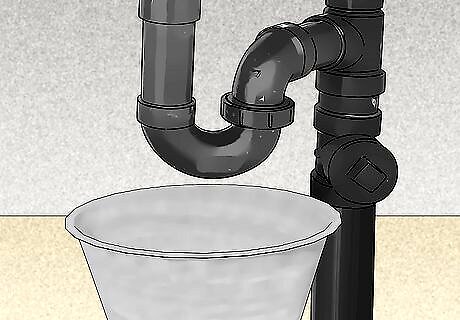
Place a bucket under the waste pipe and lay some towels down. When you disconnect the pipes, water is going to spill out from the pipe. Put an empty bucket under the pipes will catch any wastewater and throw down a few towels to protect the bottom of your cabinet. Take everything out of your under-sink cabinet if you haven’t already.
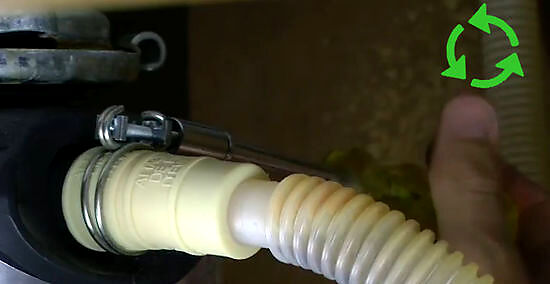
Loosen the hose clamp on the dishwasher hose and remove it. Locate the hose where the barbed dishwasher nipple feeds into it. Remove that hose by hand. Remove the pipe connecting the dishwasher to the side of the garbage disposal. Not all garbage disposals are connected to a dishwasher so this only applies for those that are connected.
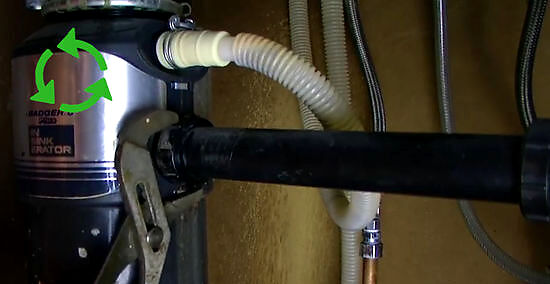
Use a wrench or tongue-in-groove pliers to unlock the p-trap. The p-trap is a u-shaped pipe that connects to the garbage disposal and takes the wastewater away from the disposal. Unlock it by turning the nut connecting it to the disposal with a wrench, pliers, or channel locks. There’s often PVC glue holding this nut tight, so you may need to use a fair bit of force to unlock the pipe.
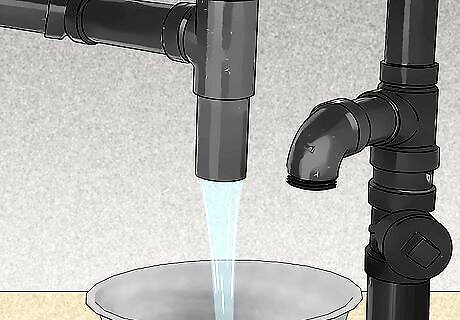
Disconnect the p-trap and drain the water into the bucket. Slowly pull the p-trap out of the pipe it’s connected to and drain the water out. It shouldn’t be a ton of water, but it’ll be enough to create a mess.
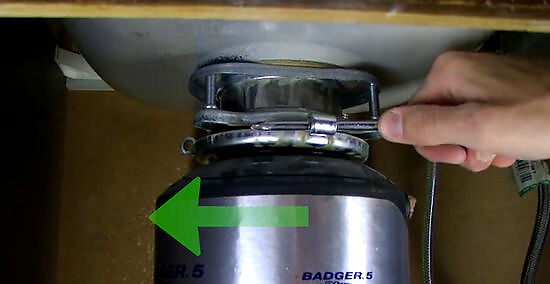
Remove the garbage disposal with a hex key or screwdriver. Look at how the top of the disposal is connected to the drain. Locate the round hook openings sticking out of the mounting assembly holding it in place. Use a hex key, snap ring insert, or a flat-head screwdriver to pull those hook openings counterclockwise. Once it starts to loosen up, use your hands to fully unscrew the disposal and pull it down. This is probably where you’ll need to use the most elbow grease. Forcing the hook openings counterclockwise can take a lot of energy. Make sure to hold the underside of the garbage disposal with your hand while removing it. They are very heavy! You can put a box under the disposal to keep it from falling down and denting the cabinet if you’d like.
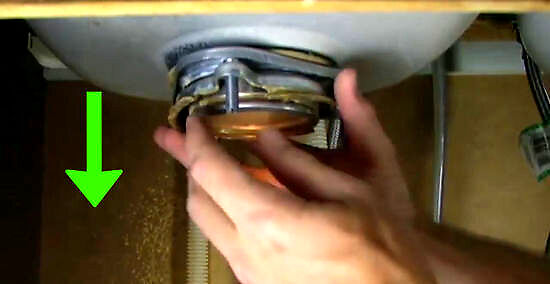
Detach the mounting assembly if you aren’t replacing the disposal. If you’re installing a new disposal and it’s the same brand as the old one, leave the mounting ring where it is—you can reuse it. Otherwise, remove the mounting assembly by loosening the three mounting screws that hold the upper and lower rings together. Remove the ring that is in a groove on the sink sleeve and then remove the sink sleeve, flange, and fiber gasket. The mounting assembly refers to the large ring around the underside of the sink’s drain that holds the garbage disposal up. Clean out any remaining sealing gaskets, plumber's putty, or debris from the sink opening.
Plumbing the Pipes Without a Disposal
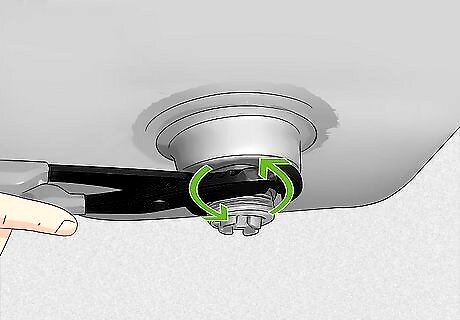
Remove the nut securing the drain flange to remove the sink drain. Use a pipe wrench to loosen and remove the nut securing the drain flange. Then, push the sink drain up through the sink for removal. If you don’t have the pipes on hand for this, pick up a kit containing all the pipes you need.
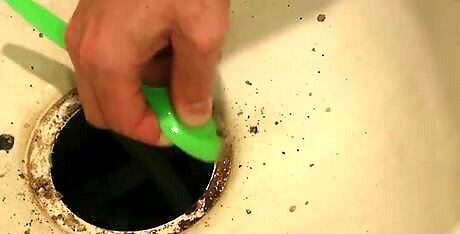
Clean the putty around the drain hole with a putty knife. Scrape the old plumber’s putty off using a putty knife. If the putty is very hard and difficult to remove, scrape it off with a razor. After cleaning off the chunks of putty, use a scrubbing pad and water to scrub the area clean. If the putty is too difficult to remove, use rubbing alcohol or mineral spirits to soften the putty up.
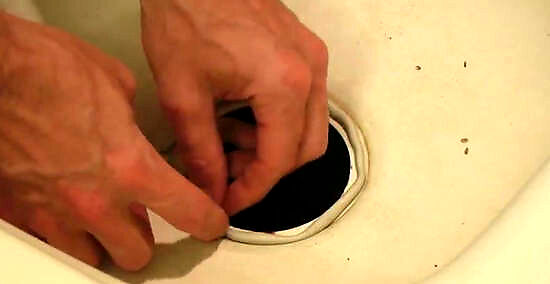
Put plumber’s putty around the drain and put the drain in place. Roll out a ⁄8 in (0.32 cm) rope of plumber’s putty and put it around the drain. The rope must be long enough to go around the circumference of the drain, but it doesn’t need to be super thick. Place it around the lip of the drain and then set the drain into the sink opening. Press the drain down firmly and wipe away excess putty. Unless you’re installing a brand new sink, use your old drain. Use a solid amount of force to compress the plumber’s putty and put the drain in place, but don’t put all of your weight on it. If you do, you could crack the rim of the sink or the countertop.
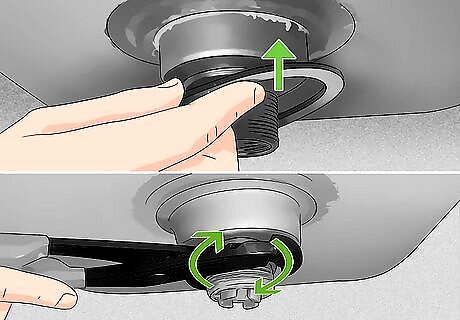
Secure the sink drain washer to the underside of the drain. The sink drain will come with a washer if you bought a new one. If you didn’t, use the old washer. Move to the underside of the drain and place the washer around the threads and secure it with the large nut. Tighten the nut as securely as possible using tongue-and-groove pliers or a wrench. It may help to have someone hold the drain down from the top so it does not move around. Remove excess putty after securing the drain.
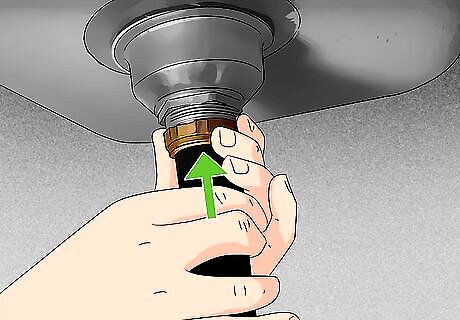
Connect the PVC drain tailpiece to the drain under the sink. Screw in the straight pipe that leads down from your sink. This pipe must be long enough that it is at the same level as the drain pipe in the wall. Hand-tighten the tailpiece to the sink drain to secure the piece. Do not over-tighten any of the pipes. If they’re secure, it’s fine.
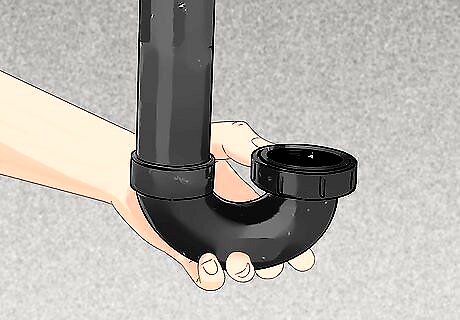
Attach the p-trap to the tailpiece. The p-trap is the rounded pipe that leaves a little bit of water in the system to prevent fumes from coming up through the drainage system. Attach the p-trap to the tailpipe and point the trap towards the drain in the wall. Use the nut to tighten the pieces together by hand, but don’t tighten it all the way. You may need a bit of wiggle room if you need to line the last pipe up with the sink drain.
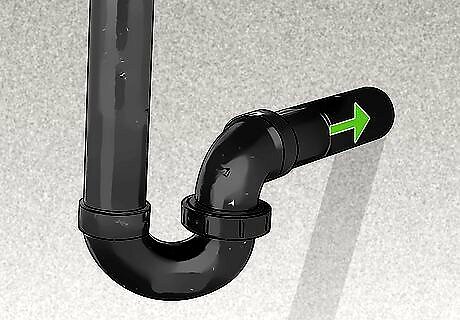
Connect the connector pipe to the adjacent sink or drain in the wall. Use the connector pipe to connect the p-trap piece to the T-fitting on the adjacent sink if there is one. If there isn’t, connect the p-trap to the drain pipe in the wall. Use the nuts and washers provided with your pipes to secure the pieces together using the tongue-and-groove pliers. Once everything is connected, tighten the nut on the p-trap. You may need to use a pipe cutter to trim the last pipe down to the correct length to reach the drain pipe. Turn the power back on when you’re done.
Replacing the Disposal
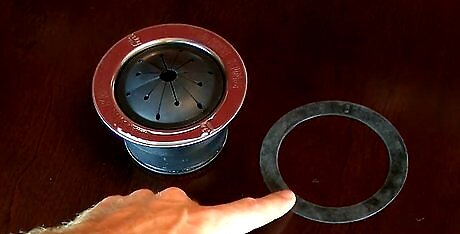
Place a rubber seal on the underside of the drain flange. The rubber seal will usually come with your new disposal. Just wrap it around the flange and then put the drain flange in the drain hole. Use plumber’s putty if your disposal does not include a rubber seal. Make sure you turn the water off at the supply lines before you get started. Purchase the same garbage disposal you had before just to keep things simple. This way, you can use the same mounting ring.
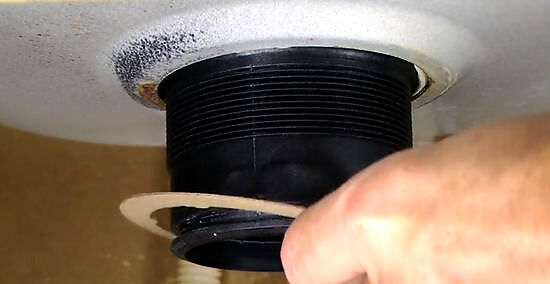
Place another rubber seal on the drain flange. Attach the metal backup ring to the drain. Use another of the provided seals on the drain flange on the underside of the sink. Attach the metal backup ring flat side up by pushing over the underside of the drain flange underneath the sink. If you’re using plumber’s putty, roll it into a snake-like shape and place it around the drain.
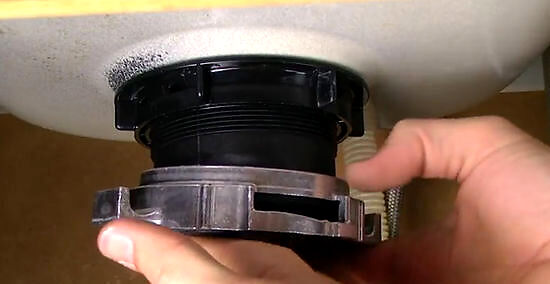
Attach the mounting ring if you aren’t using the old one. Loosely attach the mounting ring with three screws. Then, secure the mounting ring with the snap ring, which snaps into place. Finally, tighten the three screws to make sure the assembly is tight and even. The mounting bracket is now attached and ready for the new garbage disposal.
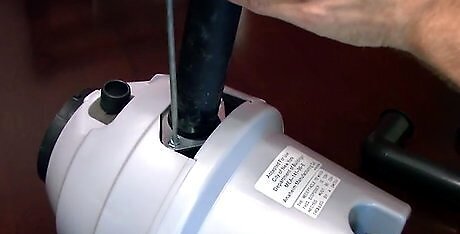
Prepare the new disposal. Turn the disposal upside down and shake it to remove anything inside. Remove the electrical plate and pull the wires away from the disposal. Screw the strain relief sleeve into place and feed the electrical wires through it into the disposal. If you are connecting the disposal to a dishwasher, remove the knock out plug using a hammer and screwdriver.
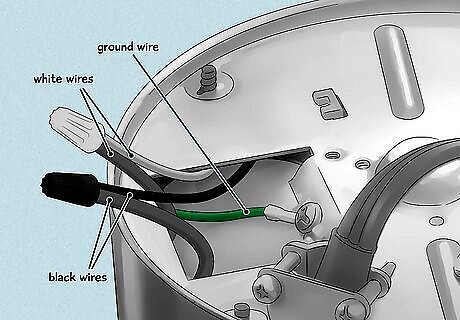
Connect the electrical wires together. Make sure the power is shut off at the fuse box. Then, connect the ground wire to the green screw on the disposal. Splice the white wires to white wires and the black wires to black. Secure the connections with wire nuts and tighten the strain relief sleeve. Replace the cover plate on the disposal.
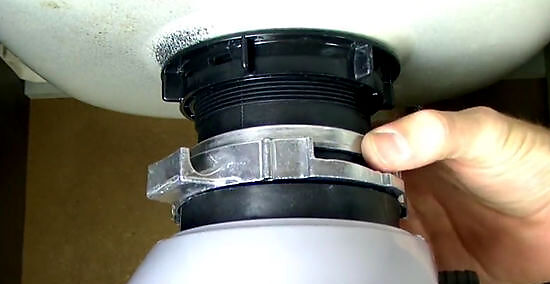
Lift the disposal up onto the mounting bracket and lock into place. Lift up the disposal and push it into the mounting bracket. Then turn the locking ring until all three hook housing pins catch. Tighten the locking ring as far as possible, using slip-joint pliers, a screwdriver, or a hex key to finish tightening. You may or may not hear the pins snap into place. Tug on the garbage disposal once it’s installed on locking ring. Does it move? If so, it’s not tight enough. If it doesn’t move when you pull on it, it’s installed correctly.
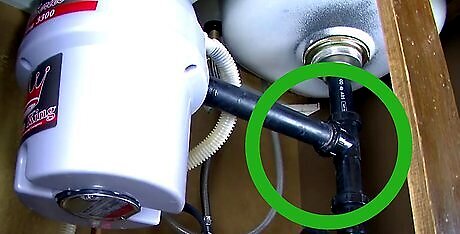
Attach the pipes to the drain in the wall. Connect a 90-degree disposal drainpipe to the disposal, p-trap, and tailpiece to the sink. Tighten the pipes together using PVC nuts. Use straight pipes and a T-fitting to connect both drains into one line and route the drainpipes into the main drain. If there isn’t a second drain, connect the tailpiece to the side of the disposal and use a flexible length of PVC to hook up the p-trap underneath it. Then, run a pipe from the p-trap to the drainpipe in the wall. So long as the p-trap drops below the drain pipe in the wall, you should be good. Dry fit the pieces together at first just so you have a sense for how the pipes go together. Connect the pipes using PVC glue on both the outside of the pipe and inside of the fitting. PVC glue will melt the material a little to give a strong weld.
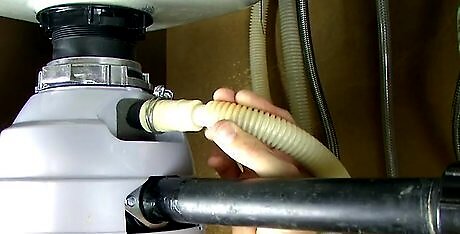
Connect the dishwasher drain line to the disposal. Dishwashers must drain through a disposal if you’re installing one. Connect the pipe to the disposal at the spot where you knocked out a plug previously using a drain hose. Just use the old drain hose. If you were doing this from scratch, you’d need to pull out the dishwasher and install a new drain line if you didn’t have one, but since you had an old disposal, you’re good to go.
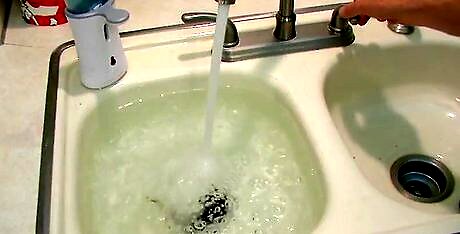
Turn on the sink to let the water run and check for leaks. Turn the water back on at the supply line. Then, turn the handle on the sink and let water run through the pipes for a few minutes to ensure nothing leaks. This will prevent a small mistake from turning into a huge mold or water damage problem later. If you do have a leak, turn the water back off, check the pipe connection, and re-tighten as needed.
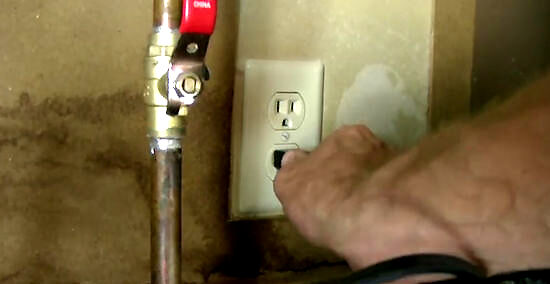
Turn the power back on. Plug the disposal back into the wall. Flip the circuit switch back on at the electrical service panel to power up the disposal. Test your garbage disposal to confirm that everything works correctly.


Comments
0 comment