
Setting Up Your Sensor
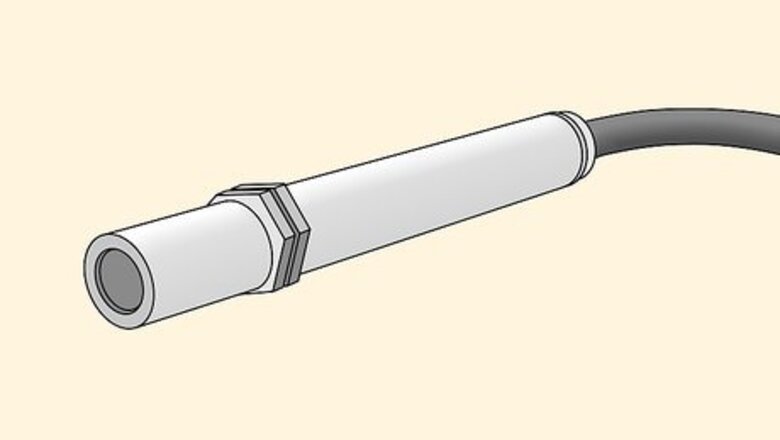
Determine what type of temperature sensor you have. While there are numerous models of temperature sensors, they boil down to 2 types: contact or non-contact. As the name implies, a contact sensor must be in physical contact with whatever you are measuring. Non-contact sensors measure changes in the air temperature, and therefore don’t have to be in physical contact with an object or liquid. Determine which type you have to take measurements correctly. Check the manual from your sensor to determine which type you have.
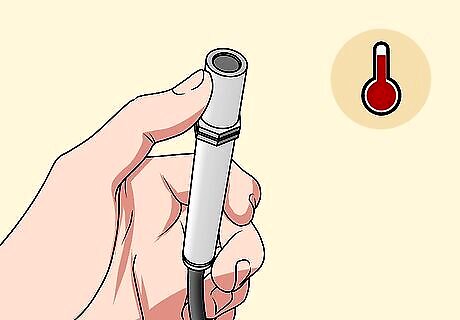
Test if your sensor uses negative or positive resistance. Temperature sensors don’t always produce a temperature reading. Instead, they might produce an electric resistance reading, which you would then convert to a corresponding temperature. Sensors respond in one of two ways to temperature. In a positive resistance sensor, the resistance increases as the temperature increases. In a negative resistance sensor, the resistance decreases as the temperature increases. For a quick test, grab the end of the sensor that measures temperature and hold onto it for a few seconds. If the resistance reading increases, you know you have a positive resistance sensor. If the reading decreases, you know you have a negative resistance sensor.
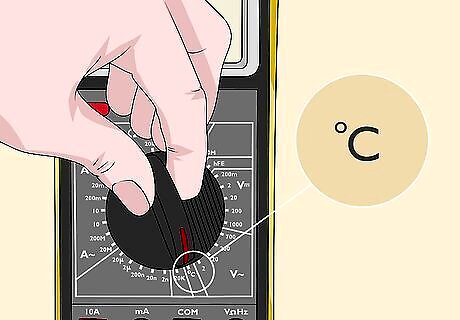
Select “Fahrenheit” or “Celsius” on the sensor reader. Some temperature sensors have an option to measure in Fahrenheit or Celsius. If your sensor has this option, choose the measurement that you’re comfortable with. Some sensors don’t produce a temperature reading, but only an electrical resistance reading. In this case, you’ll have to convert that reading into a temperature.
Taking a Temperature Measurement
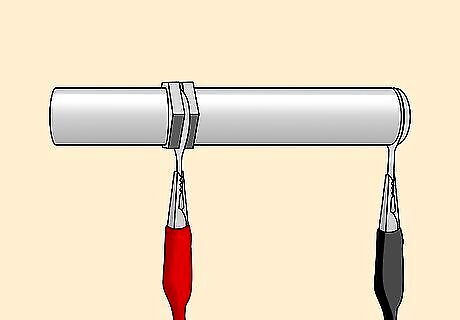
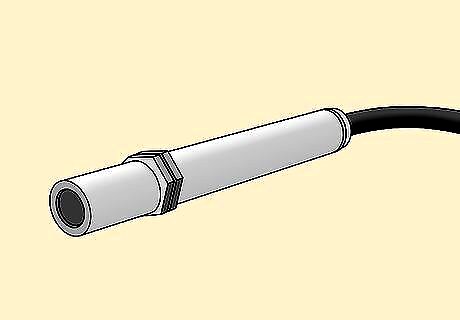
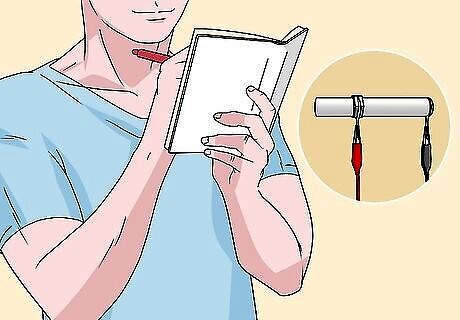
Hook the sensor to a temperature sensor reader. A temperature sensor has a reading device with 2 wires coming out of it. There are usually clamps at the end of these wires. Clamp each wire to the corresponding locations on the sensor. Temperature sensors look like electrical transistors with 2 output wires coming out. Connect the reading wires to these output wires.
Touch the sensor to the material that you want to measure. If you have a contact sensor, then make sure your sensor makes physical contact with whatever you are measuring. If you’re measuring a solid object, press the sensor against it and hold for a few seconds. If you’re measuring a liquid, dip the sensor into it and leave it there to take a measurement. Non-contact sensors usually have to be pointed at a specific object. In this case, point the sensor directly at the object or liquid and hold it there to take a reading.
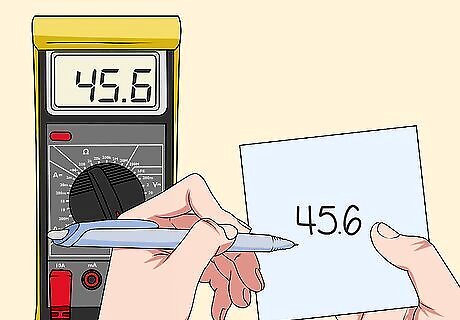
Record the resistance reading if your sensor does not convert to temperature. Electronic resistance is usually measured in ohms. If your temperature sensor does not automatically convert its reading to temperature, then the reading will be in ohms or a similar unit of electronic measurement. Write this reading down so you can begin converting it to a temperature value. Double check which unit of measure your temperature sensor uses. If you think the reading is in ohms but it’s actually in volts, your conversion will be off. Check your owner’s manual to confirm the measurement.
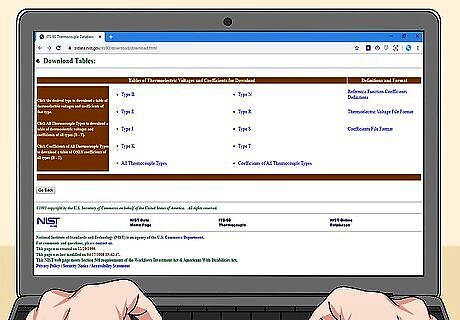
Check if there is a temperature conversion table for your sensor online. Certain sensors have conversion tables available online. This will tell you what temperature corresponds to each resistance reading. If your reader doesn’t convert the resistance to temperature, start by searching online for a conversion table. Type in your reader model for a correct table. Conversion tables for popular sensor types are available at https://srdata.nist.gov/its90/download/download.html. If you can’t find a temperature conversion table online, then you’ll have to construct your own table by measuring resistance readings at different temperatures.
Building Your Own Conversion Table
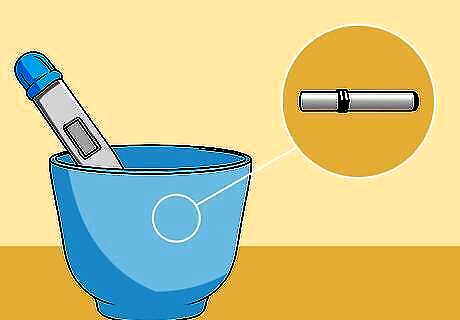
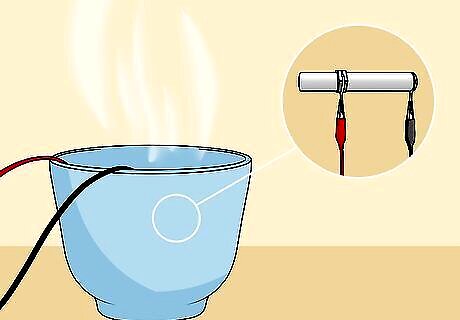
Place your sensor in a cup of water with a thermometer. Start by disconnecting the sensor from the reader. Then place it in a cup of water with a thermometer. The thermometer can be an oral thermometer or a kitchen one. A kitchen thermometer may be better because it is tall enough for you to read without removing it from the water. Use a cup or container that can be heated up, because this will be important later on.
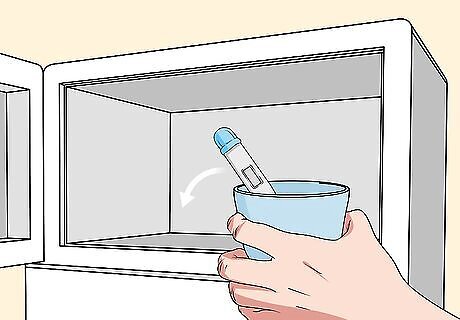
Put the cup in the freezer to bring it down to the freezing point. Starting at the freezing point of 0 °C (32 °F) lets you take multiple resistance readings at different temperatures as the water heats up. Put the cup in the freezer and wait until it reaches 0 °C (32 °F). Many factors determine how long it will take the water to reach this temperature. Water usually freezes solid within 3 to 4 hours. Look after about an hour and check the temperature. Wait longer if you have to.

Take a resistance reading when the water reaches 0 °C (32 °F). When the thermometer reaches the freezing point, remove the cup from the freezer. Then connect the sensor reader to the sensor and record the electrical resistance measurement. Note that this is the resistance reading at 0 °C (32 °F) to start your conversion table. Be neat and organized when making your chart. Have one column for the resistance reading and one column for the corresponding temperature. This will make your chart easy to read and use.
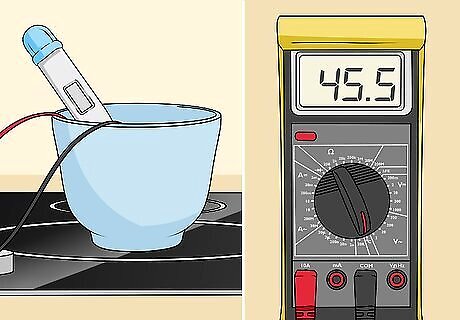
Heat up the water and record the resistance at different temperatures. Once you have your baseline reading at 0 °C (32 °F), you can then start building your conversion table. Let the water heat up and take periodic measurements at different temperatures. Leave the temperature reader wires attached so you don’t have to take the sensor out of the water for measurements. Ideally you should work all the way up to the boiling point of 100 °C (212 °F) to get a complete conversion chart. However if you don’t intend to measure temperatures that hot, you can stop before this point. There are many ways to heat the water up. If your stove doesn’t use flames, you can place the cup on the heating element and put it on a low setting. Putting the cup in front of a heater will work too, but it won’t get the water as hot. This table can be as precise as you want it. You can take a reading at every individual degree for a very accurate table. If you don’t need your table to be that precise, you can take a measurement at every 5 or 10 degrees.
Use this conversion chart when you take temperature readings in the future. With this collection of readings, you now have a conversion chart to go along with your temperature sensor. Refer back to it whenever you take a reading to convert the resistance measurement to a temperature.

Finished.


Comments
0 comment