views
Yet another set of monthly Windows 10 updates, and yet more mysteriously broken functionality on laptops and desktops that have unfortunately installed these updates. This time around, Windows 10 machines are struggling with a new bug that impacts the sleep mode that is causing machines to power up without any user input. This has been reported on PCs running the Windows 10 August updates and the Windows 10 September 2020 optional update. Users on the Microsoft support forum are reporting that either their PCs don’t go into the sleep mode or they keep waking up even when not being used. Microsoft has not yet issued a fix for this latest Windows 10 update bug.
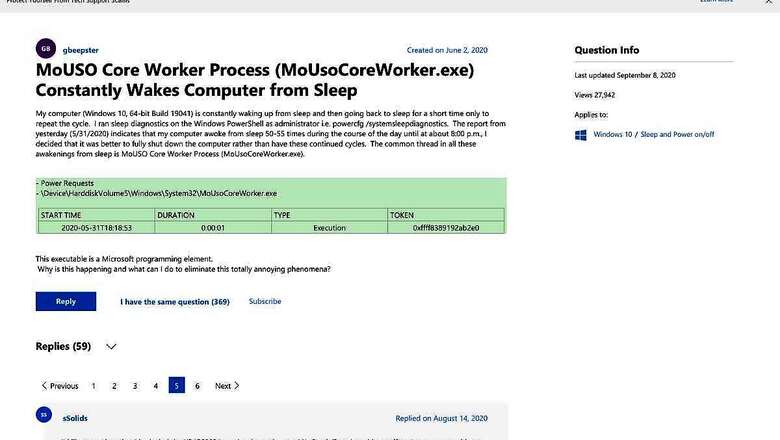
It turns out that there is a specific process that is causing this problem—users are reporting that the MoUSO Core Worker Process (MoUsoCoreWorker.exe) is the culprit. “My computer (Windows 10, 64-bit Build 19041) is constantly waking up from sleep and then going back to sleep for a short time only to repeat the cycle. I ran sleep diagnostics on the Windows PowerShell as administrator i.e. powercfg /systemsleepdiagnostics. The report from yesterday (5/31/2020) indicates that my computer awoke from sleep 50-55 times during the course of the day until at about 8:00 p.m., I decided that it was better to fully shut down the computer rather than have these continued cycles. The common thread in all these awakenings from sleep is MoUSO Core Worker Process (MoUsoCoreWorker.exe),” says a user gbeepster.
“This process mysteriously appeared in my task manger after the latest update. I am having multiple sleep issues as well regardless of what power management settings I edit,” says Chriswa74. Another user, gclow, who is using an HP TouchSmart PC says they have Windows 10 Pro 2004 installed and the MoUsoCoreWorker.exe is stopping their PC from going into the sleep mode.
The temporary solution for you at this time, if you have been lucky enough to not suffer from these issues on your Windows 10 PC, is to pause the automatic OS updates for the time being. You can pause updates from downloading and installing on your Windows 10 PC for up to 7 days at a time or select a time frame up to 35 days to stay update-free. Here is how to do it.
Click on the Windows 10 icon on the bottom left of the screen to open the start menu. Here, select the Settings menu, which opens a new app window. Here, either scroll down to find Windows Update or search for it. This opens the update page, which shows the list of pending updates if any, and the download as well as install status for each of these. Look a bit further down on this page, and you will see the “Pause Updates for 7 days” option. This is the ticket. You can select this option to pause the automatic download and install of the Windows 10 updates for up to a week at a time, and you need to keep repeating it for the paused situation to continue.
If you want a bit more freedom in terms of selecting the window in which you don’t want Windows 10 to update, you must scroll a bit further down on the Windows Update page and select the Advanced option. This takes you to a further set of options, and here you can select a date up to 35 days from that time, to keep Windows Update from doing any automatic installations.


Comments
0 comment