
Preparing the Surface
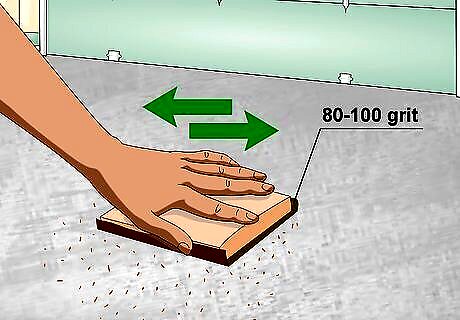
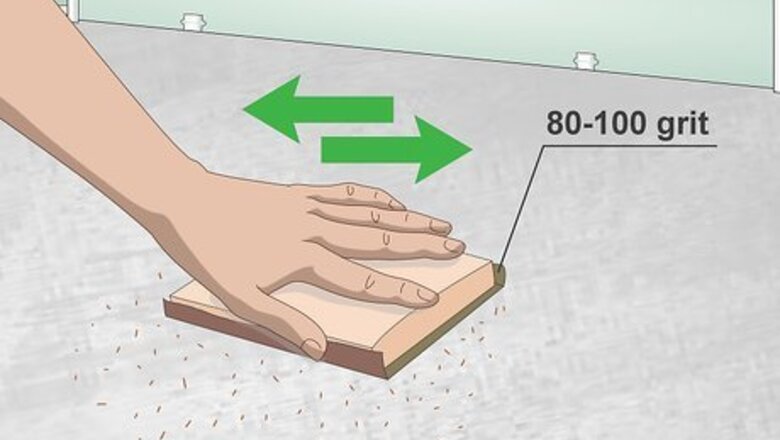
Sand the surface with 80- to 100-grit sandpaper. This is vital, unless you are working with metal or concrete, as it will remove old finishes and give you a rough surface to work on. Keep sanding the surface until all previous paint, varnish, or sealer is gone, and the texture is consistent. You don't need to sand brand-new lumber that you just cut or bought from the store. Sandpaper is the best, but you can speed the process up with a power sander.
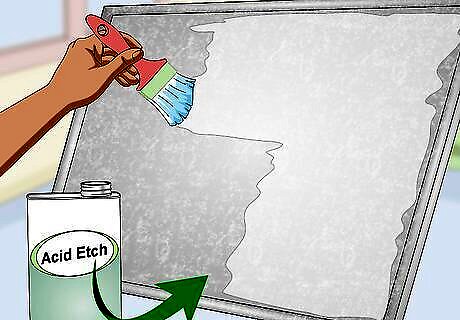
Treat metal surfaces with an acid etch or a shot blast. Prepare a solution that is 1 part muriatic acid and 1 part water. Clean your surface with this solution, then neutralize it. Rinse the solution off with plain water twice; make sure that you don't leave any acid behind, or the primer won't stick. You can buy these products in a home improvement store. Be sure to wear long pants, long sleeves, gloves, and safety goggles. Read all of the safety precautions on the label.
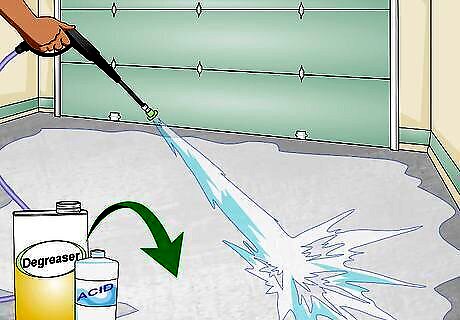
Degrease and acid etch concrete surfaces. Remove any dry debris first. Apply a commercial degreaser to remove any surface oils. Clean the surface with a solution made from equal parts muriatic acid and water. Use a pressure washer to remove all traces of acid. Ensure that concrete surfaces are fully cured before you use degreaser and acid. Most concrete needs to cure 28 days.
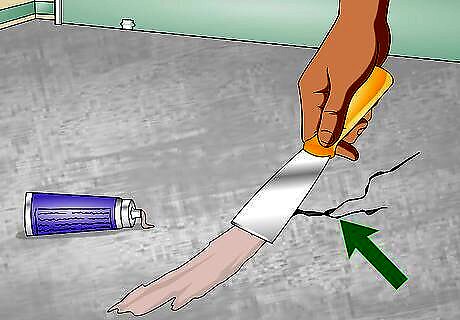
Fill in any imperfections with the appropriate filler. If your surface has cracks or pits, you need to fill those in. What sort of filler you use depends on what the material is made from, so choose accordingly. Once you have the imperfection filled, you must let it dry and cure completely. Sand the filled-in area afterwards. For example, if you are filling in wood, use wood putty. If you are filling in concrete, use spare concrete. For metal, try metal epoxy putty. It's best to do this after the initial sanding, as the sanding process itself can reveal imperfections.

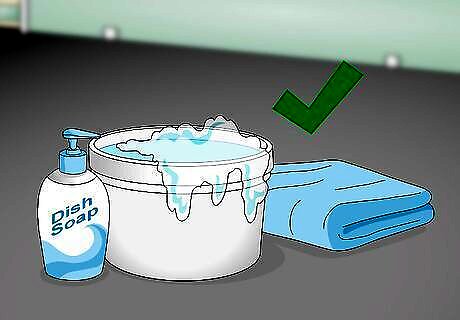
Clean the surface with mild dish soap and water, then let it dry. You can also use laundry detergent and a scrub brush. Do not use a solvent-based cleaner, however. If you are worried that there might be some oily residue, clean it off using a commercial degreaser. Make sure that your metal surface is free of rust. If there is any rust, treat it with a rust-removal product.
Applying the Primer
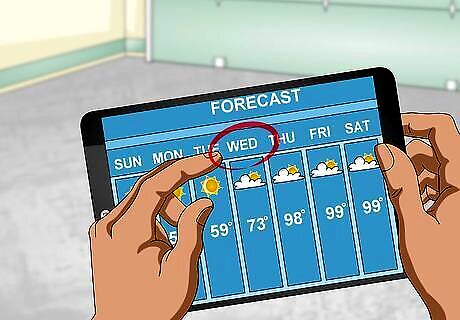
Choose a day when the temperature is between 55 and 95 °F (13 and 35 °C). The humidity must be below 80 to 85%, otherwise the primer will not cure properly. For even better results, ensure that the weather is 5 °F (−15 °C) above the dew point. You can find out the dew point by looking up the detailed weather report for your area. Temperature and humidity are important, otherwise the primer may not cure properly.
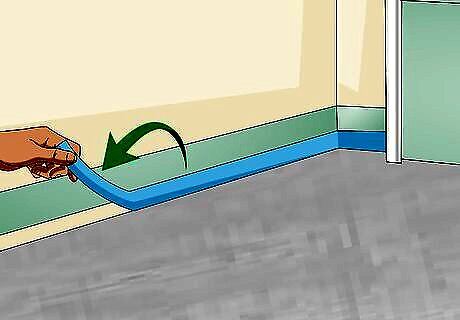
Mask off the areas that you do not want to coat with Tuff Coat. Use masking tape in small areas, such as trims and corners. If you need to mask off a larger area, cover that area with paper, cardboard, or plastic sheeting first, then seal the edges with masking tape. You will remove the masking material at the very end, after you apply the last layer of Tuff Coat.
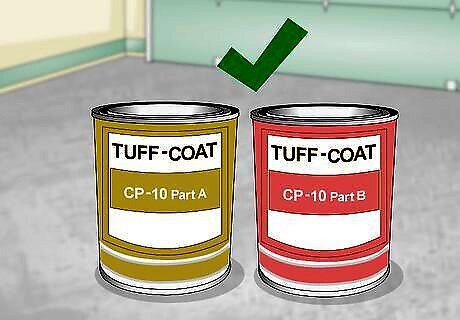
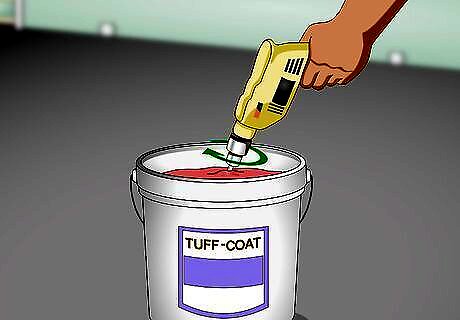
Choose a CP-10 or MP-10 Tuff Coat primer. You must prime the surface before you apply the Tuff Coat, and you really should use 1 of the 2 primers made by Tuff Coat; this ensures that there won't be any chemical reactions. You will need about 1 1 gallon (3.8 L) of primer to cover 40 to 50 square feet (3.7 to 4.6 sq m). Choose the CP-10 Water Based Epoxy Primer for concrete, wood, fiberglass, or previously painted surfaces. It is good for surfaces that will be exposed to heavy use and moisture. Choose MP-10 Water-Based Metal Primer MP-10 if your surface is bare aluminum or steel. You can find these products wherever Tuff Coat is sold, including online and home improvement stores.
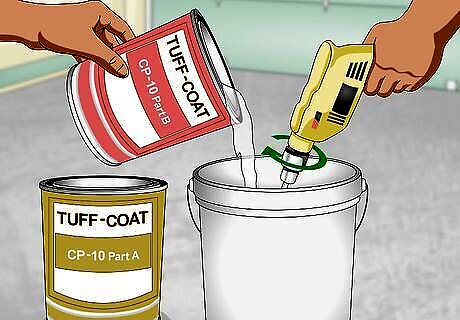
Mix both parts of the CP-10 primer with a drill mixer. The CP-10 primer comes in 2 parts: a resin and a hardener. Measure out equal amounts of each component, and pour them into a disposable container. Mix the epoxy with a drill mixer for 2 to 3 minutes at 250 to 500 RPM (rotations per minute), or until it is thoroughly blended and emulsified. Mix parts A and B separately first, then mix them together. The MP-10 metal primer is ready to use as-is. Simply open the can and stir it with a wooden paint stick. Don't use a paint stick for the CP-10 primer. It is not enough; you need a lot more power and agitation.
Apply your chosen primer with a paint roller or a paintbrush. Pour the primer into a paint tray if you are using a roller, or leave it in the can if you are using a paintbrush. Apply 1 coat of the primer to the entire surface. If you are using a paint roller, choose one with a ⁄8 in (0.95 cm) nap. Work quickly. The resin will start to set in about 90 minutes.
Allow the primer to cure according to the instructions. CP-10 primer is ready in about 6 to 48 hours. MP-10 is ready to use in 1 to 4 hours, but it can take as long as 48 hours. Do not wait longer than 48 hours, however, otherwise you will have to sand the surface and re-coat it. Do not remove the masking material yet.
Preparing the Tuff Coat

Purchase enough Tuff Coat to cover your surface. You will need 1 gallon (3.8 L) of Tuff Coat to cover 40 to 50 square feet (3.7 to 4.6 sq m). You will need 2 coats of Tuff Coat for most applications, so multiply your calculation by 2. Tuff Coat is typically sold in 1-gallon (3.8-L) and 5-gallon (18.9-L) buckets. For industrial purposes, you will need 1 gallon (3.8-L) for every 35 square feet (3.3 sq m), and 3 coats total.
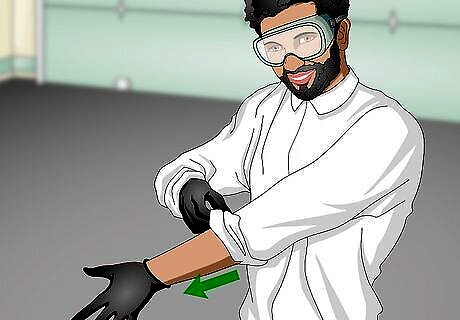
Protect your skin, clothing, and work space. Tuff Coat is permanent once it dries. Wear old clothing and shoes that you won't mind ruining. Next, pull on a pair of gloves to protect your hands. It would be a good idea to wear some safety goggles as well. Put some cardboard, newspaper, or plastic under the can of Tuff Coat to catch any spills.
Have soap, water, and cloths to wipe up spills. Tuff Coat is easy to get out while it is wet, but once it dries, it is permanent. It dries to the touch within 30 minutes, so you will need to take care of any spills as soon as they happen.
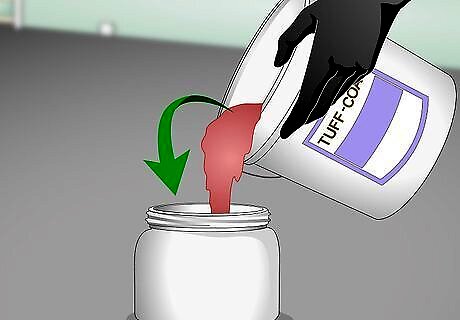
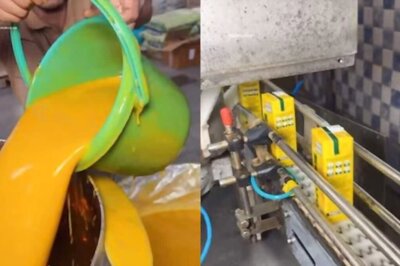
Mix the Tuff Coat with a drill mixer until it looks like pancake batter. Open your can of Tuff Coat and turn the drill mixer on. Slowly lower the mixer into the paint, then continue to submerge it as it mixes the paint. Keep mixing the paint for a few minutes, until it gains a batter-like consistency. Use a drill mixer that has about 250 to 500 RPM (rotations per minute) and a metal mixing blade. Don't use a paint stick; it won't create enough agitation. Don't dip the drill mixer straight to the bottom right off the bat. Lower it gradually towards the bottom. How long this takes depends on the drill and drill speed. Just keep mixing it until it looks like pancake batter.
Using a Roller to Apply Tuff Coat
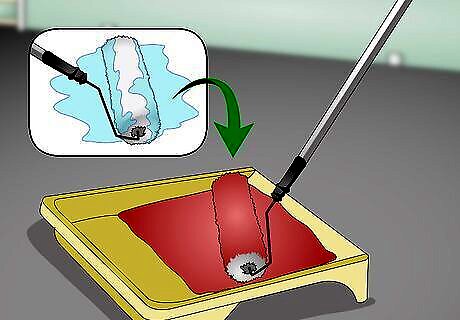
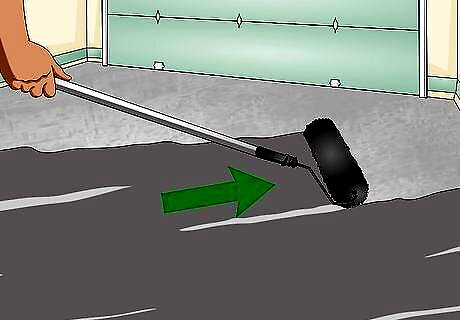
Dampen a Tuff Coat paint roller with water, then dip it into Tuff Coat. If you want to, you can pour the Tuff Coat into a paint pan first, but this really is not necessary. Dampen the roller with plain water first, then dip it into the Tuff Coat, making sure to saturate it completely. Use a paint roller made by Tuff Coat. It's designed to work with the chemicals in Tuff Coat; other paint rollers will not pick up and spread the Tuff Coat.

Apply 4 to 5 vertical strokes to your surface. Dip the roller into the Tuff Coat, then roll it across your surface, top-to-bottom, then bottom-to-top. Dip it into the paint again, and make another vertical stroke, overlapping the first one by a little. Make 4 to 5 vertical rows, then stop. Re-dip the roller into the paint after each vertical stroke.
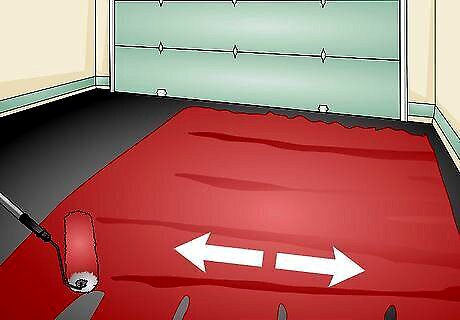
Roll your roller horizontally across your vertical strokes. Don't apply any Tuff Coat this time. Simply roll the roller back and forth across the first 4 or 5 vertical strokes. This will help distribute the Tuff Coat better and give you a smoother finish.
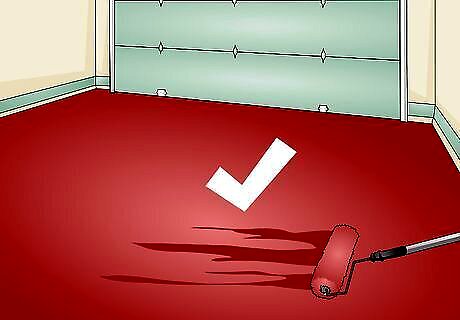
Continue to paint your surface in the same manner until it is all covered. Apply 4 to 5 vertical strokes, dipping the roller into the Tuff Coat after each one. Go back over the vertical strokes with horizontal strokes. Once your surface is covered, stop.
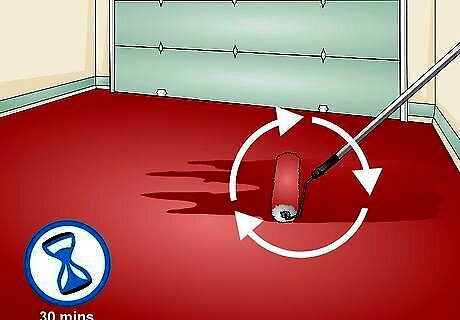
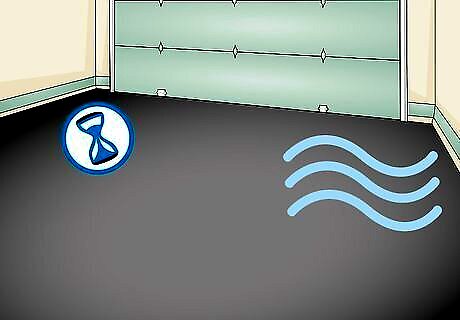
Wait about 30 minutes, then apply a second coat, if needed. Whether or not you apply a second coat is up to you. It will take more time and use more materials, but it will also make the surface more durable. When doing a second coat, start with horizontal strokes instead. Go back over them with vertical strokes. You only need to wait until the Tuff Coat is dry to the touch before applying a second coat. This will take about 30 minutes.
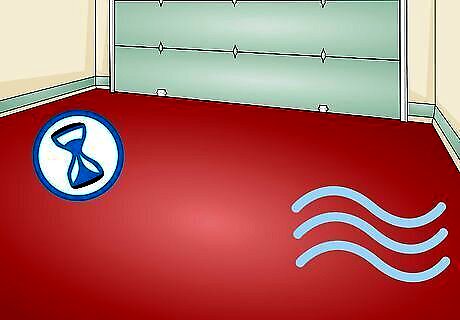
Allow the Tuff Coat to dry and cure completely. The paint will be dry and ready for light wear after 10 to 12 hours, but it would be best to wait 24 hours. It will cure completely after 5 to 7 days.
Using a Sprayer to Apply Tuff Coat
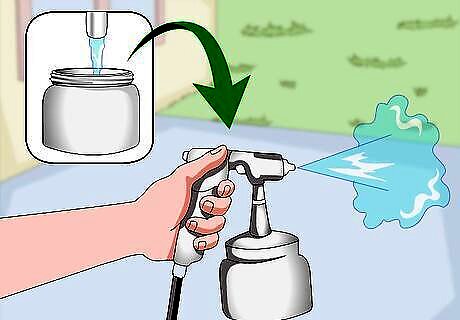
Fill the spray gun with some water, then spray the water out. This is known as "priming" and it will prepare the spray gun for the Tuff Coat. Don't actually spray the water onto the surface, however; spray it away from the surface onto something that can get wet. For best results, set the pressure to at least 40 psi. The spray gun will make a slight spitting or sputtering sound; this is normal.
Fill the spray gun with Tuff Coat. Where you pour the Tuff Coat depends on the type of sprayer that you are using; you should pour the Tuff Coat into the same tank that you'd pour the paint. For best results, let the Tuff Coat reach room temperature before proceeding.
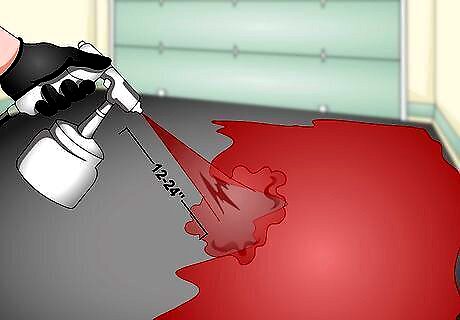
Apply the Tuff Coat 12 to 24 in (30 to 61 cm) away from the surface. Do a few test squirts away from the surface first to ensure that everything is working properly. Next, hold the nozzle 12 to 24 in (30 to 61 cm) away from the surface at a 90-degree angle. Apply a light, even coat all over the surface. Don't apply a thick coat. It is better to do a light, even coat. Wipe off any excess Tuff Coat with a cloth and water immediately.
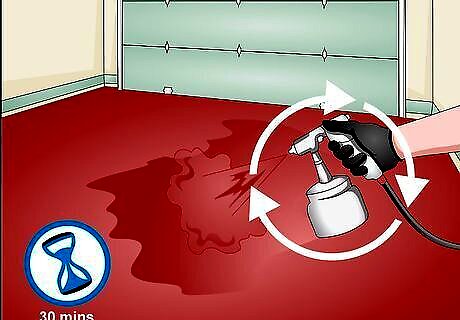
Wait about 30 minutes, then apply a second coat. How long this takes depends on the temperature and humidity. Once the surface feels dry, apply a second coat using the same technique: at a 90-degree angle, from 12 to 24 in (30 to 61 cm) away.
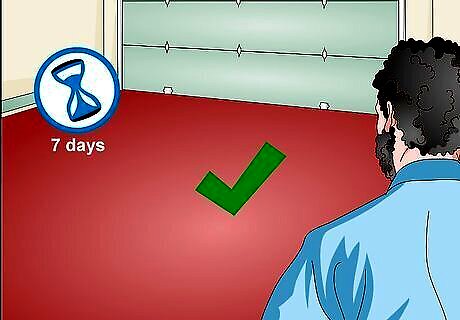
Let the Tuff Coat dry and cure completely. After about 10 to 12 hours, the paint will be ready for light wear. It will be completely dry after 24 hours. You will need to wait 5 to 7 days for it to cure completely, however.


Comments
0 comment