
Using the Auto Fill Handle

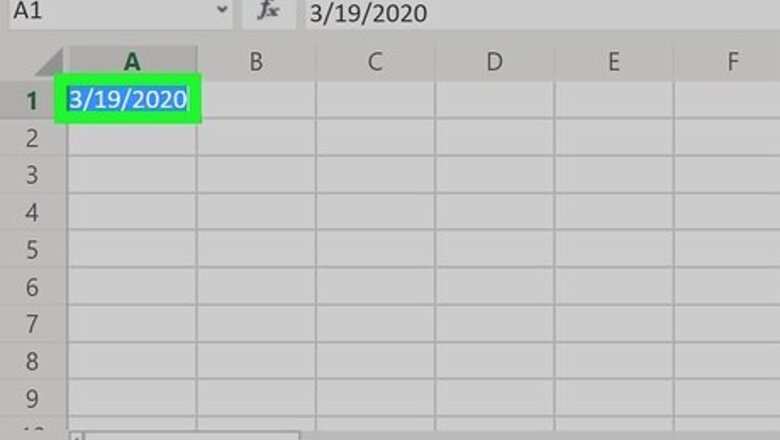
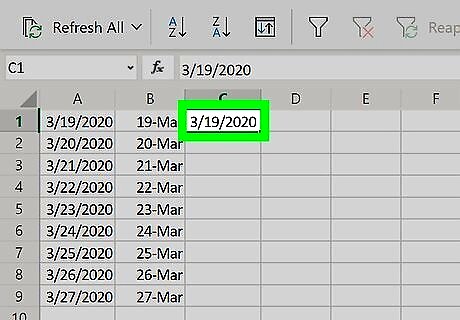
Select the cell or cells that you wish to copy down. To select multiple cells, click and drag your cursor over the cells. You can also hold Ctrl while clicking multiple cells to select them all. Or, hold down ⇧ Shift while selecting the first and last cells in the block to select all cells in between. For example, you could select a cell containing text to copy across multiple cells. You could also select a sum formula to copy down; Excel will automatically pick up the corresponding referenced cells and adjust the formula output. You can also choose a cell that begins a series, such as a date or a number. The Fill Series option will generate a pattern; for instance, consecutive dates, or a series of auto-generated ID numbers.
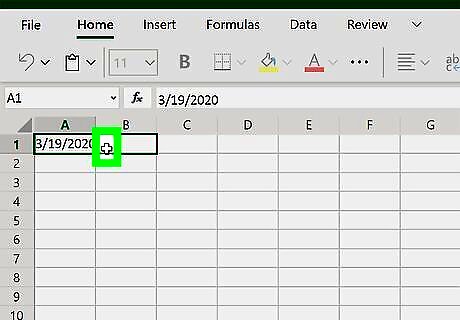
Hold your cursor over the filled square in the bottom right corner of the selected cell area. Wait until the cursor turns into a solid + without arrows.

Click and drag the mouse down or across the blank cells that you wish to fill. Before you release your mouse, you can see a preview of what each cell will be filled with as you stop over that cell. Alternatively, you can double-click the + symbol. It will only fill as far down as the cells to the left or right of that column go.
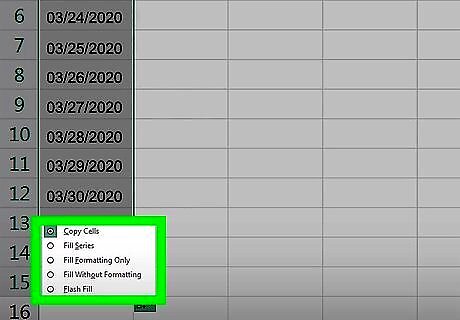
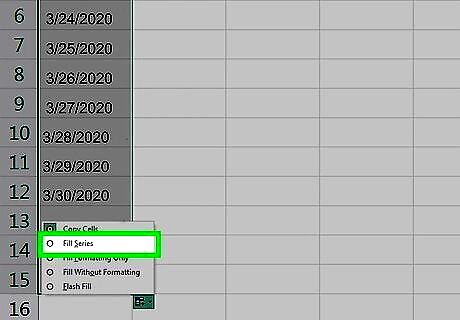
Review the Auto Fill Options by clicking the icon as it appears. Once the cells are filled, the Auto Fill Options icon will appear in the lower right. Select from one of the following options: Copy Cells Fill Series Fill Formatting Only Fill Without Formatting Flash Fill (fills in cells based on formatting and data from other cells)
Using the Auto Fill Ribbon Button
Select the cell that you wish to copy down, as well as the cell(s) that you wish to fill. To select multiple cells, drag your cursor over the cells. You can also hold Ctrl while clicking multiple cells to select them all. Or, hold down ⇧ Shift while selecting the first and last cells in the block to select all cells in between.
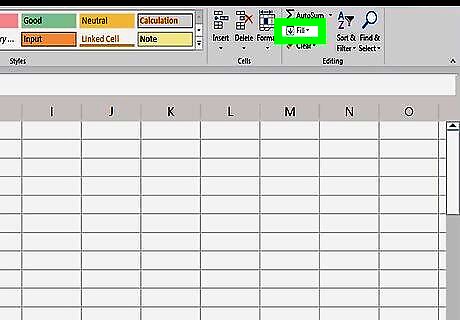
Click the Fill button. This can be found in the Editing section of the Home tab. The icon is a blue down arrow in a white box.
Select a Fill option. Choose a direction to fill and Auto Fill will automatically fill the blank cells with the data from the first cell. Or, you could define your own series for Auto Fill to follow. To define a series, select Series... after clicking the Fill button. You could, for example, define a Date series so that Auto Fill completes the empty cells with the weekdays or the months following the initial date. Or, you could define a linear series with a step value of 5 and an initial value of 1, so Auto Fill creates a series of 1, 6, 11, 16, ...
Using Flash Fill
Use Flash Fill if you want to fill in cells based on formatting and data from other cells. Excel will detect a relationship between the selected source cell and cell(s) next to it, and continue that pattern for the designated cells. For instance, Flash Fill would be useful if you had a column of first names and a column of last names, and wanted to create a third column of initials based on those. Type in the initials for the first row in the third column, then Flash Fill that cell down. Excel will detect and continue the pattern.
Select the cell that you wish to copy down, as well as the cell(s) that you wish to fill. To select multiple cells, drag your cursor over the cells. You can also hold Ctrl while clicking multiple cells to select them all. Or, hold down ⇧ Shift while selecting the first and last cells in the block to select all cells in between.
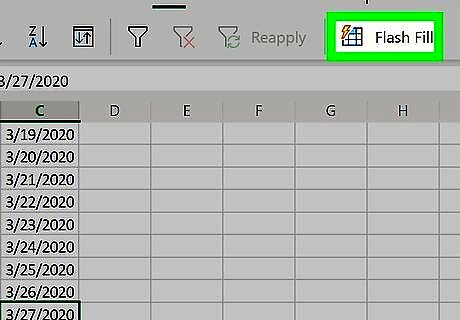
Click the Fill button in the Editing section of the Home tab. Select Flash Fill. Excel will fill the blank cells. Alternatively, select Flash Fill from the Auto Fill options after dragging the handle down If you change any data in the referenced columns, data in the Flash Fill columns will automatically update.


Comments
0 comment