views
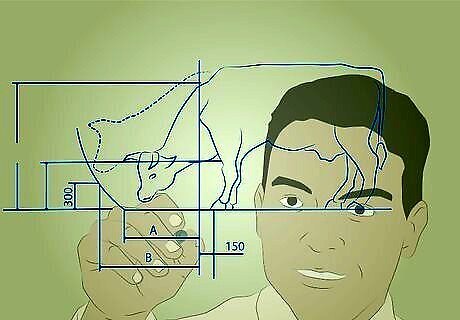
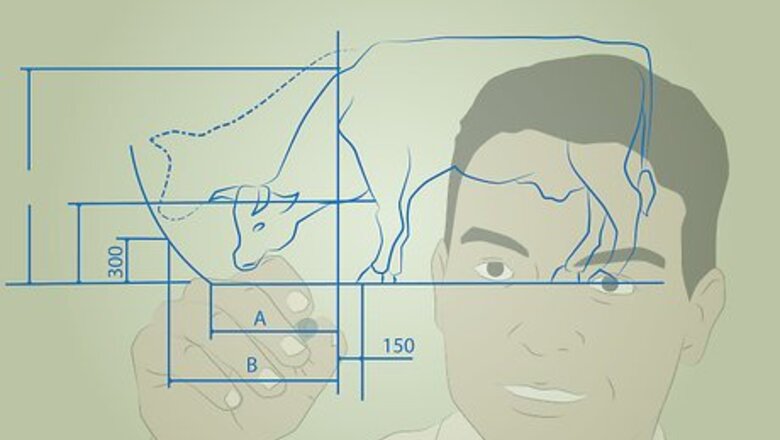
Determine or know what livestock you own or will potentially have to help you consider what your fencing needs will be. Most fences are suited for a variety of farm animal species, but ideally you shouldn't waste money on building something that will end up being what you don't need or is not enough to hold in the animals you are wanting to keep. For example, you shouldn't put up chicken wire if you're only going to have cattle, nor should you install cattle panels for chickens, goats or pigs. Chicken wire is best for chickens and other poultry and other small stock, and cattle panels are best for cattle and horses. With that in mind, you must also understand the risks of having a particular individual animal that may be more of a Houdini than the rest, which should be encouragement enough to make sure you make your fences, "goat-tight and bull-strong." Goats are notorious for testing fences, being prone to climb up, jump over, crawl under, crawl through or even walk through fences. Build your fence so that it's tall enough that they are not likely to jump over and in the ground enough that they won't crawl under. The space between wires need to be smaller than the size of their heads, because if a goat can get its head through, then the rest of its body is sure to follow! Sheep are less notorious for testing fences, yet are as small as goats; thus similar fencing requirements are required for this domestic species. Pigs are worse for digging under and crawling under fences than going over them. You will need to install fencing that is deep enough underground that pigs won't root too far underneath to escape. Many horse owners will argue that barbed wire fencing is the worse thing for horses to be contained in, and would rather spend the extra money on rail, or board fencing than wire fencing. Horses are much more apt to jump over a fence and figure out a way through the gate latch than crawling under or through a fence. However a stallion hot on the trail of a mare in heat will test a fence to its limits; thus if you own a breeding herd of horses, make sure the corral you are containing your corrals in is strong, sturdy and tall enough a stallion won't test it. Fencing for cattle is a little more easier to choose because there are more choices a producer can make for holding their cattle in depending on where a producer wants to hold them in. Barbed wire fencing is the most common type of fencing for pasturing cattle. Electric fencing is best for those fence lines that are being tested too much or those who are rotational-grazing cattle. More rugged fencing such as stand-alone iron panels, wood board or iron rail is best for corrals, handling facilities and working or holding pens, and highly recommended for bull and cull-cow pens.

Determine what type of fence or fences that needs to be built. Once you know what kind of livestock you will have to contain and what needs to be done to keep them in, ultimately what you choose depends on how much money you are willing to spend to buy the supplies, and how long the fence-line needs to be (or, what perimeter or area needs to be contained with a surrounding fence). Note that there is a huge difference in fences for corrals versus those for pasture. With cattle for example, corral fences need to be tougher and stable than pasture fences. Pasture fencing for cattle require simple barbed-wire or high-tensile fences, whereas for pigs, goats and sheep, pasture fencing requires page wire up to a 3 to 5 feet (0.9 to 1.5 m) tall, respectively. Pasture fencing for horses can also be barbed wire or high-tensile, but others like to get a little more fancy and have painted wood fences or aesthetically-pleasing iron fencing. There are numerous types of fencing available. Some examples include: Temporary electric fencing in the form of permanent (such as high-tensile) or temporary electric. Electric fencing can be the fastest and cheapest to build if you live in the country. It will handle any animal that is trained to the wire, and is also useful as a psychological barrier to even wildlife. Wire that is electrified is said to be energized, or "hot." Temporary electric is perfect for rotational or managed-intensive grazing because it can be moved around all the time. How to install an electric fence will not be covered here because some different techniques are involved with installation of this compared with building a standard permanent livestock fence. However, please see How to Make an Electric Fence for more information. Barbed wire fencing with barbed wire installed alone in four to six or more-wired fences, smooth-wire fence in the form of high-tensile or low-tensile fencing (this type of fencing is often electrified) or a combination of smooth and barbed wire--one strand of barbed wire usually runs across top and sometimes at differing levels, or one strand of smooth wire runs across the top with the bottom wires barbed. Both types are fencing are best for livestock Paige wire, though more expensive than barbed or smooth wire, is best for operations that pasture or raise goats, sheep, and pigs, and is a common pasture fencing for holding bison and elk. Paige wire may also be used on farms or ranches that run a cow-calf operation, and necessitates use if the producer doesn't want their calves out of the corral. Paige wire is also called "farm fence" or "woven wire," and comes in the form of woven chicken wire or 12 to 14 gauge wire welded together to form squares of varying lengths apart, from four to six inches apart. It can stand as low as three feet or as tall as eight feet. Wooden horse railing or wooden boards are best for those who want more aesthetically pleasing farms and don't want to worry about the potential problems posed by wire fences. It can be expensive but safe and effective for horses. Wooden board fencing is also suitable for holding cattle. Iron railing fencing is also suited for farms that have horses or wish to have aesthetically-pleasing yards. It can also be used for other livestock like cattle and sheep, especially in high-traffic areas such as holding corrals or sacrifice corrals. Iron panel fencing comes in panels that need to be stabilized with wooden posts or stand-alone panels that simply require a tractor to put them into place. These, depending on the size, are great for keeping large animals such as deer, cattle (especially bulls), horses (including stallions), bison and even elk.
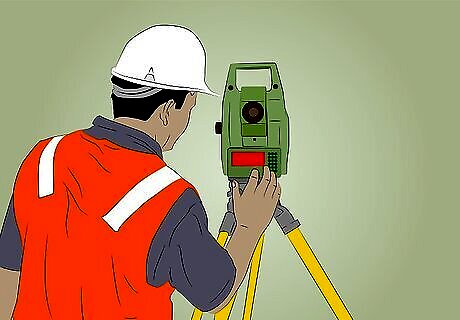
Obtain a survey of your land. A legal land survey may be required to determine the exact perimeter of the land that you own, or where your land ends and your neighbor's begins. You may need to arrange for this first since a wait may be involved. Note this is crucial for determining where your permanent fences are going to go especially if you have land that is not already surrounded by existing boundaries such as a road or a tree line. It is less important if you are building internal fences within the base perimeter fence, because quite often you can survey out where these internal fences will go yourself rather than spend money to hire professional surveyors to do it for you. Surveying out internal pasture and corral fences require quite a bit of measuring and making sure you have corners that are close to 90 degrees, and not at an obtuse or acute angle that your animals will find and get themselves cornered in. Use surveyor stakes (also called "lath", surveyor tape, a 200' tape measure, and chalk or marking paint, with the latter two items ideal for marking out small, "working" corrals and handling facilities. You will need to use these items after you've completed the step after this next one.
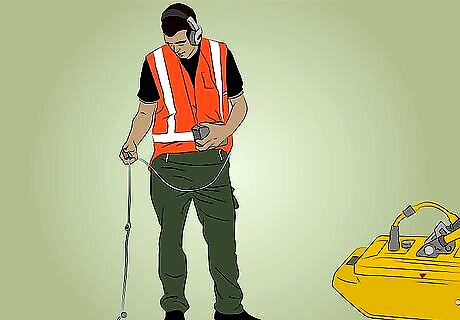
Phone the utility and gas company to mark out any underground utility and pipe lines that may be on your property. They will come out and put up stakes and/or bright spray paint to note where any hidden lines may be that you should be aware of prior to starting any fence building. Be sure you know where utility/gas lines go before you dig or start pounding in fence posts because if you don't, you will either have the costly endeavor of having it fixed, or you could be end up in the ER of the local hospital.
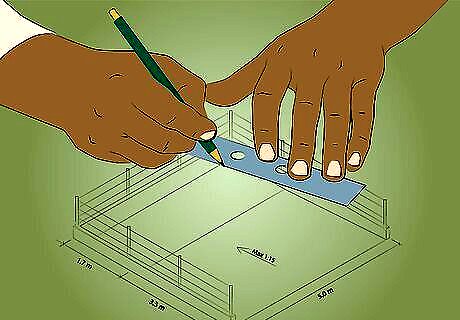
Determine where your fences are going to go on paper. You will need a ruler, a protractor, a pencil, paper, and an eraser to create a drawing to help you figure out an efficient system of movement from pasture to pasture, pasture to corral, corral to pasture, and corral to handling area. Especially for pasture rotations, you must design a system that reduces or eliminates risk of returning to a pasture that has just been grazed and requires rest, and be organized so that you are going to have smooth flow of traffic from one pasture or corral to another. The land survey done will help you out with your planning, especially if you can acquire a copy of a surveyor's map of your land. Finding your land on Google Earth may help as well, especially to give you a better idea of how much land you need to cover and what the estimated measurements of your fence lines will be. You then can sketch out your pasture and corral spaces, noting the following: How many enclosures you want to have. For pastures, this all depends on the grazing system you want to have, and whether you want just a permanent perimeter fence so that you can have movable fencing for a rotational grazing system. Where your gates should be. Remember, you need to have good flow. For most livestock, movement is smoother (and it's easier to herd them) if a gate is put in the corner of a pasture rather than in the middle of the fence line. This is because most animals that can be herded as a group (almost all species of livestock except pigs and chickens) often always go to a corner rather than a fence. Where any "high-traffic" lanes may be (optional). These are good if you need to divert animals away from a farmed field, a residence, or a protected natural area in moving them to another pasture. Lanes may be good if you have water facilities out on pasture as well as several pastures that are rotated throughout the year, and this one water source is sufficient for all moves. Length of each fence-line, noting how much land area you have, and the perimeter of your land base via the surveying results. This will help you calculate out how much wire and how many posts will be needed. Length of gates and how many, for example if you need two 10 foot gates or only one 16 foot gate. Keep in mind space needed for potentially having equipment come into the pasture for various reasons, from reseeding pastures, mowing or haying excess forages, to spreading manure, or even collecting a dead animal (like a cow) for disposal.
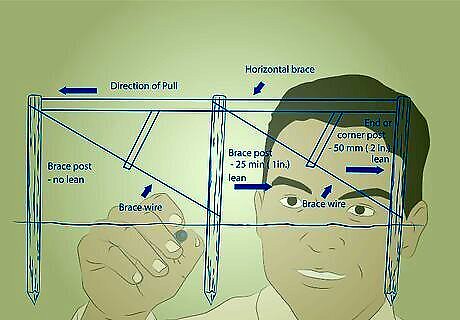
Plan out what kind of corner braces you want or need for your pasture fences. This is your anchor point for your fence that takes the brunt of the force generated by both lines of the fence that the corner brace is connected to, and is the first and most important thing you need to build for a pasture livestock fence. You might want to search around your area for these corner braces when you go driving around. You will find all manner of corners out there for you to observe which have held up over the years to various degrees. Considering the value that a fence has, it makes sense to build your corner assemblies up to the highest standard in your area. Corner braces range from an H brace, N brace or a brace with a wood post at the top and wire stretching from the top of one post down to the bottom of the other. In other words, when two H-braces back to back which are commonly seen on a pasture fence corner, three vertical posts, two horizontal braces, and bracing wire are used to construct such a corner brace. This type of construction is standard and will hold up almost any fence for many years to come.
Mark out all of your fence lines, corners, lanes, and gates. Using surveyor tape, lath, a long tape measure, chalk or bright paint, measure out where your fence-lines will go, where your corner braces will be, any lanes you will have, and where your gates will go. Mark out where you will need to sink posts in to first start forming corner braces. The chalk and paint are ideal for smaller areas (like laying out a handling facility), and pointing where corner posts will need to go. Lath with surveyor tape tied work the best as reference points to where corners will be, and where corner posts will need to be pounded in to. Use all as best as possible so that when you come back with your supplies, you won't be confused as to where to begin or where your fence-line should actually be. Note what color of surveyor tape or painted lath the gas company and/or surveyors used to mark out the buried utility lines, and avoid using that color to avoid confusion and a potential mishap.
Purchase your fencing supplies. You will need quite a number of items: Fence posts (treated wood, metal, or metal T-posts), both with the tapered ends and some that have no tapered ends for use as top bracing posts on corner braces; Barbed, smooth or paige wire or, boards or rails depending on what kind of fence you have settled on; For wire fences especially, all wire comes in rolls so you will need to build a contraption that allows the spool of wire to freely spin when you pull it along and unroll a strand of wire along the fence line, all without you having to hold the very heavy new spool (most new spools of barbed wire weigh around 70 pounds (31.8 kg) to 90 pounds (40.8 kg), which is not easy to carry for most people who have a lot of fence to build) and walk along to unroll it. Start with a metal or iron rod or pole that easily fits in the center of the spool, then go from there with any spare wood or metal parts you find that you can hammer or weld together. Note, though, that iron or metal parts tend to be more durable than wood, even when a wooden spool holder is held together by screws. There are all sorts of inventions many producers have created that has worked for them, from truck-mounted holders to tractor-loader holders, all with the same purpose: Allow the spool to spin freely on its center axis so that it can be more easily unrolled. Simply type in "barb wire spool holder" to your favorite search engine and be prepared to be inspired by the search results. A ratcheting come-along wire stretcher (hand-held or operated from a vehicle, the latter ideal for wire fences longer than 20 feet (6.1 m) or 30 feet (9.1 m) long); Fencing pliers; A hammer (if you don't already have a good heavy-duty one); Nails (6 to 8 inches (15.2 to 20.3 cm) spiral or ringed nails for putting up board or rails and corner posts) or fencing staples (come various sizes depending on the size of wire you are putting up. Most common small sizes are usually 1.25 inches (3.2 cm), and the common large sizes are 2.5 inches (6.4 cm)); A heavy mallet (optional, though useful for putting in corner braces, and maybe pounding in some fence posts); A post-pounder (rented from your local farm supply store); and A chainsaw or hand-saw (if you don't already have either) for sawing the tops of bracing posts and pounded posts used for forming the stabilizing corners of your fences.
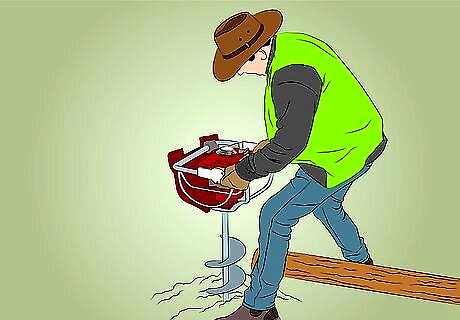
Dig holes. An auger or post hole digger is used to dig any holes that are required, especially for the start of constructing corner braces. The posts are buried in a hole that is as deep as is necessary in your area, depending on the type of soil you have. Corner brace posts need to be dug so that the base is sunk in at least 30 inches (76.2 cm) to 2 feet (0.6 m) deep.
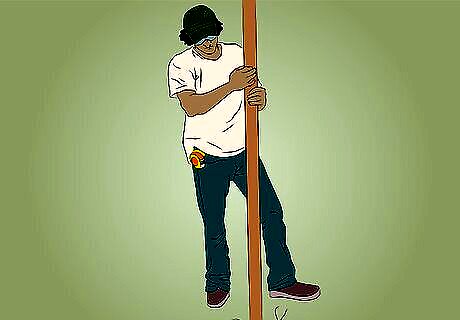
Install corner posts. Corner posts are usually larger in diameter and even longer than line posts. Some people choose to set them in concrete, however others argue that setting them in concrete will make them more prone to rot than if they were set in gravel, sand or the soil they are to be set in. Make sure they are straight and level (it is never good to have crooked corner posts!), before installing the top post connecting all three sunken posts. Fill in the space around the three posts with the soil that was dug out, gravel, sand, or concrete if you so choose. You should have a an approximate right 90-degree angle formed between the post that is standing at the very center point of the corner of your fence and the other two on either side. Connect the bracing, horizontal posts with the three posts. Use a tape measure, a pencil, and a chainsaw to mark and cut out the points where the posts are to meet and be very snug with each other. You may need to use a mallet to fully connect the top post with the sunken-in posts. For constructing H-corners with a bracing wire: Place the blunt-end post on top of the two standing posts, and mark the top portion that needs to be removed on the standing posts, and mark the portion at either end of the brace (along the curved side, not the flat side) that will also need to be removed. Allow for 6 inches (15.2 cm) to be cut down into the post before removing the length marked out at a 90-degree angle. You should end up with a right-angle cut into the standing posts and the same at either end of the bracing post; the cuts facing each other directly on the standing posts, and one the same side of the bracing post. Do not remove more than what is marked, rather right on the mark or slightly less to allow for a more snug fit of the bracing post. Place the bracing post over the cuts and hammer in the ends, trying to do both at the same time, or rather not first working on getting one end all the way in before trying the other. As mentioned, use a mallet if the braces are too tight to use with a hammer. Hammer in a couple nails into the end of the bracing post to keep it in place. Install the brace wire. The brace wire crosses from the top of one post down to the other, and tightening that wire with a stick by winding the wire up as tight as possible without breaking it further enhances the strength of the cross brace. Direction of where the brace wire is located is really important. The wire should be looped around the top of the very middle corner brace, and sloped down to the post on the outside of the corner. Smooth galvanized wire is highly recommended, with four to five loops between each posts, then twisted. Direction of twist is up to you. Hammer in two or three staples over the wire on each of the standing posts to secure it. Repeat with the other side of the corner. And, repeat this step with all other corners. Note that with board or rail fences, installing corner braces is not required. Even hot-wire temporary fences do not require permanent corner braces. EXPERT TIP Liz Riffle Liz Riffle Regenerative Farming & Agriculture Specialist Liz Riffle is a Regenerative Farming & Agriculture Specialist and the Owner of Riffle Farm in West Virginia. With over six years of experience, Liz specializes in holistic bison farming and employing humane agricultural practices in her business. Riffle Farm is the first commercial bison operation in the state of West Virginia and is part of the movement to facilitate the large-scale regeneration of the world’s grasslands. Liz is a Savory Accredited Professional and teaches Holistic Management across the country. She received her Masters in Nursing Education from Excelsior University and was part of the US Navy Nurse Corps Commission at Northwestern University. Liz Riffle Liz Riffle Regenerative Farming & Agriculture Specialist Installing reinforced fence posts accommodates livestock terrain. Building livestock fences in hilly or rocky areas takes extra planning. Strong corner fence posts are a must. The spacing between posts may need adjustment on uneven ground. For bison, which are large and push hard, install posts every 20 feet. Add supports between posts to make the fence more stable. This tailored approach keeps animals safely contained while working with the natural landscape.
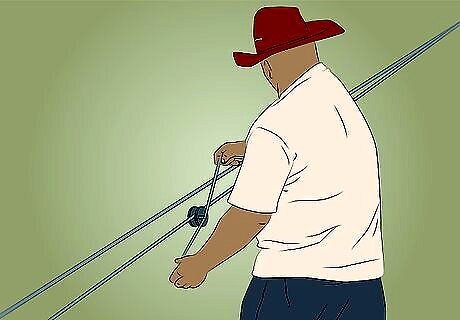
Put up the first line of fencing wire. This is to act as a guide to where to sink the line posts in with the post-pounder. The first wire should be around 8 to 10 inches (20.3 to 25.4 cm) off the ground. This step is usually not necessary for board or rail fences, nor temporary electric fences.
Put up line posts. Line posts (or "fence posts" mentioned above) must be set at regular intervals. This distance varies widely from fence to fence, and can range from as close as 6 feet (1.8 m) apart and as far as 50 feet (15.2 m) apart. Closer is better if finances allow, and is a necessity if you are building holding or working corrals that will take a lot of abuse from the animals herded in them. All of the line posts you use that are would should be treated posts--no exceptions should be made, because untreated wood posts have a much shorter life-span than those that have been chemically pressure-treated. These same posts should taper at the end which makes it easier for the post-pounder to drive them into the ground. Ideally line posts should be sunk in 14 to 18 inches (35.6 to 45.7 cm) deep regardless of terrain. More posts will be needed for more uneven terrain such as the edge of a hill or into a valley.
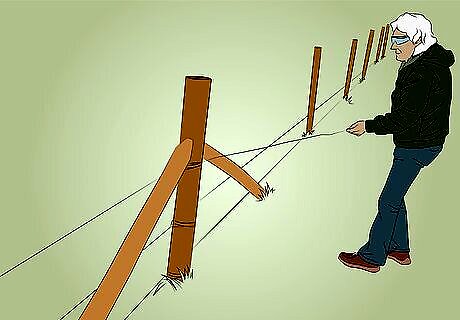
Put up the rest of the wires. You will need to judge how many strands you want especially for wire fences. The standard is four wires per fence-line (especially for barbed-wire fencing), but some producers prefer to install five or six-wire fences especially along roads. Make sure each wire is evenly spaced with the other. This is also part of what makes a fence strong and sturdy. If the wires are not evenly spaced it makes it easy for an animal to put its head through the fence or even be able to go right through or under the fence without any problems. You must make it difficult for this to happen. For board to rail fences, the standard is three board or rails, one on top of the other and evenly spaced per fence line.
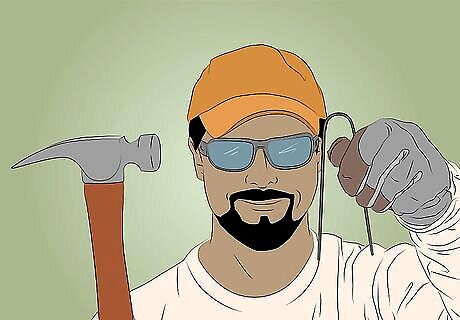
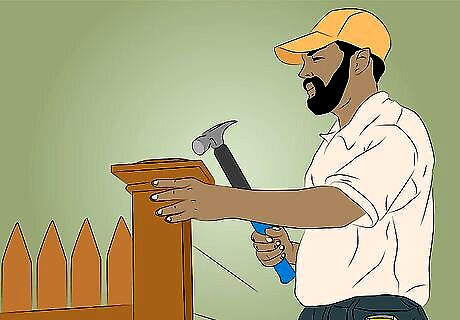
Hammer in the staples. Each line post will need to be connected to the wires strung up by staples. This is important because livestock will find a hole in the fence, and a hole can be a wire that is not connected to a post with a fence staple, or a wire that has been broken from too much pressure exerted on it. The staple should be hammered in at an angle to the wire (never perfectly perpendicular), and the loop slightly pointing up. It takes a lot of practice to get good at hammering staples in so they look nice and neat. They are not like hammering nails, because the two pointed ends allow for a lot more give than a single-spiked nail. Each blow to the staple must be right on (ideally, blows happening so that the angle of the hammer head is next to perfectly perpendicular to the angle of the post)so that it won't angle up too much into the wood, or bend so much that the staple gets so flat it needs to be replaced. Also, when first attempting to hammer you may miss it so that the staple goes flying off somewhere in the grass and gets lost forever! Check the perimeter of the fence-line to see if you missed any staples or anything else that may be amiss.
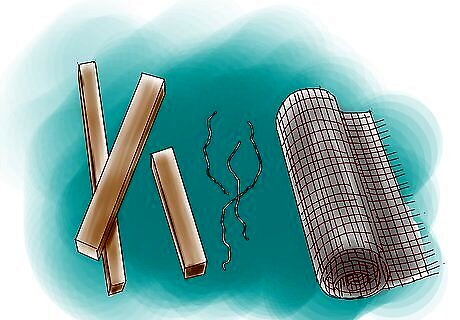
Repeat the steps above for the rest of the fences you need to build.
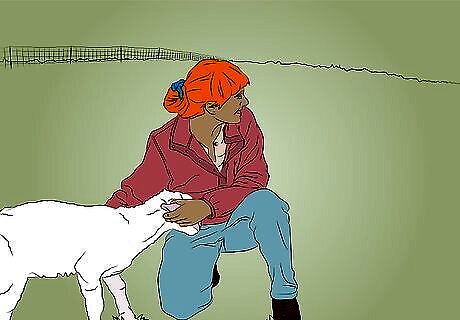
Let the animals out to the pasture. Once you are done building the fences, you can finally let your animals out to pasture. Keep an eye on them for an hour or so as they wander the perimeter of their new pasture to see if they find a hole to go through. If there's no problems, then you're good to go!







Comments
0 comment