
Basic Three-Stitch Bobble
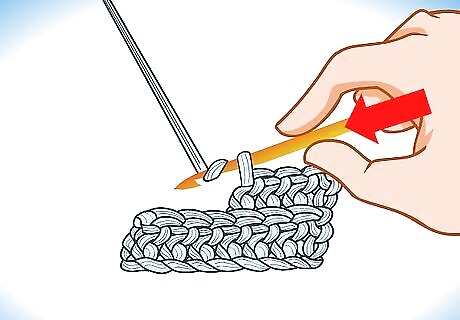
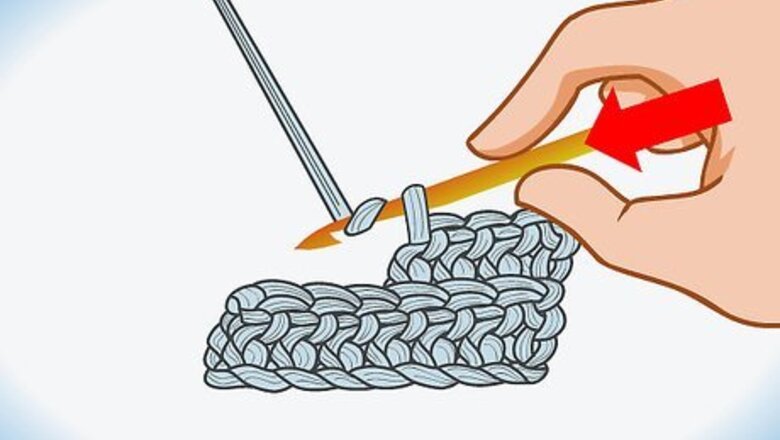
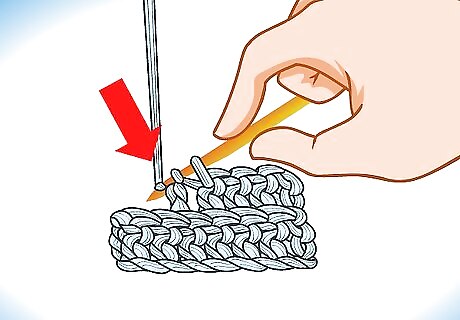
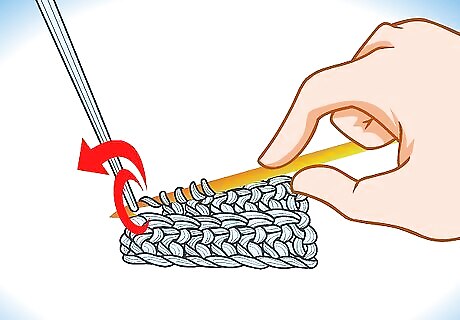
Yarn over and insert the hook. Wrap the yarn over the tip of the hook from back to front, then insert the hook into the next designated stitch or space in your work. The appropriate stitch will vary depending on the project pattern you're working with.
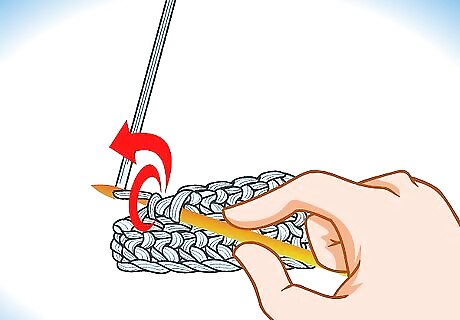
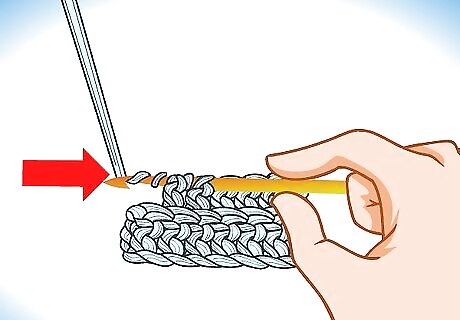
Pull up a loop. Wrap the yarn over the tip of the hook again, then pull the hook and yarn back through to the front of the work. After completing this step, there should be three secure loops on your hook.
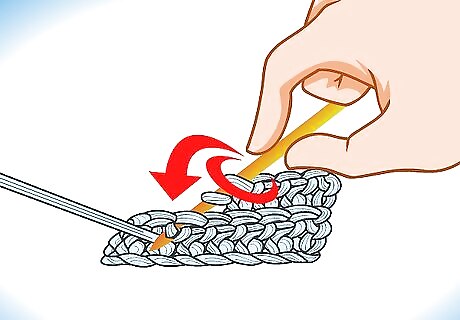
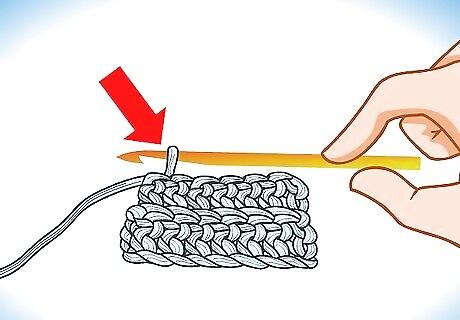
Yarn over and draw through twice. Wrap the yarn over the hook again. Catch this yarn-over inside the tip of the hook, then pull it through the top two secure loops on the hook. There should be two loops left on your hook after this. Note that you have also created one half-finished double crochet.
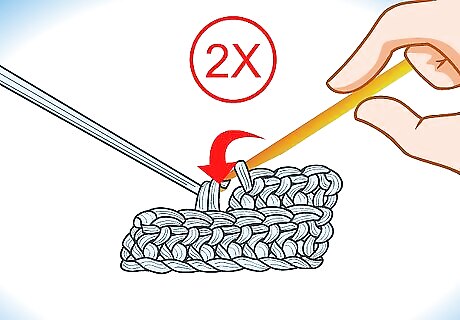
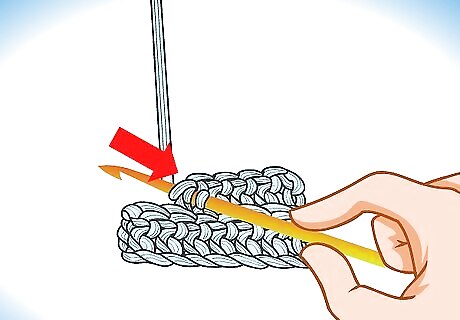
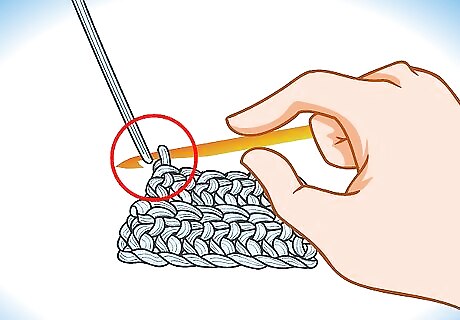
Yarn over and work into the same stitch. Wrap the yarn over the hook from back to front again, then insert the tip of the hook into the same stitch or space. It is absolutely essential that you work each portion of the bobble stitch into the same stitch or space. No part of an individual bobble should be worked into a separate stitch or space.
Pull up another loop. Wrap the yarn over the tip of the hook, then use the hook to pull that yarn-over back to the front of the work. There should be four secure loops on your hook at this point.
Draw through two loops. Yarn over the hook again and pull that yarn-over through the first two secure loops on your hook. This should leave you with three loops on your hook. You have also created a total of two half-finished double crochets.
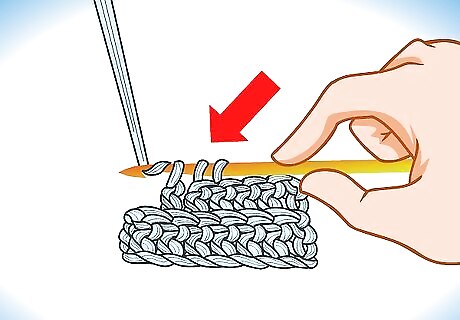
Work into the same stitch once more. Wrap the yarn over the tip of the hook and insert it into the same stitch or space one more time.
Pull up one final loop. Yarn over the hook. Catch the yarn-over in the hooked tip and pull both the hook and yarn back through to the front of the work. There must be five secure loops on your hook at this point.
Draw through twice. Yarn over the hook and pull that yarn-over through the top two loops on the hook. At this point, you should have four loops on your hook and three half-finished double crochets. These half-finished double crochets are the three stitches of your “three-stitch” bobble.
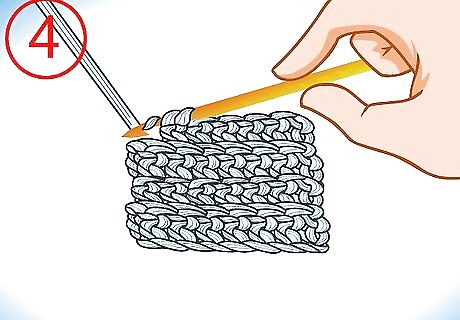
Close the the remaining loops. Yarn over the hook one final time. Pull this yarn over through all four loops currently on your hook. This step finishes the actual bobble stitch itself. You should be left with one loop on your hook. This loop will be used to continue your work but is not included in the stitches of your bobble.
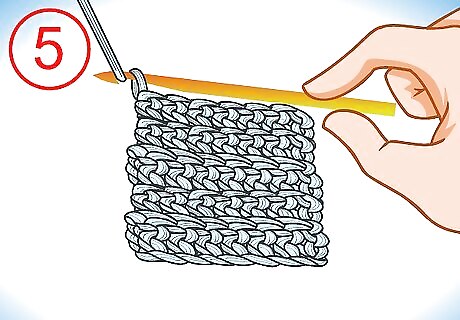
Seal the bobble. Work one chain stitch from the loop on your hook. Doing so seals the bobble and prepares your yarn for the next stitch in your pattern. To make a chain stitch, simple yarn over the hook once and pull the yarn-over through the loop previously on your hook. That completes one chain.
Expanding the Bobble
Create a four-stitch bobble. A four-stitch bobble is created in the exact same way as a three-stitch bobble, except for the fact that one additional half-finished double crochet is created before the bobble is sealed. Work the basic three-stitch bobble through the point where you have three half-finished double crochets and four loops on your hook. Instead of closing the remaining loops, work one more half-finished double crochet. Yarn over the hook. Insert the hook into the same stitch or space. Yarn over the hook again, then pull it back through to the front of the work, giving you a total of six loops. Yarn over and pull it through the first two loops. You should have five loops on your hook and four half-finished double crochet. After creating the fourth stitch, yarn over and pull the yarn through the remaining loops on your hook, closing off the bobble. Seal the bobble with a chain stitch to secure it. Note that the resulting bobble will be bulkier than a three-stitch bobble.
Make a five-stitch bobble. A five-stitch bobble is made in the same manner as the four-stitch bobble, but instead of finishing off the bobble after four half-finished double crochets, you need to create a fifth half-finished double crochet. Work the four-stitch bobble through the point where you have four half-finished double crochets and five secure loops on your hook. Do not close off the remaining loops yet. Instead, create one more half-finished double crochet. Yarn over the hook and insert it into the same space or stitch. Yarn over the hook again, then draw up a loop by pulling the yarn back to the front side of the work. You should have seven loops on your hook at this point. Yarn over the hook and pull it through the first two loops. This creates a fifth half-finished double crochet. Note that there should be six loops on your hook. After creating the fifth stitch, yarn over the hook again. Pull that yarn-over through all six loops on your hook to complete the bobble. Secure the bobble by working a chain stitch immediately after it. This bobble will be even bulkier than the four-stitch version. Theoretically, you could create an even thicker bobble by continuing to work half-finished double crochets into the same space, but the five-stitch bobble is usually the largest you would want to use.
Bobble Rows
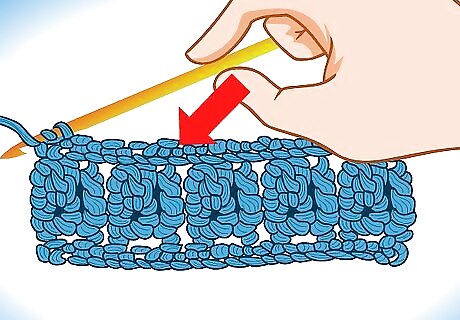
Work the bobbles into an established piece. Unless otherwise instructed, you'll usually need to work bobbles into a previously created row of single crochet (or a row made with a similarly simple crochet stitch). Attach the yarn to your hook using a slip knot, then work a foundation chain with an even number of chain stitches. Single crochet into the first loop from the hook, then continue to single crochet down the length of the chain. You should end up creating an odd number of single crochets.
Chain three and work the first bobble. Create three chain stitches at the start of your bobble row, then work the bobble into the first stitch. Note that the chain-three you create counts as your first half-finished double crochet, so you will need to reduce the final number of stitches you actually work for the bobble by one for this first stitch. In other words, work two half-finished double crochet if the rest of your bobbles will be three-stitch bobbles. Work three half-finished double crochet when using four-stitch bobbles. Work four half-finished double crochet when using five-stitch bobbles across the row. Only this first bobble will be different. The remaining bobbles will have the standard number of half-finished double crochet in them.
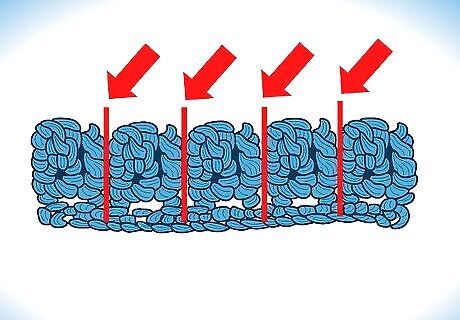
Leave a little space in between separate bobbles. To prevent the bobbles from running together, you will usually need to work one single crochet into the stitch or space immediately following each individual bobble. This step can vary depending on the project pattern you use, however, so it is best to check the instructions (when applicable). Continue alternating bobbles and single crochets down the row until you reach the end. The final stitch of your row should be a bobble stitch.
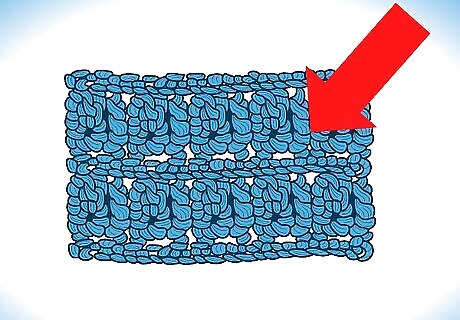
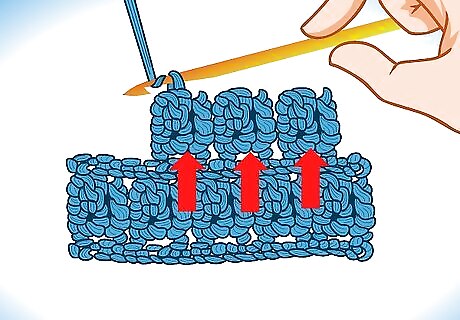
Single crochet in between separate rows. The row immediately after a bobble row should be a row of single crochet (or another similarly simple stitch). Make sure that you single crochet once into each bobble and single crochet of your previous row. If you were to create a row of bobbles directly on top of the first, the bobbles of both rows would be facing opposite sides of the work. In other words, one would face the "right side" and the other would be hidden on the "wrong side." Creating a row of single crochet in between bobble rows will prevent this from happening.
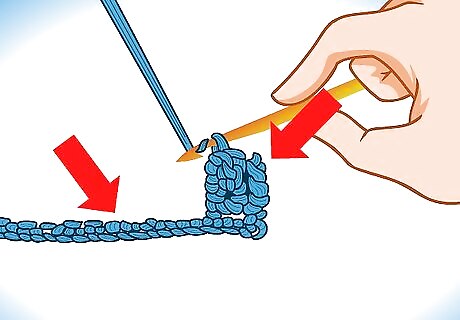
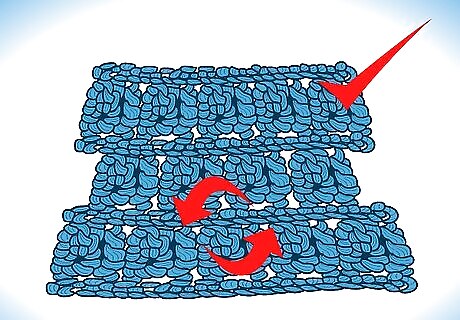
Work your next row of bobbles into the gaps. The bobbles of your second bobble row should fall out in the spaces between the bobbles of your first. At the start of your second bobble row, chain one, turn, and single crochet into the first stitch. Work a standard bobble crochet into the next stitch. This should cause the bobble to land in between two bobbles from your previous row. Continue this pattern down the length of the row.

Repeat as needed. You should be able to create as many rows of bobbles as desired by following this pattern. Simply remember that: Individual bobbles should be separated by one single crochet. Bobble rows should be separated by a row of single crochet. The bobbles of each row should fall in between the bobbles of the previous row.
Flip the work over when finished. The bobbles will actually appear on the back side of your work, so you will need to flip the work over after you've finished creating them. After finishing your bobble rows, you can tie off the work or continue on with other stitches called for in your project pattern.


Comments
0 comment