
Diagnosing a Non-Working Drive on Windows
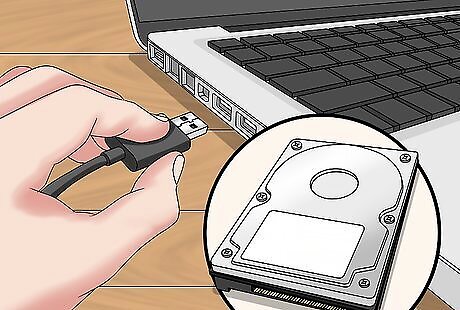
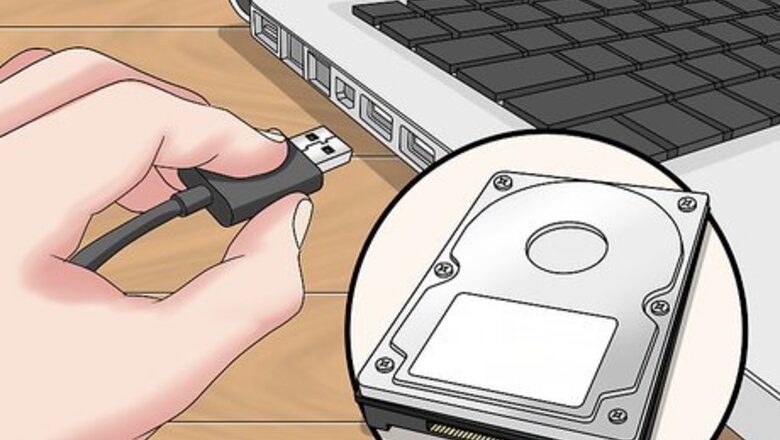
Attach the non-working hard drive to a working computer. To do this, you'll need to remove the non-working hard drive from its computer, plug it into a USB adapter, and then plug the adapter into a working Windows computer. Depending on the hard drive, you'll either need a SATA to USB adapter or an IDE to USB adapter. An IDE drive has a several-inch-wide connector at the end of its connection ribbon, while a SATA drive has a more narrow ribbon and connector. Modern hard drives use SATA connections.
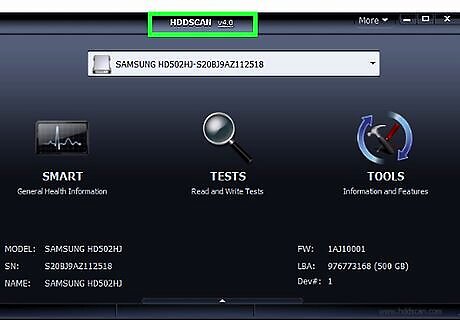
Download and install HDDScan on the working computer. HDDScan is a free, low-impact program that allows you to scan and diagnose drives that are attached to the computer. To install it: Go to http://hddscan.com/ Click the red DOWNLOAD Open the downloaded ZIP folder. Extract the file by clicking the Extract tab, clicking Extract all, and then clicking Extract Double-click the "HDDScan" setup file. Click Yes when prompted. Click Agree Wait for HDD Scan to open.

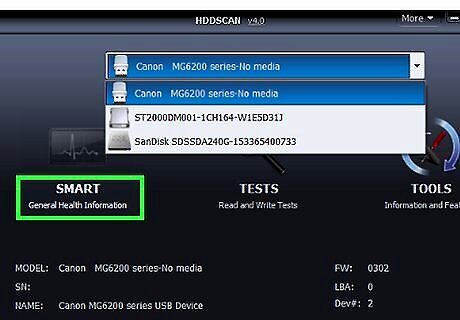
Select your attached hard drive. Click the white drop-down box at the top of the HDDScan window, then click a hard drive name in the resulting drop-down menu. HDDScan will default to your computer's internal hard drive, so click the hard drive name that wasn't originally in the drop-down box. If the hard drive doesn't appear here, it may be too damaged to read at all. You should take it into a repair service to have it checked for recovery options.
Click SMART. It's on the left side of the window.
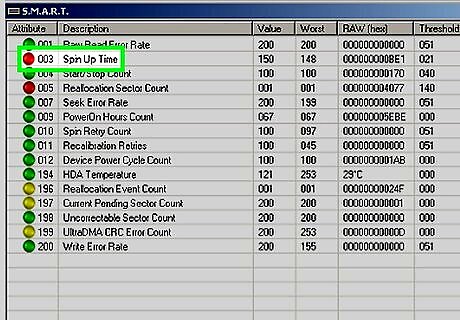
Review your hard drive's information. You'll see a long list of hard drive aspects, each of which will have a colored circle to the left of it and data related to the aspects to the right. If your hard drive is completely inoperable and you have to take it into a repair service, you'll want to print this page by clicking Print at the top of the window. Any item with a red circle to the left of it is in poor condition. For example, if you see a red circle to the left of the "Spin Up Time" heading, your hard drive is taking too long to start up which is most likely causing problems.
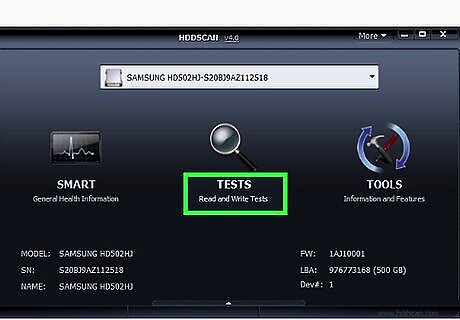
Click TESTS. It's a magnifying glass-shaped icon in the middle of the window.
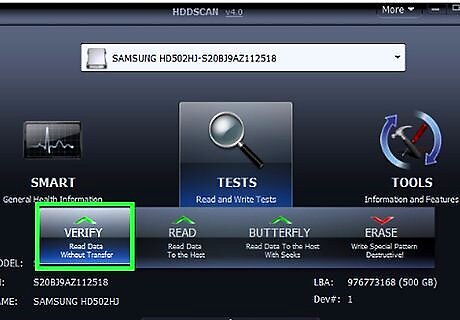
Click VERIFY. This option is in the left-hand side of the drop-down menu. A drop-down window will appear.

Click the right-facing arrow. It's on the far-right side of the drop-down window. Doing so will prompt HDDScan to begin scanning your selected drive for errors.
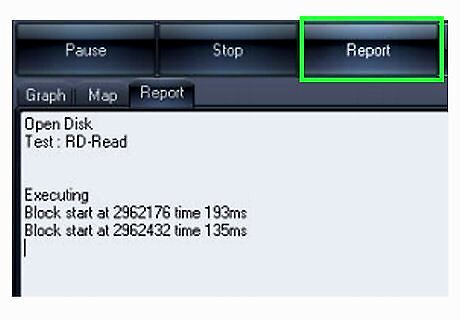
Review the test's result. Once the test is done, you can select it in the bottom section of the window and then click Report to see the number of dips in performance. The more dips you see, the more corrupted your hard drive is. The READ test attempts to read data off of your hard drive, which helps indicate which sectors of your hard drive are corrupted or unresponsive.
Take your hard drive into a professional repair service. If your hard drive shows more than a couple of significant dips in performance, chances are that it needs to be repaired physically. You'll need a tech professional to repair your hard drive for you. In most cases, the repair service will only be able to recover data off of the hard drive; you most likely won't be able to use the hard drive again.
Diagnosing a Non-Working Drive on Mac
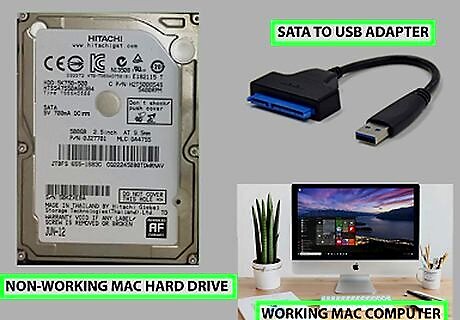
Attach the non-working hard drive to a working Mac computer. In order to figure out the problem with a non-working Mac hard drive, you'll have to remove the drive from your Mac, plug it into a USB adapter, and plug the adapter into a working Mac computer. Most Mac hard drives will use SATA connections, so you'll need a SATA to USB or USB-C adapter.
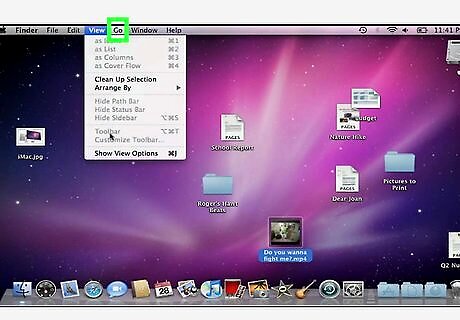
Click Go. It's a menu item at the top of the screen. A drop-down menu will appear. If you don't see this menu item, first click the desktop or open Finder.
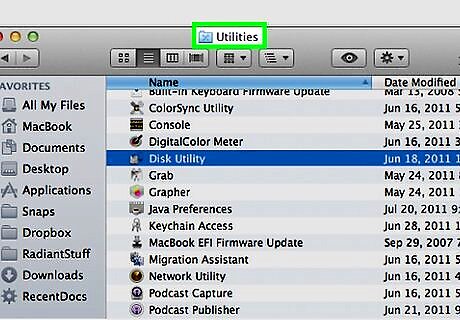
Click Utilities. You'll find this in the Go drop-down menu. The Utilities folder will open.
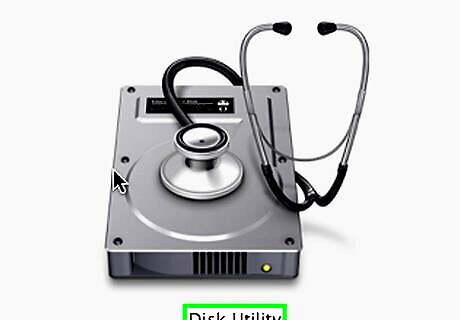
Open Disk Utility. Double-click the Disk Utility app, which resembles a grey hard drive with a stethoscope on it.
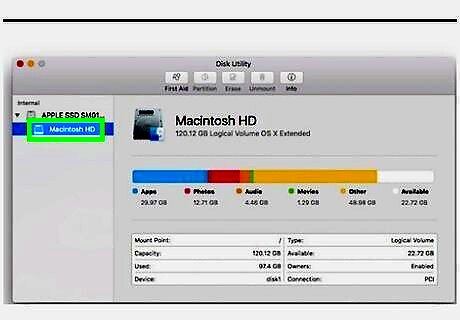
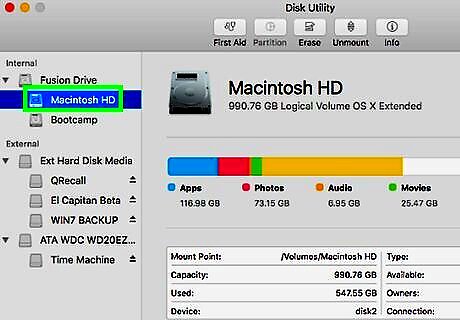
Select the attached hard drive. Click the name of the attached hard drive in the left-hand sidebar to do so. If the hard drive doesn't appear here, it may be too damaged to read at all. You should take it into a repair service to have it checked for recovery options.
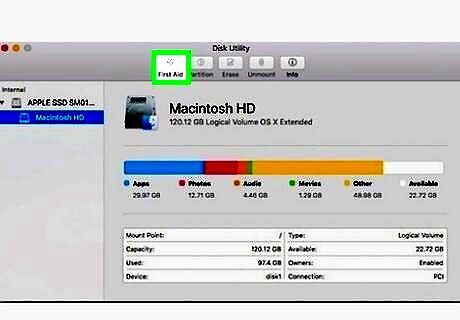
Click First Aid. It's a tab near the top of the window.
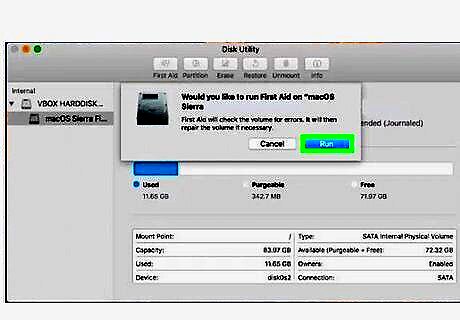
Click Run when prompted. You'll see this prompt appear at the top of the window.

Click Continue when prompted. Doing so will cause Disk Utility to begin scanning for and repairing any minor problems with your Mac's hard drive, as well as searching for larger problems.
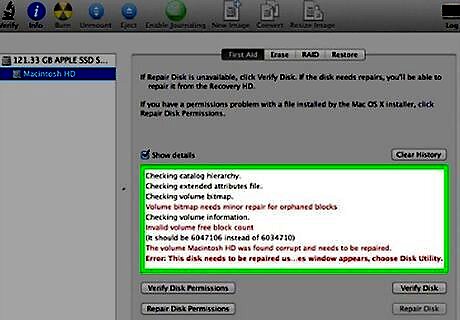
Review the results. Once Disk Utility finishes scanning the drive, it will provide you with a list of drive issues, at least one of which may be responsible for the drive's failure. You will most likely receive a message saying that the hard drive is about to fail. If possible, back up the hard drive—you cannot repair it from this point.
Take your hard drive into a professional repair service. If your hard drive shows more than a couple of significant errors, chances are that it needs to be repaired physically. You'll need a tech professional to repair your hard drive for you. In most cases, the repair service will only be able to recover data off of the hard drive; you most likely won't be able to use the hard drive again.
Diagnosing a Working Drive on Windows
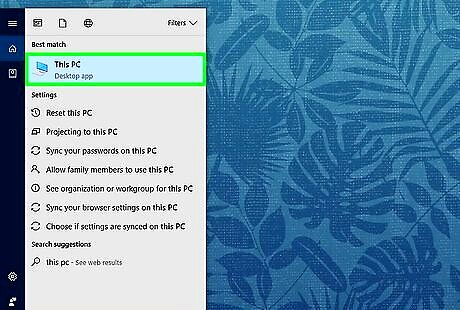
Open Start Windows Start. Click the Windows logo in the bottom-left corner of the screen. The Start menu will pop up.
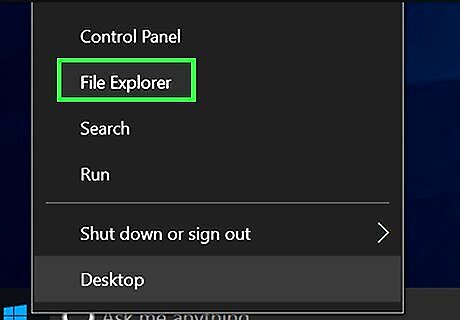
Open File Explorer Windows Start Explorer. Click the folder-shaped icon in the lower-left side of the Start menu to do so.
Click This PC. It's a computer-shaped icon on the left side of the window, though you may have to scroll down through the left-hand sidebar to find it.
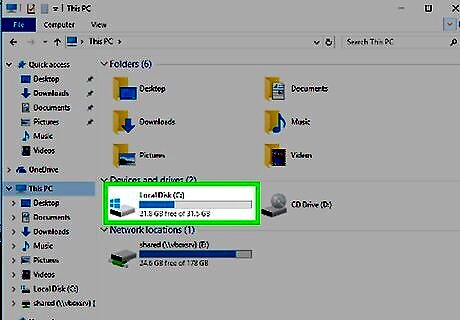
Select your hard drive. Below the "Devices and drives" heading in the middle of the window, click the hard drive that you want to diagnose. Typically, your computer's built-in hard drive is called OS (C:). If you don't see any drives here, click the "Devices and drives" heading to prompt them to appear.
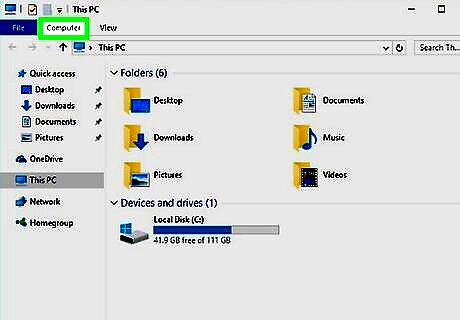
Click Computer. It's a tab in the upper-left corner of the window. A toolbar will appear.
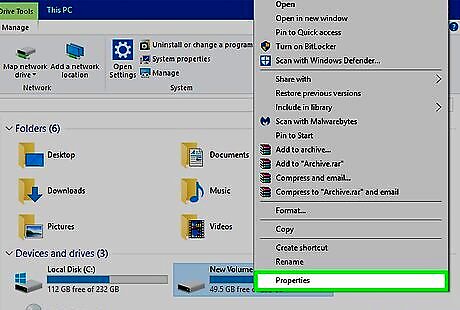
Click Properties. You'll find this white box with a red checkmark in it in the far-left side of the Computer toolbar. Doing so opens your selected hard drive's Properties window.
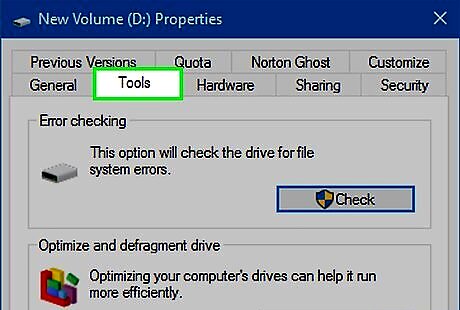
Click the Tools tab. It's at the top of the Properties window.
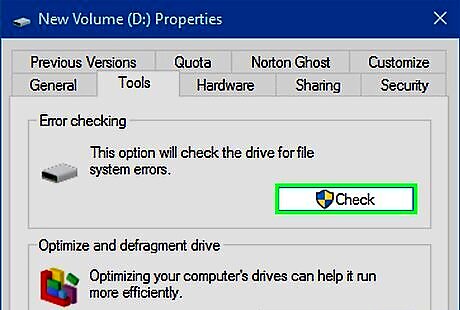
Click Check. You'll find this button in the upper-right side of the Tools tab.
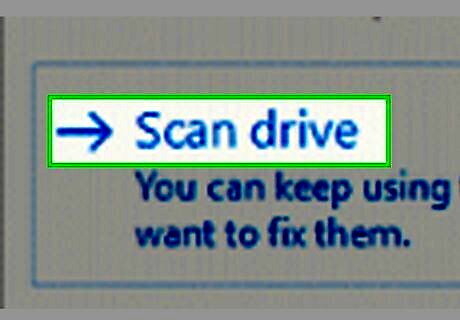
Click Scan drive if prompted. Doing so will prompt the Check Disk tool to begin scanning your computer's hard drive for errors. If you encounter an error that says "Windows can't check the disk while it's in use", click Schedule disk check instead, then close any open windows and restart your computer. Windows will check the hard drive before your computer finishes restarting.
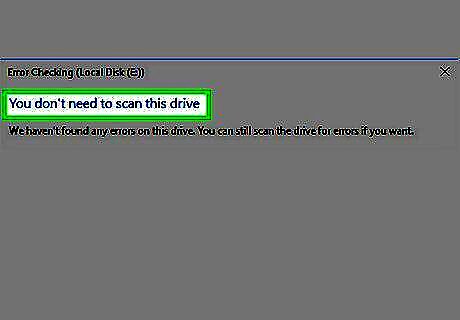
Follow any on-screen instructions if errors are found. If any minor problems are found on your hard drive, you'll be asked for permission to fix them. Windows will also fix most minor issues without asking.
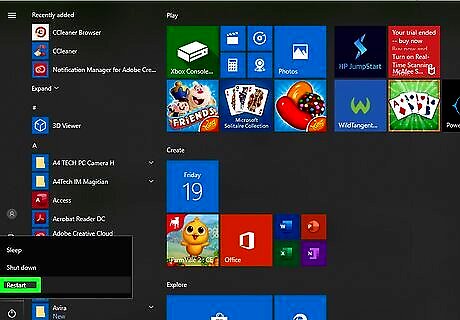
Restart your computer. Click Start Windows Start, click Power Windows Power, and click Restart to do so.
Diagnosing a Working Drive on Mac
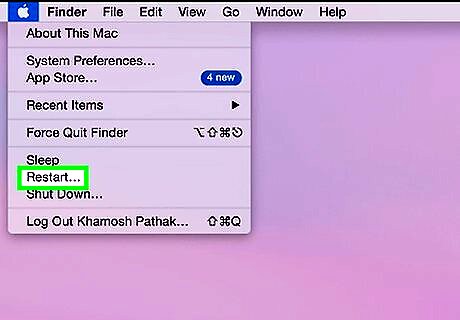
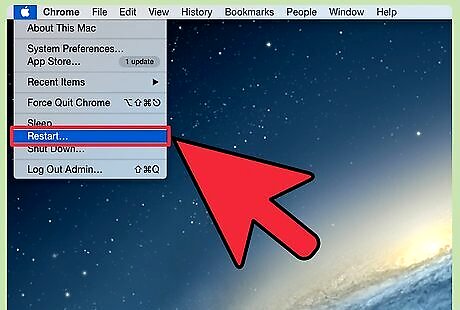
Begin to restart your computer. Open the Apple menu Mac Apple in the top-left corner of the screen, click Restart... in the resulting drop-down menu, and click Restart Now when prompted.
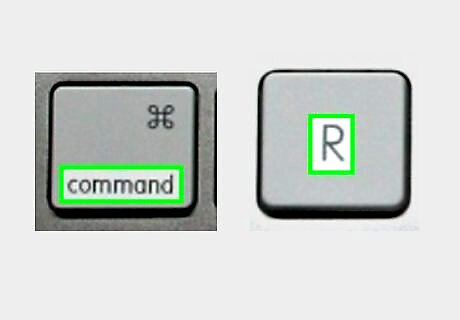
Hold down ⌘ Command and R. You'll need to do this immediately after your Mac's screen turns off and continue holding them down until you see the Apple Logo appear.
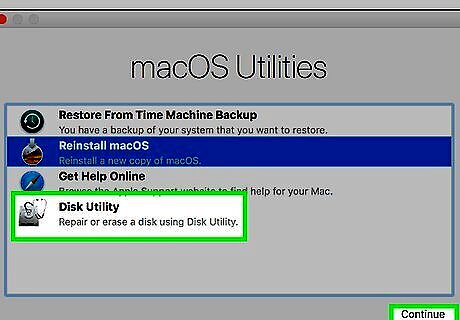
Open Disk Utility. Click Disk Utility in the Recovery window, then click Continue in the bottom-right corner of the window.
Select your Mac's hard drive. Click the name of your Mac's hard drive (e.g., Macintosh HD) in the left-hand sidebar to do so.
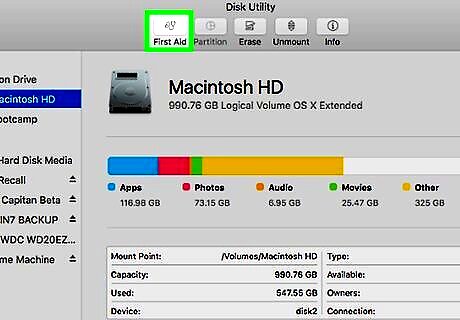
Click First Aid. It's a tab near the top of the window.
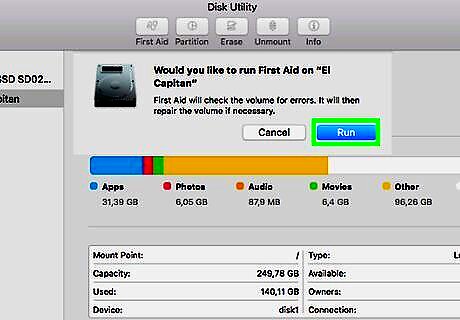
Click Run when prompted. You'll see this prompt appear at the top of the window.
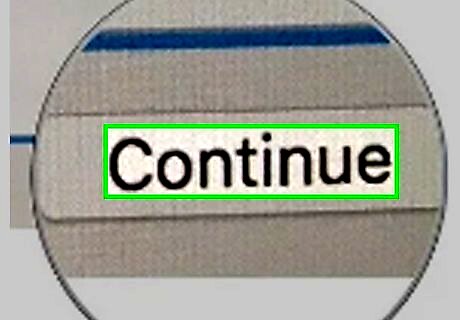
Click Continue when prompted. Doing so will cause Disk Utility to begin scanning for and repairing any minor problems with your Mac's hard drive.
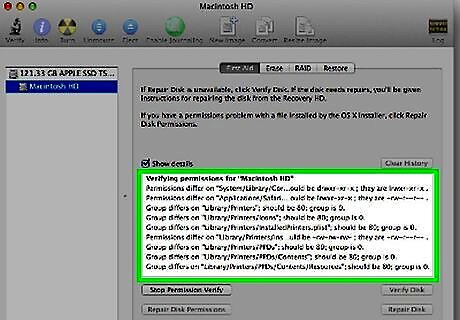
Follow any on-screen directions. While Disk Utility will fix most common errors on its own, it will also alert you if it finds any hard drive errors which it cannot fix. In many cases, hard drive issues are due to overlapping files, one of which may be corrupted. If Disk Utility finds such an instance, it will provide a list of the files involved, after which point you can delete or rename one or more of the files. If you receive a message saying that the hard drive is about to fail, back up the hard drive. You cannot repair it from this point.
Restart your Mac. Click the Apple menu Mac Apple and click Restart... in the drop-down menu, then click Restart Now if prompted. Your Mac should restart into its normal mode. If Disk Utility cleaned up your hard drive for you, your Mac should be back to normal. If Disk Utility provided you with a list of corrupted files, you may need to delete the files in question before your hard drive will be back to normal.


Comments
0 comment