
Transplanting Daylilies
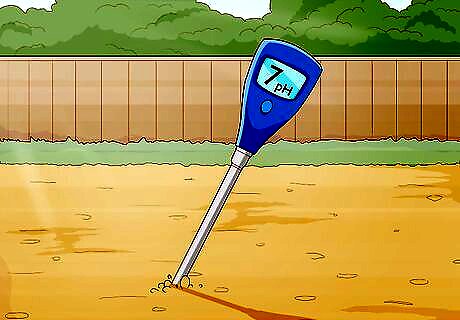
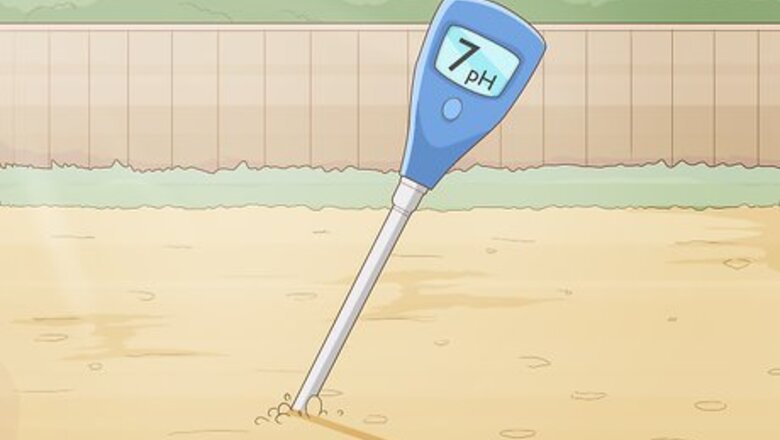
Choose a sunny location with well-draining soil for transplanting. Daylilies aren’t picky about their soil, but they do prefer friable soil (it can be easily crumbled in your fingers) with some rich compost and a balanced pH. If you’re concerned about overly acidic or alkaline soil, buy a pH tester from any gardening store to check your soil. A pH level of 7 is ideal. Daylilies thrive in rich, moist soil, so feel free to add some compost if you have some.

Dig a hole in the soil about 4 inches (10 cm) deeper and wider than the roots. Use a shovel to dig a hole deeper and wider than the roots of the transplant you’re replanting. If you want a fuller appearance, you can plant multiple transplants in the same hole about 7 inches (18 cm) to 9 inches (23 cm) apart. To plant each chunk separately, dig as many holes as you need to, leaving about 15 inches (38 cm) to 18 inches (46 cm) between each hole.
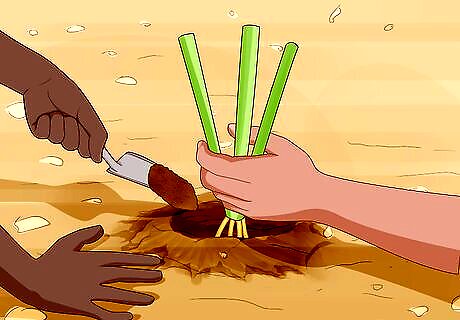
Hold the transplant upright in the hole while you refill the area around it with dirt. Use one hand to hold the transplant upright and your other hand to shovel dirt back into the hole around the roots and crown of the daylily. Lightly press the soil down to steady the plant before you let go. The dirt should come up to the base of the leaves, just covering the top of the crown. Repeat this process for each transplant.
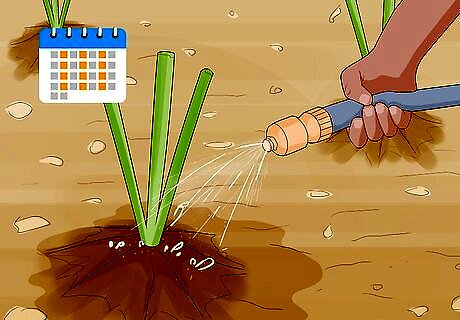
Water the new plants once every 2 or 3 days for the first 3 to 4 weeks. Keep the area well-watered until they become established, which should take a few weeks. If you notice dry patches of soil, that means it’s time for a watering! Avoid watering the surface of the daylilies during the hottest part of the day because doing so could cause open blooms to spot or wilt.
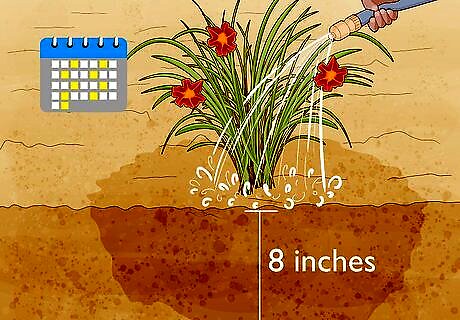
Water the established daylilies once or twice a week. After the daylilies are settled into their new soil-home, water them once or twice a week at the roots until the water reaches about 8 inches (20 cm) down into the soil. To test the soil for moisture, use a trowel to dig a small hole in an inconspicuous place near the daylilies. Feel the soil with your hands to check for moisture. Avoid digging a soil-test hole within 18 inches (46 cm) of your plants! Daylilies can handle some droughts because their plump roots can store extra water, so don’t worry if you miss a weekly watering now and then.
Dividing Daylilies

Choose early spring or late summer to divide your daylilies. It is best to divide them in early spring before they begin their yearly growth, or wait until late summer to early fall when they’re done flowering. Whenever you choose to divide the plants, they may not produce flowers the first summer, or may produce fewer flowers than normal. If you live in an area where it snows in the late fall or early winter months, plan to divide them in the late summer because the daylilies will need 6 to 8 weeks to settle before the first freeze.
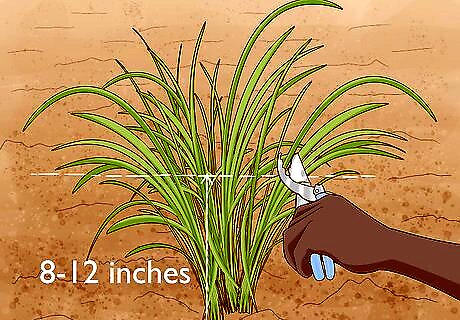
Trim the leaves down to 8 inches (20 cm) to 12 inches (30 cm) tall. Use sharp scissors to trim down the leaves anywhere between 8 inches (20 cm) to 12 inches (30 cm) from the top of the soil. Trimming will make it easier for you to see the individual fans and cut down on the amount of materials you’ll be working with. If you’re dividing them in the early spring, you may not need to trim them as they’ll typically be short already.
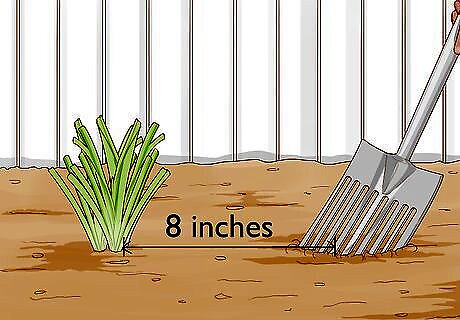
Insert a garden fork into the soil about 8 inches (20 cm) away from the plant. Loosen the soil around the plant by inserting a garden fork into the soil about 8 inches (20 cm) away from where the leaves enter the ground. Wiggle the handle of the fork forward and back to loosen the soil. Repeat this action 4 or 5 times on each side of the plant. Each clump below the plant contains multiple leaves, crowns (where the leaves meet the roots), and roots, so it’s important to insert the fork a little ways away from the actual leaves as not to stab the crown or central root center.
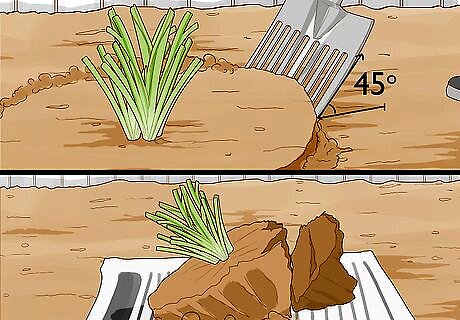
Use a garden fork to dig under the roots and lift up the plant. After the soil has loosened, insert the fork deep into the ground at about a 45-degree angle and use your foot to push it down until the prongs are fully underground. Then, push the handle of the fork at a downward angle to lift the plant out of the soil. The plant will likely topple onto its side (revealing all the roots), which is just how you need it to be.
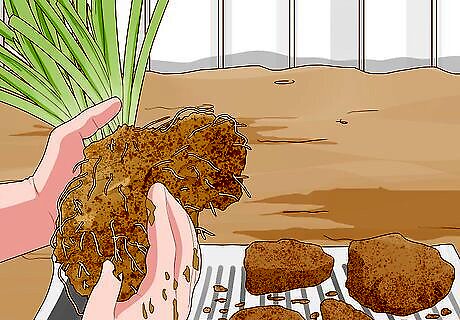
Comb through the roots to remove as much soil as you can. Use a garden fork to carefully comb out as many large clumps of soil from the roots as possible. Then, use your hands to tease out any stubborn clumps. It’s okay if you accidentally pull off some of the root strings. Just try to avoid pulling out lots of strands.
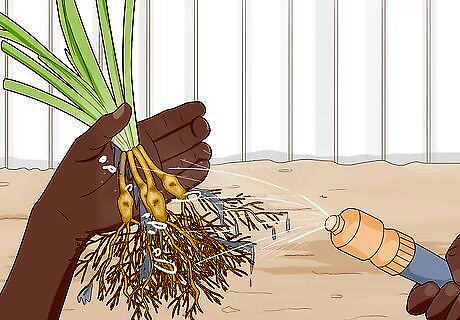
Spray the top, bottom, and sides of the plant with a hose to remove dirt. Use a garden hose to wash the entire plant with water. Spray it from all angles to get rid of small specks of dirt and pests that may be hiding in the leaves. Washing the roots with water will release them from each other, making it easier to separate them.
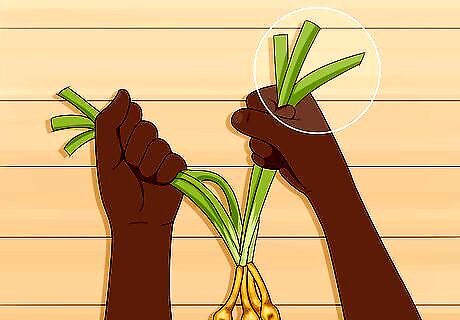
Grasp 2 or 3 fans that are showing signs of natural separation. Look at the bottom of the leaves to find a spot where a few fans seem to be sectioning off from the rest of the clump. Untangle their roots as much as possible from the rest of the plant’s roots, grip the crown area (between the leaves and the roots), and pull the fans away. Look around the sides of the plant to find places that show signs of natural separation. Use your free hand to hold the main clump of fans steady while you pull away the smaller fans. Use your fingers to wiggle the stringy roots apart.
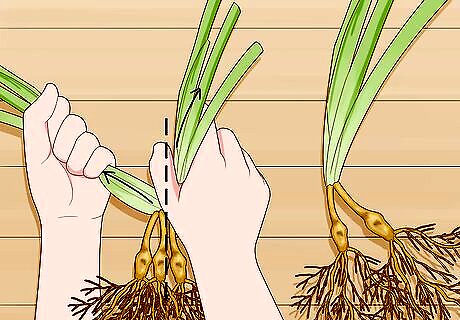
Remove sections a few fans at a time until the entire chunk is separated. Carefully repeat the separating process until the whole chunk has been separated into many parts. Make sure to grip the small sections by the crown as you pull them away to prevent breakage. Daylilies can put up with rough handling, so don’t worry about doing too much damage when you pull them apart. Just try to keep the crowns of the fans intact. If some fans don’t want to separate, use a small knife to vertically cut the crown area between the fans to separate them.


Comments
0 comment