
views
X
Research source
If you’d like to try out this fun hairstyle, you have two options. You can create two separate braids, or you can combine the braids at the bottom to make one big braid.
Creating 2 Separate Braids
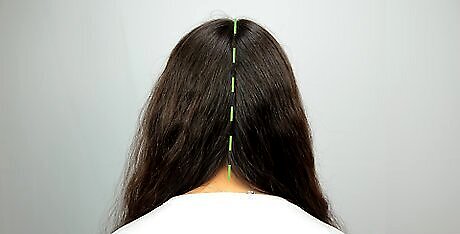
Divide your hair down the center of your head. Use a comb to create a smooth middle part. You can use the teeth of the comb or the tail of the comb if it has one. Go slowly, making sure that your part is straight. Comb each side until it is smooth. You may want to use the long end of a rat tail comb to make a clean part. Your hair will be easier to braid if it’s still slightly damp, but you can still braid dry hair.
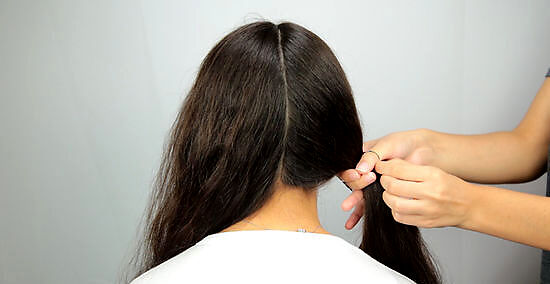
Tie 1 side of the part with a hair tie. Wrap a ponytail holder or scrunchie around the hair on one side. This will keep the hair separated into a part so that you don’t accidentally pull hair from that side while you work on the other braid. You can also use a hair clip if you’d prefer.
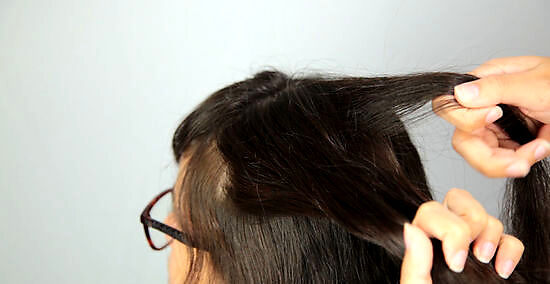
Separate a .5-in (1.3 cm) piece of hair near your hairline into 3 sections. Start your braid as close to your hairline as you can. You do not need to have all of the hair in your hand when you get started. Just pull small sections from near your scalp. You will pull in the remaining hair as you braid. Try to keep the 3 sections equal in size to make the braid look more uniform. If you have thicker hair, you may need to start with more hair in your 3 sections. It may take some practice to learn the best way to braid your own hair. As you braid, your arms may get tired. If this happens, you can hold your hair in place with one hand and let the other arm rest for a few seconds. Then switch hands and rest the other arm. Keep going because your style will be worth it!
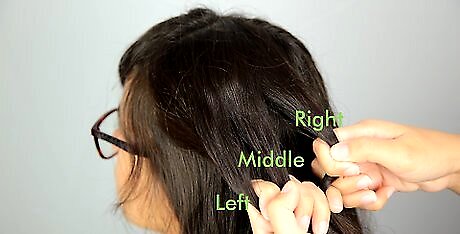
Create a left, middle, and right section. This will help you keep track of which section of hair you should be weaving. As you braid, the sections will change position.
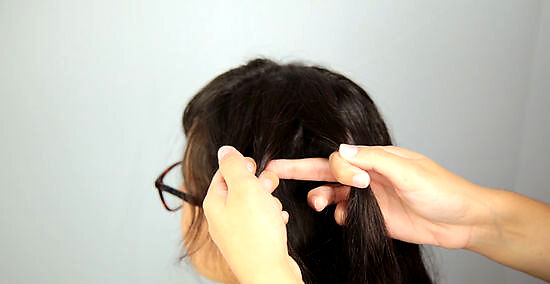
Weave the left section across the middle section to begin. Adjust the middle section so it on the left now. Pull your hair tight to stabilize the braid and prevent flyaways.
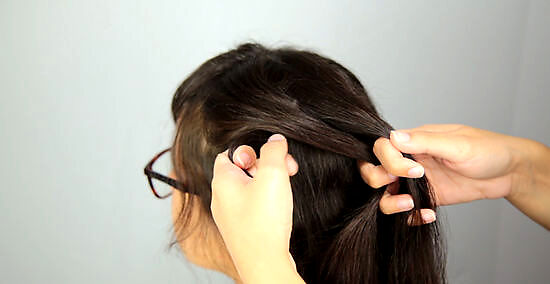
Weave the right section over the middle section to continue the braid. Adjust the first section so that it becomes the new right section. Make sure that your hair is pulled tightly.
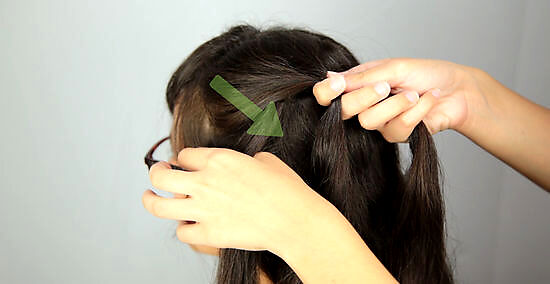
Add more hair to the left section, then cross it over the middle section. Adjust your hair, pulling it tightly. How much hair you add each time will depend on how thick your hair is. If you have thick hair, you'll want to pull in bigger chunks of hair so that you incorporate all of the hair into the braid before you reach the nape of your neck. If you have thin hair, you'll need to pull in less. Each time that you pull in hair, make sure that it's equal amounts for each of the 3 sections, so that the braid will be neat. Make sure that you are pulling your hair tightly throughout the entire braiding process.

Add more hair to the right section before crossing it over the middle section. This is the pattern that you will use to finish your braid. Repeat weaving the left side and then the right, gathering hair as you go. Braiding is hard work! You may need to rest your arms sometimes while you braid. Just make sure that you don't let go of the braid.
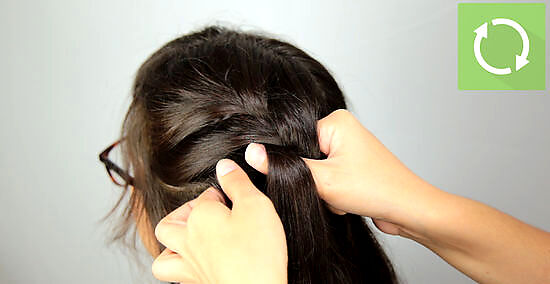
Continue the braiding process until you’re near the bottom of your hair. Toward the end of the braid, you should end up with 3 sections like you would in a regular braid. Continue weaving your hair as you would a basic braid.
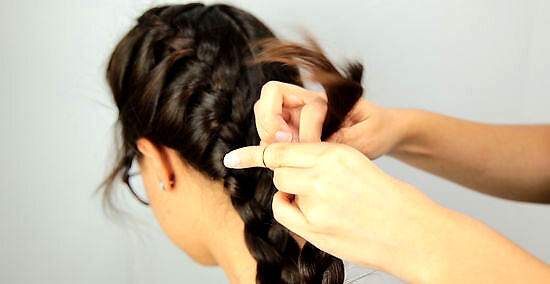
Use an elastic band to secure the braid. Wrap your tie around your hair near the bottom of the braid, about 1 to 2 inches (2.5 to 5.1 cm) from the ends. You can tie off your hair at any point during your braid. For example, you may want to tie off your braid just below the nape of your neck, depending on how long your hair is. If you have curly, textured hair that isn't prone to unraveling, you won't need an elastic, so it's optional. Before beginning your second braid, let your arms rest for a few minutes.

Braid the other side of your hair. Follow the same process on the other side of your head to create another French braid. When you finish, you should have 2 French braids, 1 on each side. If you'd like, you can tuck the ends of each braid under the opposite braid to create a hair "crown." You'll need to secure the braids in place with a few bobby pins.
Combining Double French Braids into 1 Braid
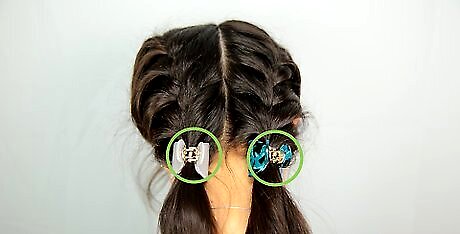
Start 2 separate braids, but clip or tie them just below your nape. You will begin the double braids as you would if you were creating 2 separate braids. However, you should stop the braids a few weaves below the nape of your neck so that you can combine them there. When you finish braiding the first side, secure it with a clip or hair tie while you braid the other side. Choose a tight clip or tie to hold the braid. If the clip is loose on your hair, the braid will start to loosen. The nape of your neck is the base of your head, just before your neck starts.
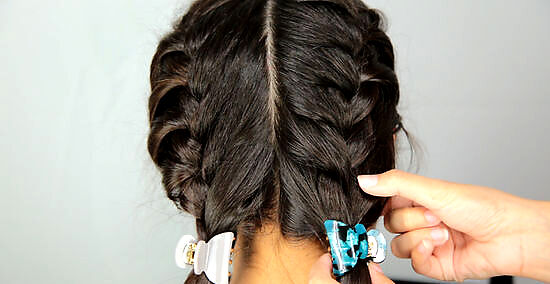
Loop your index finger under the right section of your right braid. This will be the section furthest to the side of your head. Make your loop near the bottom weave around the area where you’d like to combine the 2 braids.
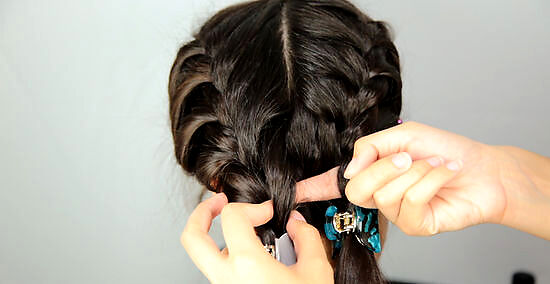
Loop the same finger under the right section of the left braid. You should have both braids on your finger. Make your loop on the left braid near the same area of the weave as you did on your right braid. This will become your new right section for the rest of the braid.
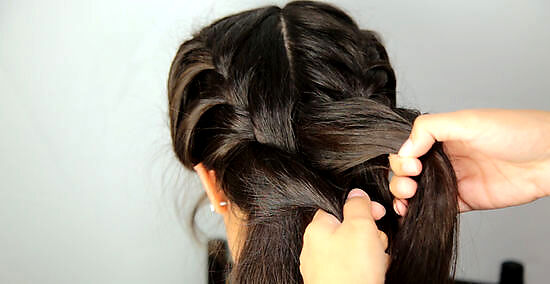
Loop your thumb under the left sections of each braid. Start on the left braid. Make your loop in the same area of your weave as you looped the right side. This will become your new left section for the rest of the braid.
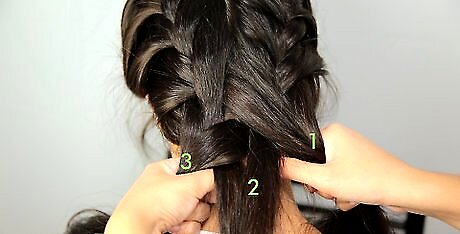
Remove your hair ties or clips, holding your new sections in place. Your 2 right sections will become 1, your 2 left sections will become 1, and the middle sections will become 1. Be sure to hold your hair tightly so that your braid doesn’t come loose. With your free hand, pull out any weaves below the part where you are joining the 2 braids. Alternatively, you could create your new sections by joining the left and middle sections of your left braid, the right section of your left braid and the left section of your right braid, and the middle and right sections of your right braid. Some people find this method easier, though it might not look as smooth where the braids join.
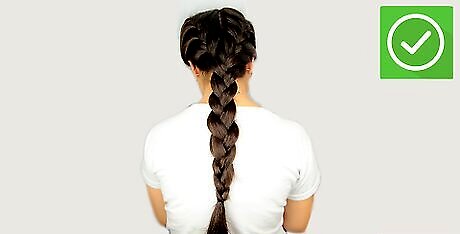
Finish your braid by weaving your 3 remaining strands. Start by crossing the right side over the middle section, and then repeat with your left side. Continue weaving until you reach the bottom of your hair, and then secure your braid with a tie.







Comments
0 comment