

Sketching a Leafy Tree
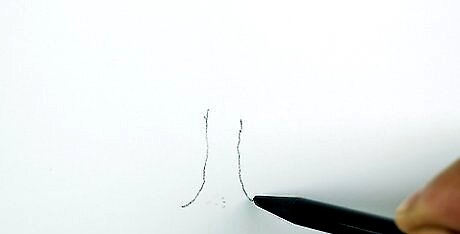
Create the trunk for your tree. Try to have an idea of the overall shape you'd like your tree to be. If you're going to make a large oak tree, for instance, begin drawing a wide trunk that reaches high into the sky. To make a smaller birch, for example, draw a much narrower trunk. Consider using HB and 2B pencils for the outlines of the tree. Later, you can shade in the tree with darker 4B or 6B pencils.
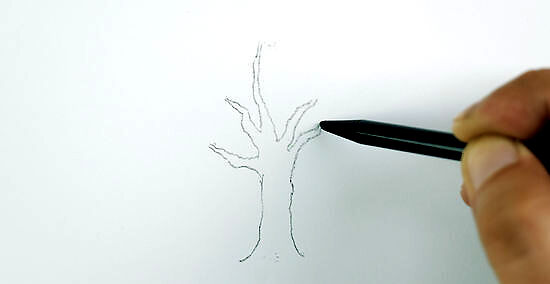
Draw several large branches that extend from the trunk. Sketch as many branches as you like and position them on both sides of the trunk. You'll also need to draw at least 1 large branch that tapers from the top of the trunk. If you're drawing a young, small tree, keep in mind that there probably aren't very many large branches and they'll be much thinner than the branches of a large, old tree.

Make the branches taper as they move away from the trunk. Instead of drawing thin twigs that come off from the branches, draw the branches so they narrow before becoming small. Vary the sizes of the branches so they look more natural.
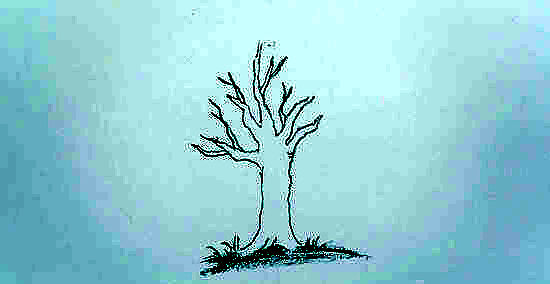
Blend the base of the tree to its surroundings. Your tree will look out of place with nothing to ground its roots. Sketch a little grass or rocks near the root structure. Then, shade around the base of the trunk to add interest. Remember which direction the sun should be shining from in your drawing so you can create a slight shadow coming away from the tree.
Go back and shade in the bark and branches of the tree. Use a darker pencil to create twists and turns in the bark. Don't be afraid to shade and make darker spaces within the bark or branches. This will make the tree look rough. You can also smudge some of the graphite with a blending stump. This can help create shadows and depth. If you're drawing a tree from real life, pay attention with where the light and shadows shift from top to bottom and from one side to the other.
Draw the foliage for your tree. Hold your pencil so it's almost horizontal when the tip touches the paper. Then, make small, gentle movements that represent clusters of leaves instead of drawing individual leaves. This will make your tree appear more natural.Tip: Keep a loose grip on the pencil. This will help you relax and not think too much about making the tree symmetrical. Make some of the leafy areas darker to show depth within the tree. If you're drawing a tree in the winter, you could skip drawing leaves or just draw a few that are still clinging to the branches.
Drawing a Fir Tree

Sketch a thin line that will be the tree's trunk. Use a 6B or dark pencil to draw a thin line on your paper. Make the line as tall as you'd like your fir tree to be. You can make your tree trunk as straight or curved as you like.
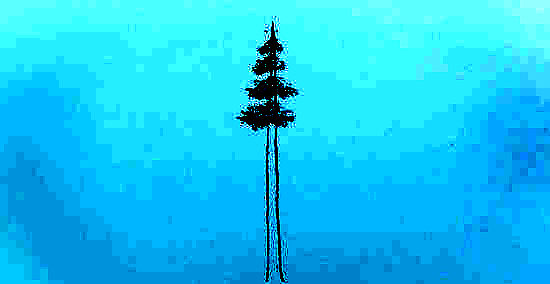
Make a few short branches coming from the top of the trunk. Draw the branches so they're angled up and away from the trunk. Keep in mind that the branches that are at the top should be the shortest since they'll fan out near the bottom. Sketch some of the higher branches thinner than the ones near the bottom of the tree.
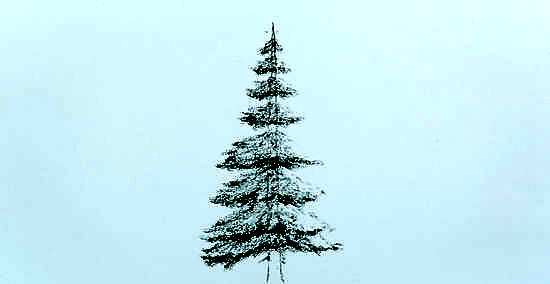
Keep making the branches all down the trunk. Extend the length of the branches the further down the trunk you go. When you're near the bottom, leave a gap so you can draw the trunk reaching the ground.Tip: Since most fir trees aren't perfectly symmetrical, alternate some of the branches or leave gaps between them. Keep your hand loose and relaxed as you work in order to make a more realistic-looking tree.
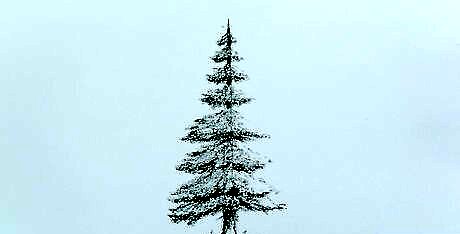
Use a blending stump to blur the center of the tree. Since you usually can't pick out the details when tree branches overlap, blend along the middle of the tree near the trunk. Try to leave the tips of the branches more defined so they stand out. If you don't have a blending stump, you can gently rub the paper with your clean finger.
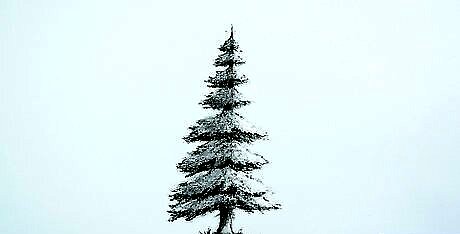
Define the trunk and branches with a very sharp pencil. Go back over your tree with a sharp, dark pencil, such as a mechanical HB pencil, and draw over each branch so they really stand out. Then, draw the trunk between the branches much darker and shade in the base of the tree. Fill out the trunk so it's as wide as you like.


Comments
0 comment