views
Outlining the Castle
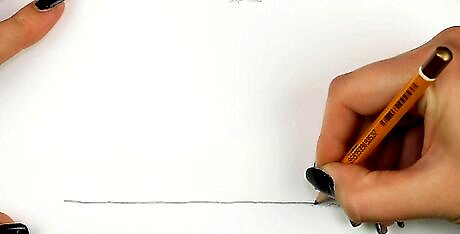
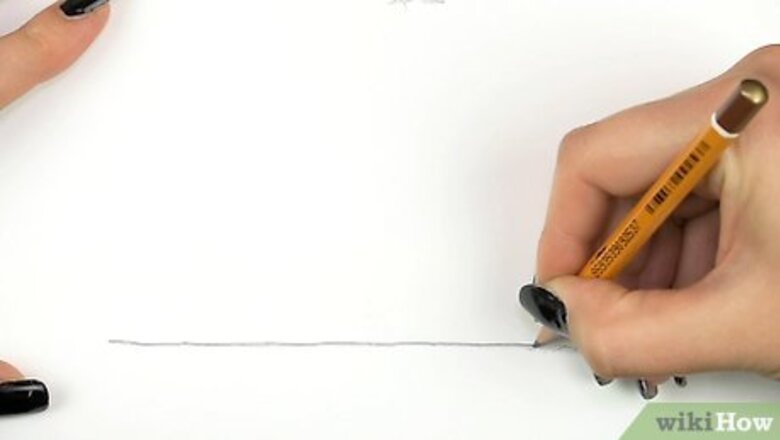
Draw a straight, horizontal line for the ground. If you’re trying to make it as neat as possible, use a ruler to sketch the line. Make it at the bottom of the page so you have plenty of room above it for the castle. This line will be the base you use for the rest of the outline. Another option is to draw a curved line for a hill or a cliff. You could draw a castle on top of a cliff with a long, winding path leading to it, for instance.
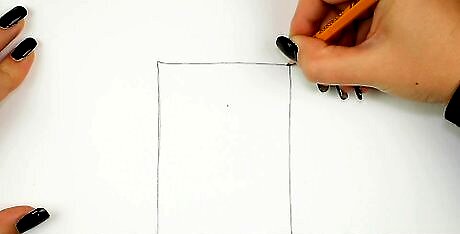
Make a 5 in (13 cm)-wide rectangle in the center for the castle keep, which is a big tower. The keep is the small, center part of the castle where the front door will be. Find the center point in the ground line and measure out from it. Draw vertical lines to mark the sides of the keep, then connect them with a horizontal line, forming the top of the keep. Make the keep taller than it is wide. The castle may look a little squashed if the towers are much taller than the keep. Keep in mind that, if you draw a castle seen from the side, some parts of the keep may not be visible.
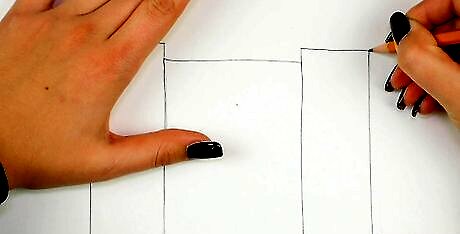
Add towers by making rectangles ⁄4 in (0.64 cm) taller than the keep. A simple way to create towers is to make these rectangles about the same height as the keep. Then, extend them a little more so they rise above the keep. They are there to protect the castle, so they should be tall enough for the castle guards to look out over the walls. Another option is to make keeps with a curved base and slightly slanted sides. This will make them stand out even more when you add tops to them.

Add upper towers that are about 1/4 the height of the lower towers. Try measuring about ⁄4 in (0.64 cm) from the sides of the towers. Sketch vertical lines at these points that are about ¼ as tall as the base of the towers. Then, connect each pair of vertical lines with a horizontal one. There are many different ways to decorate towers, so you don’t have to make yours segmented or square-shaped. However, you can use this technique for a quick way to sketch basic towers.

Draw outer walls about ⁄4 in (0.64 cm) shorter than the towers. Go back to the ground line at the base of the tower. Measure out from each tower and draw a vertical line. Keep the outer edges of the castle about as wide as the towers, but make them a little shorter. Make them shorter than the towers so the castle guards in the towers can see over them. Connect the walls to the towers with a single, horizontal line for each one. Check to make sure the walls are at a consistent height compared to the rest of the castle.

Top the towers with small triangles to finish outlining them. Each tower needs a roof, so cap them by drawing a simple triangle. Make the triangles as wide as the rectangles at the top of the towers. Starting at the edges, draw diagonal lines that meet above the center of each tower. The towers, especially the roofs, are very easy to customize. For example, you could draw crown-shaped caps to make them look more open and battle-ready.
Detailing the Castle
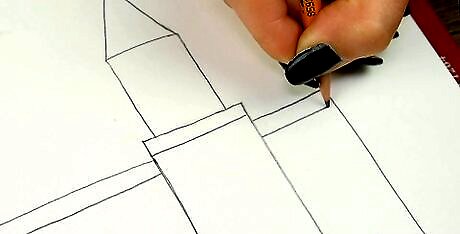
Draw a horizontal line ⁄4 in (0.64 cm) from the top of the castle for the roof. Measure down from the walls, towers, and keep. Make a separate line across each part. These lines will add more depth and detail to your castle.. These lines make the roof of the castle look more distinct. They also help outline the upper walkways, which you can add more detail to later.
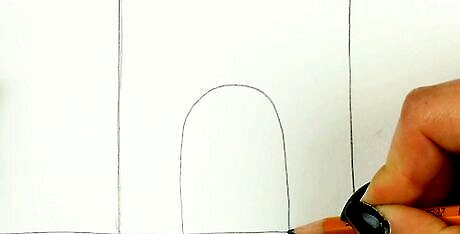
Make a door arch that is about ⁄4 in (0.64 cm) the height of the keep. Draw it in the center of the keep. Make sure its edges are an equal distance from the towers to the left and right. Sketch an upside-down U-shape to create a basic door. Change the height of the door depending on your design. You could make it big, about ⁄4 in (1.9 cm) the height of the keep, and it will still look good. A big door might make your castle look even harder to break into! If you’re drawing a castle from the side, the door may not be visible at all. Keep in mind the angle you have chosen for your drawing.
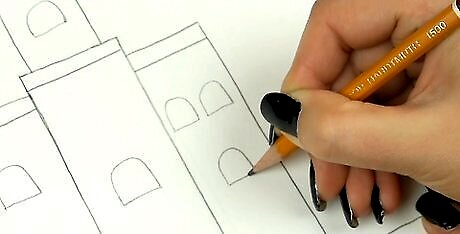
Sketch windows along the castle by drawing small arches. People need some way to look out of the castle, so add a couple of windows along the front. Try drawing a pair of windows above the door, keeping them about ⁄4 in (0.64 cm) from the top. Place a single window in the center of each tower section and then 3 more on the outer walls. To draw simple windows, make them the same shape as the door. Draw a small, horizontal line, then draw an upside-down U-shape over it. The window positioning, size, and shape can vary a lot. It’s your design, so draw them how you want them!
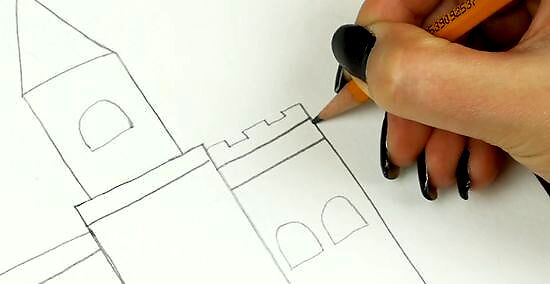
Top the outer walls with rectangles about ⁄4 in (0.64 cm) tall. Start at the edges of the wall. Draw a short, horizontal line, followed by a vertical line that stops short of the walls. Repeat this to form a series of small blocks similar to what you see on real castles. The blocks are small areas to protect people as they look down from the castle walls. Make them look nice by keeping them small and spaced consistently.
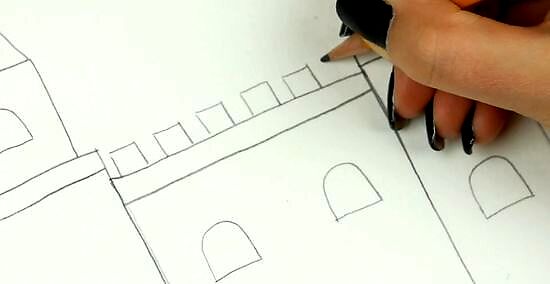
Draw ⁄4 in (0.64 cm) blocks along the top of the keep. To distinguish the keep, make the blocks a little different than the ones on the wall. Try drawing half squares coming out of the top of the keep. Space them out consistently, leaving small gaps between them so the people in the castle have room to look out. If you wanted to, you could erase the outline forming the roof of the keep and replace it with these small squares. Try making these rectangles a little bigger than the ones on the towers to distinguish them.
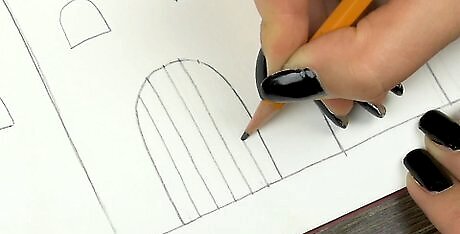
Finish the door with some horizontal lines and other decorations. The simplest way to make the door stand out is with a series of lines consistently spaced out across its width. Try measuring about ⁄8 in (0.32 cm) from the edge of the door. Then, draw a straight line from top to bottom. Keep doing this until you have run out of room. To ensure these lines are spaced out more evenly, measure the width of the door first. Take the measurement across the bottom or middle part of the door where it is widest. For additional decoration, you could draw a pair of thin wooden bars running across the door’s width. Try placing them ⁄3 in (0.85 cm) of the way from the top and bottom edges. You could also draw an arch around the door to make it look like it has a wood frame.
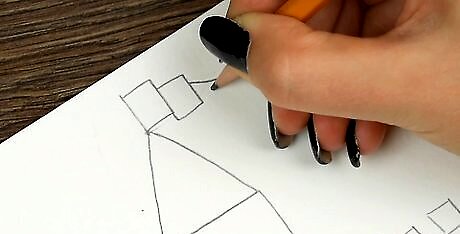
Sketch pennants coming from the top of each tower for optional detail. Draw a vertical line out of the peak of each tower to create flagpoles. Then, make a simple flag by drawing a triangle attached to it. You could customize it by making it wavy, like it’s blowing in the wind, or by giving it a forked shape similar to a dragon’s tongue. You could also choose to change the flag size or leave them off the castle. Customize your castle with different decorations!
Completing the Background and Coloring
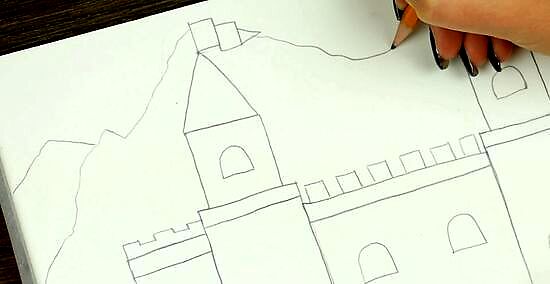
Draw mountains and other background details if you wish to add them. Try sketching some mountains behind the castle to make it look like a strong, majestic fortress. Draw a couple of triangular peaks coming up from behind the castle. Draw a circle underneath the mountain peaks for snow caps. Add other details as well, including a sun, flowers, or anything else that could make the scene come to life. For example, if your castle is on a cliff, shade the cliff to make it look rocky. Try making a few thin, vertical lines. Add some horizontal ones and curves for rocks and cliffs.

Erase any outlines or stray marks left on the castle. If you’re using a pencil, this part will be easy. Remove anything you don’t plan on keeping for the final version of your drawing. For example, you could have some stray outlines left over from when you were forming the various parts of the castle. Make sure the remaining edges look neat so your castle looks magnificent. Always sketch the castle’s shape and details in pencil first. You can always draw over and erase the outlines before finishing you’re done

Darken parts of the castle walls if you wish to make them more realistic. Lightly shade some selected spots with a pencil to make them look darker than the surrounding stone. Try shading a few spots around the sides of the towers, outer walls, and doorways. To shade them, draw a bunch of thin, diagonal lines or dots close together. Picture where the shadows are on the castle and shade those areas. You can also add discolorations to the castle walls to make them look a little more weather-worn and natural. Shading can be tough, but you don’t need to do it if you’re happy with your design. Experiment with different shading techniques, like hatching and cross hatch marks.

Make thin marks across the castle to outline its stones. Space them out evenly, starting with the horizontal lines. Using a thin pencil and a ruler, sketch these lines very lightly across the castle. Then, add vertical lines when needed to divide the castle up into individual building blocks. Remember that you don’t have to draw each individual stone or make them look perfectly even. You could sketch a few light lines in some places to make the walls look rough and detailed. These small details are difficult to get right, so consider using less of them or not including them at all if they affect your design negatively.
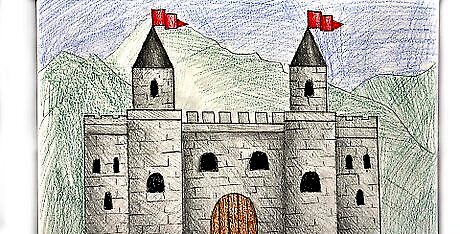
Color the castle with markers or something else if you want. Adding color is optional, but it could make your drawing feel more finished. Crayons, markers, colored pencils, and all sorts of other tools can be used here. For a basic design, you might wish to color the tower peaks blue and the flags red. Then, make the castle walls beige with some black and brown spots. Color the background elements as well, such as the sky and any mountains you have added. Make sure the castle contrasts with the background so you can easily admire it!





Comments
0 comment