views
Windows Laptops
Check your laptop's Wi-Fi button or switch. Some PC laptops have a physical Wi-Fi button or switch near the keyboard that lets you quickly turn Wi-Fi access on or off. If you have such a switch, make sure it's set to the On position. A light will usually (but not always) illuminate when the Wi-Fi switch is on.
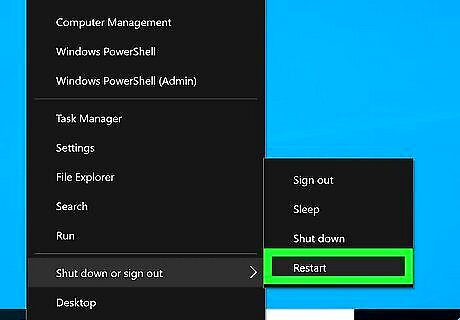
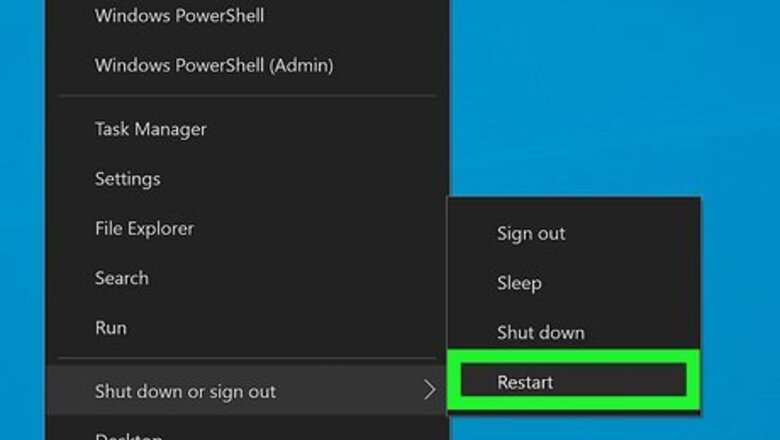
Restart your PC. This can clear up a lot of issues, problems relating to Wi-Fi and networking connections. Before you continue troubleshooting, do a quick reboot and see if that resolves the problem.
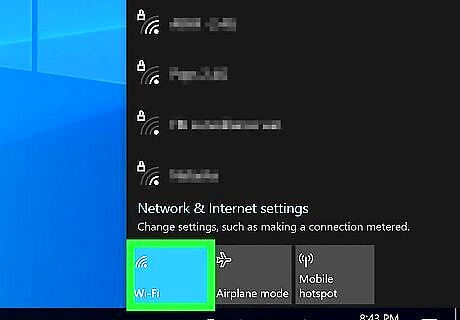
Make sure Wi-Fi is enabled in Windows. Here's how: Click the "No internet access" icon, which looks like a globe, on the taskbar near the clock. If you don't see it, click the up-arrow to expand the overflow icons. If the Wi-Fi tile is gray or deactivated, click it to turn on Wi-Fi. While you're here, make sure Airplane Mode is disabled—if the tile is illuminated, click it to turn it off.
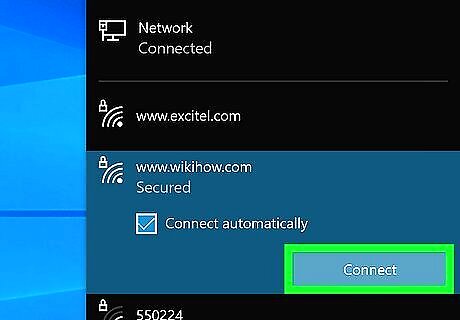
Try to connect to a Wi-Fi network. Click the "No internet access" icon on the taskbar again—you should see a list of nearby wireless networks you can connect to. If you see the network you are looking for, click to connect to it. If you're using Windows 11, after clicking the "No internet access" icon, click the right-arrow next to the Wi-Fi tile to bring up the list of networks. If you don't see the network you want to connect to, try moving closer to the wireless access point. If you are connected to a wireless network but unable to browse the web, click Disconnect on the network name, and then click Connect to reconnect.
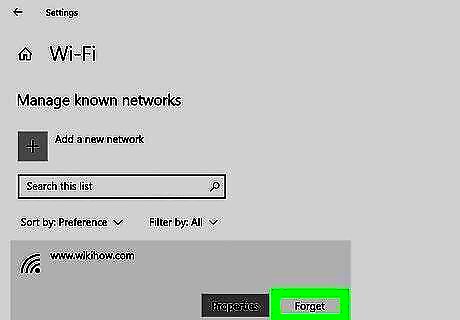
Forget and re-add the network. If you're getting an error like "Can't connect to this network" when trying to connect, the profile might be corrupt. Right-click the "No internet access" icon near the clock and select Network and Internet Settings. Click Wi-Fi. Click Manage known networks. Click Forget on the network you can't connect to. Close this window, and then click the "No internet access" icon and try to connect to the network again. You will need to reenter the password.
Minimize wireless interference. If your Wi-Fi connection keeps dropping or the signal strength is low even when you're in close range of the access point, there might be something interfering with the signal. To minimize interference: Move away from devices that use 2.4GHz or 5.0GHz bandwidths, such as microwaves, cordless phones, baby monitors, 2-way radios, some tablets, Wi-Fi cameras, and unshielded power or video cables. Try to minimize physical obstructions as well, especially walls and furniture made of concrete, brick, marble/stone, metal, reflective glass, water, or ceramic tile.
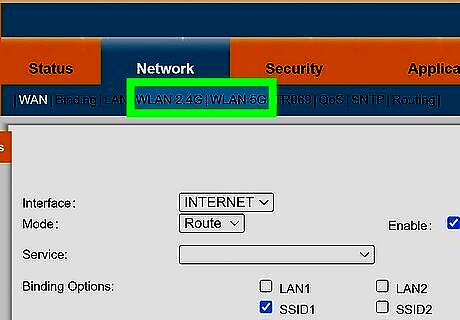
Try connecting to another band. If the network you are trying to connect to has two different network bands (2.4GHz and 5Ghz), you may see two similar wireless networks you can connect to. They'll have the same name, but one will end in 2.4G and the other in 5G. If you're having trouble with one of these bands, disconnect from that network try connecting to the other to see if that helps. For example, if your wireless network is called Centurylink1234 5G and you also see Centurylink1234 2.4, disconnect from the 5G network and try connecting to the 2.4 network. If you have access to the router, you might want to change the router's channel to a less busy channel.
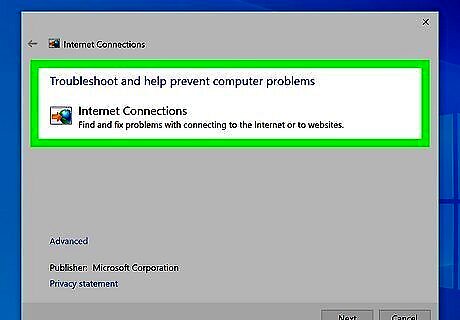
Run the network troubleshooter. If you still can't connect to Wi-Fi, the Windows network troubleshooter will perform advanced tasks, such as release and renew your IP address and reset your wireless adapter. The steps to get there are a little different depending on your version of Windows: Windows 10: Click the Windows Start menu and select Settings (the gear icon). Click Network & Internet. Click Status. Click Network troubleshooter and follow the on-screen instructions. Windows 11: Click the Windows Start menu and select Settings (the gear icon). Click System. Click Troubleshoot. Click Other troubleshooters. Click Network Adapter. Click Run and follow the on-screen instructions to repair issues. If the troubleshooter repairs issues, you should be able to connect to Wi-Fi. If the troubleshooter doesn't find any issues, restart your PC.
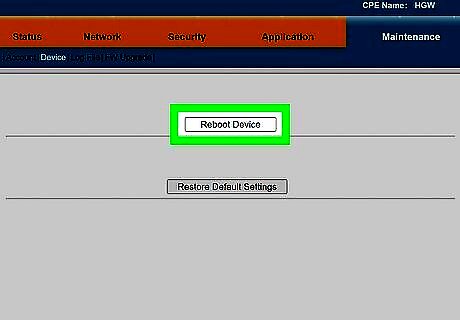
Restart your router and modem. If you still can't connect to Wi-Fi, there could be a problem with your router and/or modem (sometimes these two items are combined into one device). Here's the best way to reset your router and modem: Unplug the power cable from both the router and modem (if separate). If the light on your modem stays on, it probably has battery backup. Remove the battery for now. (If you have a separate modem) After 30 seconds, plug the modem back in to the power source and wait for it to boot back up. When the lights stop blinking, continue. Plug the router back in and allow it to boot up. This can take several moments. Reconnect your laptop to the Wi-Fi network and try to browse the web. If other devices (such as your phone or tablet) can connect to this network but your laptop can't, continue with this method. If the network isn't available for any devices, contact your internet provider for troubleshooting.
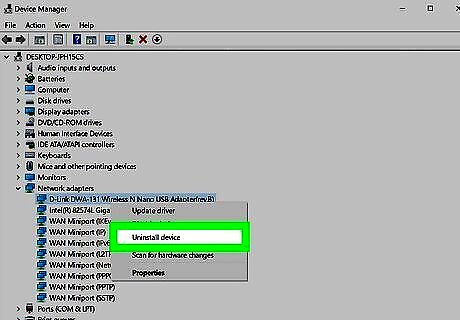
Uninstall and reinstall your network adapter driver. You'll need to do this from the Device Manager: Press Windows key + S and type device. Click Device Manager in the search results. Expand the Network adapters menu and select your Wi-Fi adapter. Right-click adapter and select Uninstall device. Check the box next to "Attempt to remove the driver software for this device" and click Uninstall. Reboot your laptop. When it comes back up, Windows will automatically install a new generic driver for your Wi-Fi card. If this resolves your problem, it's possible that a recent Windows Update is incompatible with your Wi-Fi card. You can try updating the drivers to see if that resolves the issue. If the issue comes back, uninstall the driver again and reboot to use the generic driver until a fix is available.
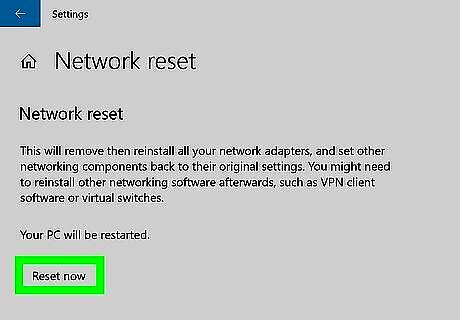
Reset your network settings. The last step is to completely reset all of your laptop's network settings. This will delete all of your saved Wi-Fi passwords and remove any customized network settings. Here's how to do it: Open the Windows Start menu and go to Network & Internet > Status (Windows 10) or Advanced network settings (Windows 11) > Network reset. Click Reset now and choose Yes to confirm. When your PC restarts, try connecting to the Wi-Fi network again.
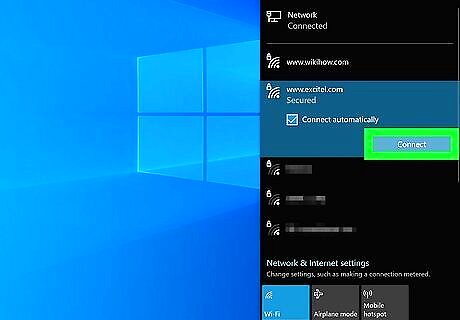
Still not working? Try connecting your PC to a different Wi-Fi network. Take your laptop to another location, even one with public Wi-Fi like a café, and see if you are able to connect there. If you can't connect to any Wi-Fi networks, there's likely a hardware issue with your laptop, and you should contact the manufacturer for service. If you can connect at a café, try checking for and installing Windows Updates. Then, head home and try connecting to your Wi-Fi again. If you still can't connect, contact your internet provider for assistance.
MacBooks
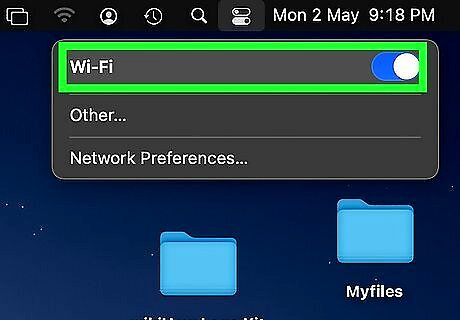
Make sure Wi-Fi is turned on. Click the Control Center icon (the two sliders) at the top-right corner of your screen. If the "Wi-Fi" icon is turned off, click it to turn it on. When Wi-Fi is on, you'll see a list of all available access points. Click the network you want to join.
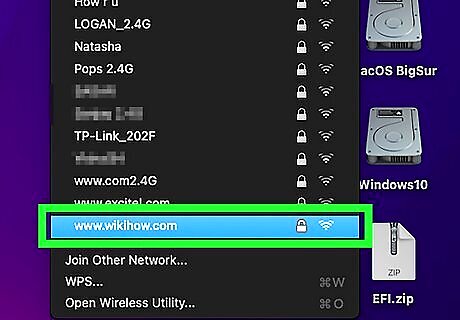
Try to join the Wi-Fi network. If you don't see the Wi-Fi network you are looking for, try moving your laptop very close to the access point.
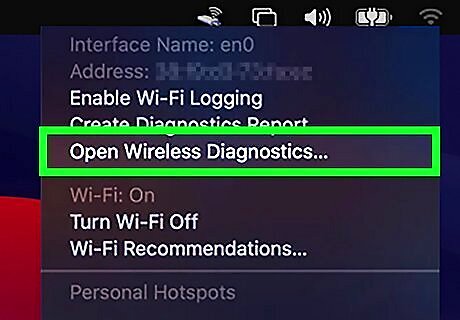
Run Wireless Diagnostics if you can connect to Wi-Fi but can't access the internet. If you are able to join your Wi-Fi network but you can't browse the web, running Wireless Diagnostics can help. Here's how to do it: Close all open apps. Press and hold the Option key while you click the Wi-Fi icon in the menu bar. Click Open Wireless Diagnostics. Follow the on-screen instructions to allow your Mac to test your wireless connection. If any issues are found, click the small "i" in a circle next to each issue found for instructions on how to proceed.
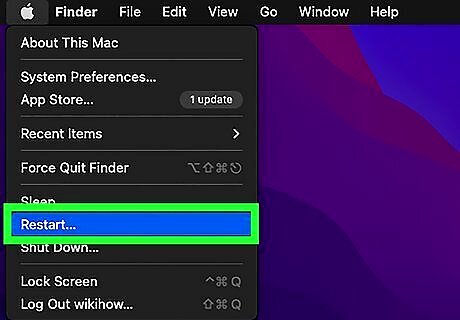
Restart your Mac. When you restart your Mac, your Mac will automatically release and renew your IP address, which often clears up internet issues. If you don't want to reboot, you can follow these steps to renew your IP address. Click the Apple menu and select System Preferences. Click Network. Click your Wi-Fi connection. Click Advanced and select TCP/IP. Click Renew DHCP Lease.
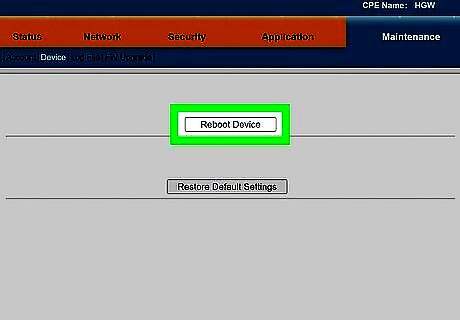
Restart your router and modem. If you still can't connect to Wi-Fi, there could be a problem with your router and/or modem (sometimes these two items are combined into one device). Here's the best way to reset your router and modem: Unplug the power cable from both the router and modem (if separate). If the light on your modem stays on, it probably has battery backup. Remove the battery for now. (If you have a separate modem) After 30 seconds, plug the modem back in to the power source and wait for it to boot back up. When the lights stop blinking, continue. Plug the router back in and allow it to boot up. This can take several moments. Reconnect your laptop to the Wi-Fi network and try to browse the web. If other devices (such as your phone or tablet) can connect to this network but your laptop can't, continue with this method. If the network isn't available for any devices, contact your internet provider for troubleshooting.
Minimize wireless interference. If your Wi-Fi connection keeps dropping or the signal strength is low even when you're in close range of the access point, there might be something interfering with the signal. To minimize interference: Move away from devices that use 2.4GHz or 5.0GHz bandwidths, such as microwaves, cordless phones, baby monitors, 2-way radios, some tablets, Wi-Fi cameras, and unshielded power or video cables. Try to minimize physical obstructions as well, especially walls and furniture made of concrete, brick, marble/stone, metal, reflective glass, water, or ceramic tile.
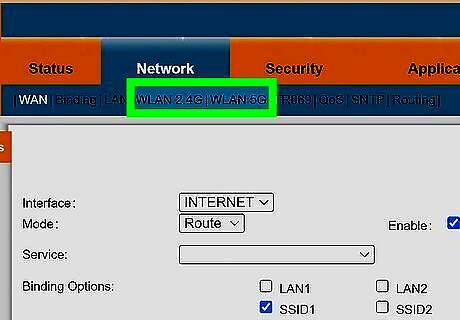
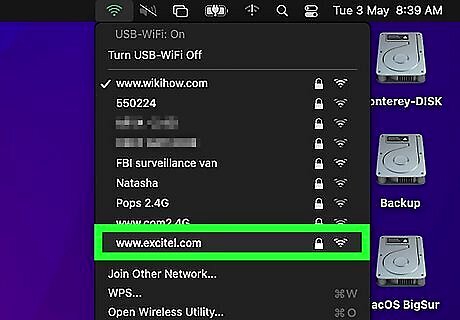
Try connecting to another band. If the network you are trying to connect to has two different network bands (2.4GHz and 5Ghz), you may see two similar wireless networks you can connect to. They'll have the same name, but one will end in 2.4G and the other in 5G. If you're having trouble with one of these bands, disconnect from that network try connecting to the other to see if that helps. For example, if your wireless network is called Centurylink1234 5G and you also see Centurylink1234 2.4, disconnect from the 5G network and try connecting to the 2.4 network. If you have access to the router, you might want to change the router's channel to a less busy channel.
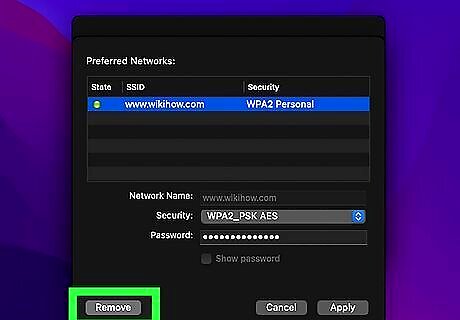
Forget and re-add the network. If you are able to see the Wi-Fi network when trying to connect but are unable to make the connection, you might be able to fix the problem by removing and re-adding the connection. Here's how: Click the Apple menu and select System Preferences. Click Network. Click Wi-Fi. Click Advanced. Select the Wi-Fi network and click the minus sign. Click Remove. Close all windows and then try to reconnect to the network. You will need to re-enter the Wi-Fi password if it was previously saved.
Still not working? Try connecting your Mac to a different Wi-Fi network. Take your MacBook to another location, such as a café or library, and see if you can connect there. If you can't connect at another location, there's likely a hardware issue with your MacBook, and you should contact Apple for service. If you can connect at a café, check for and install any updates. Then, try to connect to the original network again. If you still can't connect, there's likely an issue with your home Wi-Fi router—contact your internet provider for assistance.


Comments
0 comment