views
Preparing to Fold Your Napkin
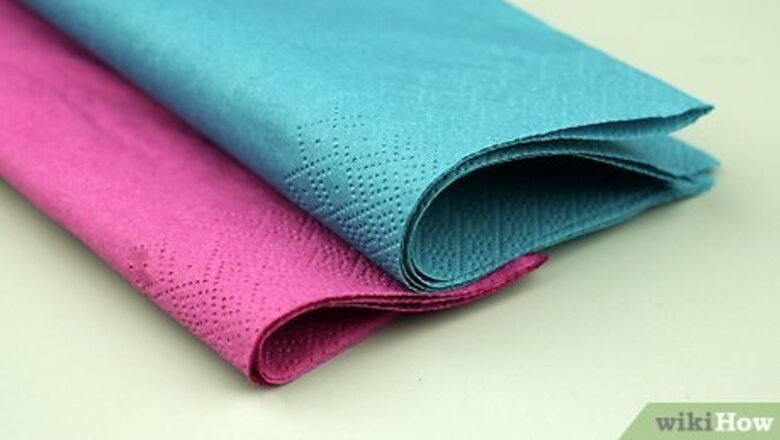
Pick the color of your sailboat. You will want a napkin that has a darker tone, like a brown, if you want to replicate the look of a sailboat. However, you can also use whatever color napkin you have. This would be the best time to also decide whether you want a double-sided napkin. Your napkin should be colored on both sides, rather than just the outside. Paper napkins are great for birthday parties, while cotton and linen napkins allow for a more professional look (hotels, restaurants, etc.).
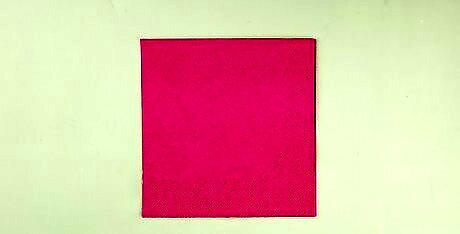
Find a square napkin to use. A 20X20 inch napkin is the ideal size for your sailboat. Naturally, the bigger the napkin the bigger the boat. Your napkin should not be too thick, otherwise you will not be able to fold it properly. If you cannot find a perfectly square napkin, try one that is as close to square as you can get it. This extra half an inch or so will even allow you to make the folds easier. Another great option is to cut your napkin to a square size. However, you want to make sure to not leave any frayed edges when you do so. This is better for paper napkins, rather than nice family napkins used for holiday dinners.
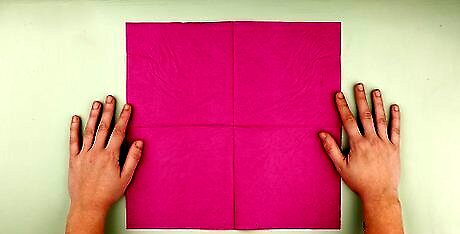
Lay your napkin flat on a surface. First clean the surface with a duster and/or glass cleaner. This will prevent your napkin from becoming stained. You can put it on a table, a desk, or a nightstand. Do not lay it on soft surfaces otherwise it will be hard to make the folds.
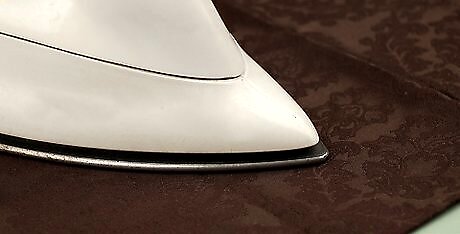
Use an iron on your napkin. This would be the best time to get out any excess wrinkles that might make your sailboat look bad. Only use an iron if you are using a cloth napkin. Do NOT iron a paper napkin. Use an iron on low, and gently press against the napkin. Make sure to get both sides.
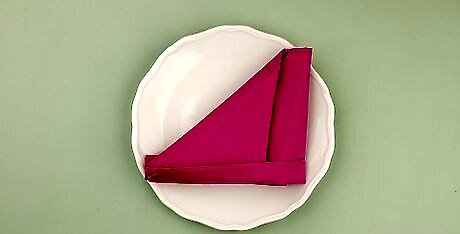
Decide on your type of fold. There are three different types of sailboat napkin folds: wind-drawn sailboat (upright), the stable sailboat (flat), and the party sailboat (upright). A wind-drawn sail is more for formal occasions like a dinner date. The stable sail can be used for any occasion, but typically formal. The party sail is mostly for festive, informal occasions. Check what event you are planning, and how each of the sailboats matches up.
Folding Your Napkin Into a Wind-Drawn Sailboat
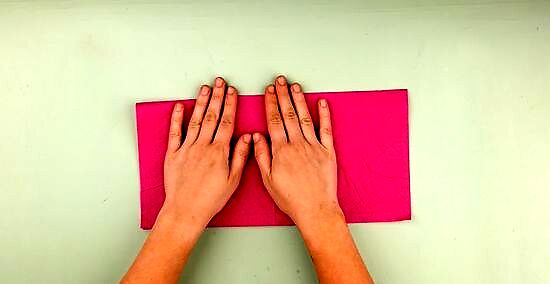
Fold your napkin downward in half. Start with the napkin facing you in the square position. Make sure that your napkin is open and flat before you begin your fold. Apply pressure with your hand if you would like a more crisp look to your sailboat. A tight fold will also allow the use of more fabric in your sailboat.
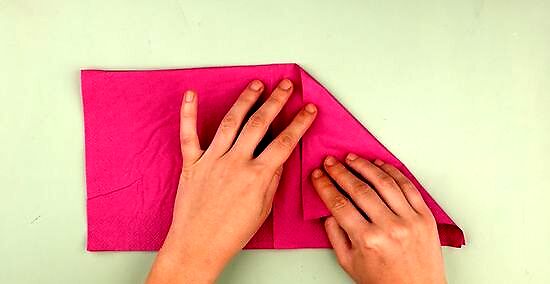
Fold the top right corner downward. Make sure when you make this fold, the open edges are towards your body. Pull the corner all the way down until it is about one inch from the bottom edge. This should create a right angle. Apply pressure to the fold with your hand for a more crisp look.
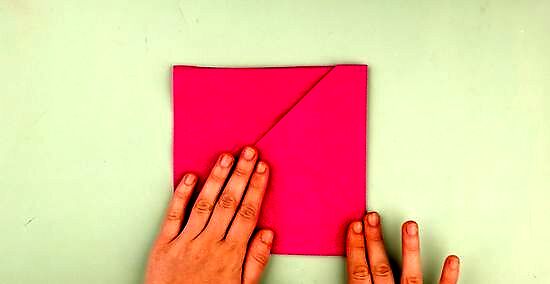
Take the bottom right corner with your hand. Fold it all the way to the left. Make sure the corner of the flap is flush, and even, with the corner you press it against. Press your hand against the fold to create a crisp crease.
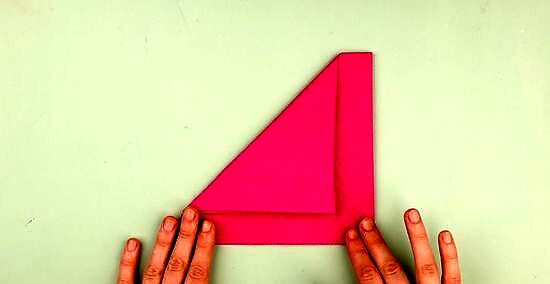
Fold the top left corner downward. Pull the corner from left to right. Make sure the edge lines up nice and smooth. Crease the fold with your hand. If the fabric becomes too thick to crease, use a heavy object like a paperweight to make the fold. If you prefer a more "fluid" sail, don't crease the fold. There should be 1/2-1 inch of excess fabric left at the bottom of your napkin, after you complete this fold.
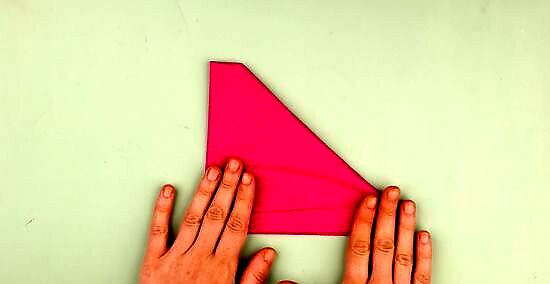
Lift the bottom flap upwards. You will want to make sure that you fold it upwards at least 2 inches (5.1 cm). This flap will form the boat in your sailboat. Adjust this fold upwards or downwards if you want a smaller or larger boat.
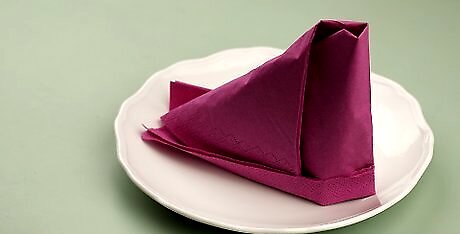
Separate the bottom folds. There are two major folds of fabric, both of which have been lifted up 2 inches (5.1 cm). The flap away from the "sail" you want to separate away from the flap closest to the "sail." Use your thumb and fold one of the flaps upwards. Take the other flap and fold it backwards. Smooth out the edges of the flaps and you now have a napkin wind-drawn sailboat.
Creating a Flat and Stable Sailboat
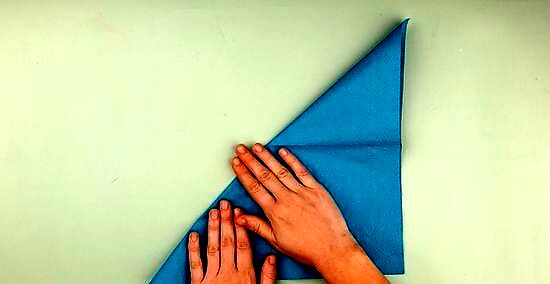
Take the upper left hand corner in your hand. Start with the napkin in a square position. Fold it down so it meets the bottom right hand corner. Crease the fold with your hand, or a heavy object like a paperweight. Then turn the napkin around, so the fold is facing downwards.
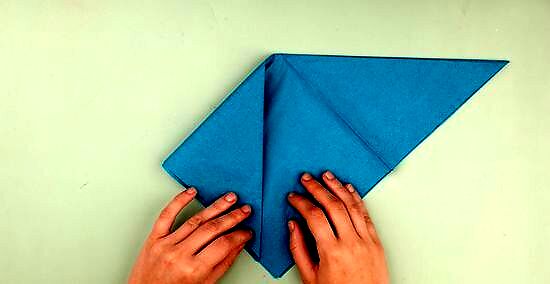
Fold the left side downward. Take the left corner with your hand and fold it down. Do this until you have a straight edge running down the middle. Note: you are not folding it left to right, but down. Do this until there is about one inch of fabric left at the bottom. Crease the fold you have made with your hands.
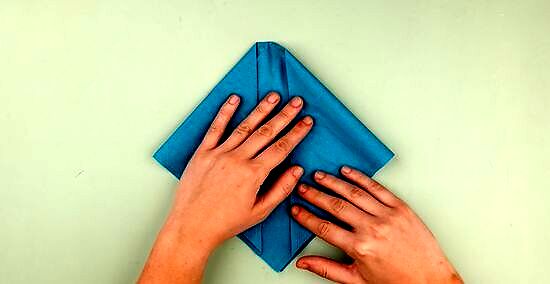
Fold the right side downward. Take the right corner and fold it down. Do this until you have a straight edge in the middle. You should now have two edges in the middle (from the left and right folds) that are basically touching each other. Crease the fold with your hand or a paperweight.
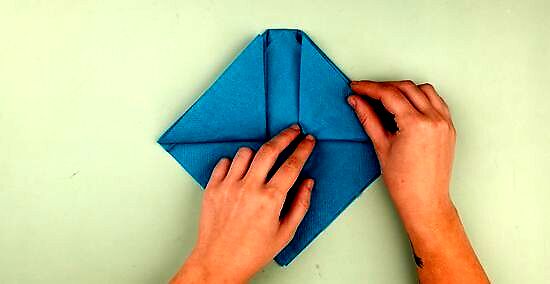
Lift the bottom left flap. Pull the bottom left flap upwards. Do this until the top flap meets the bottom fold. Now do the same with the bottom right fold. Lift it up until the top right flap meets the bottom fold. Crease both folds with either your hand or a heavy object.
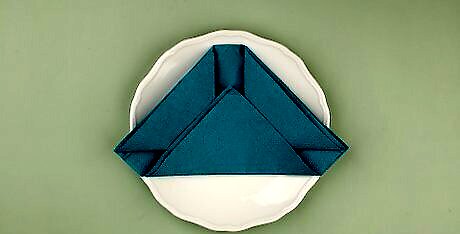
Fold the bottom edge upwards. This will create the "boat" part of the sailboat. Pull up the bottom edge as much as you would like, depending on the size of the boat and/or sail you want. Once this is done, lay the napkin on a plate.
Constructing a Party Style Napkin Sailboat
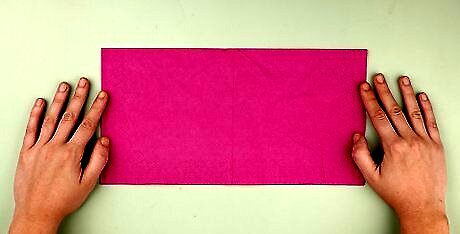
Cut a paper napkin to size. Rather than using a square napkin, this project requires a rectangular napkin. If you have a rectangular napkin, feel free to use that. If not, take the left edge of your square napkin, and fold it until the edge reaches the middle. Take the right edge, and fold it until the edge hits the middle. Crease both folds with your hands. After you have folded, open the napkin back up. You should have 4 sections. Cut off one of the outside sections and you are ready to begin.
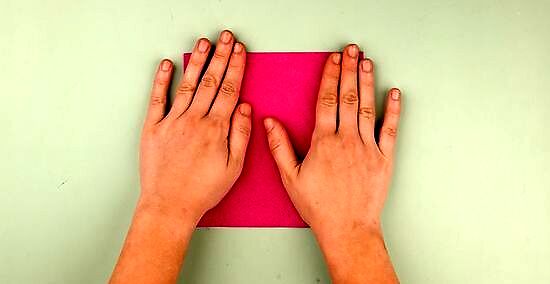
Fold down the top edge of your napkin. Position the napkin so that the top and edges are the small sides of the rectangle. Fold down the top edge until it meets the bottom edge. Crease the fold with either your hand or a small, heavy object like a paperweight.
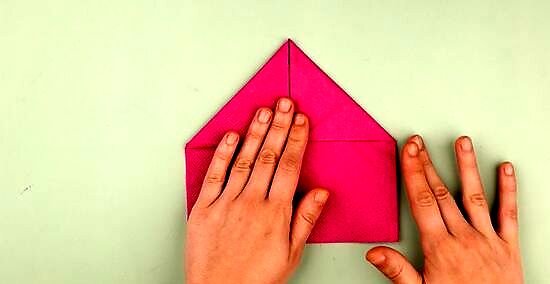
Bend the two upper corners down. You can do one at a time, or both at once. Fold them towards the middle, until the two corners meet. Make sure the two edges of the flaps are flush with one another. Finally, crease the folds with your hand or a paperweight.
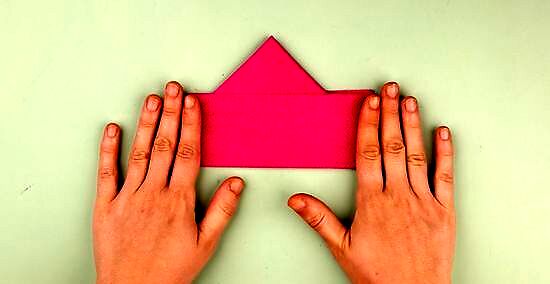
Lift the bottom flaps up. There should be two bottom flaps. Lift the top flap up until you are covering about half of the triangle. Flip your napkin over, and flip up the other bottom flap the same way. Crease both of these folds again, with either your hand of a heavy object.
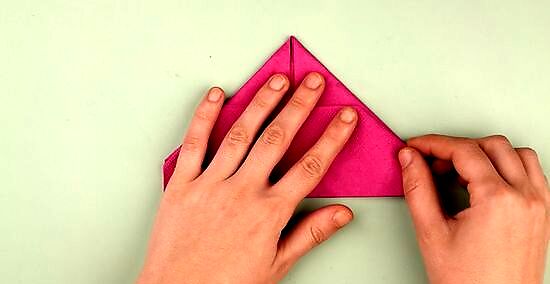
Press in the flap corners. On each of the flaps you just folded up, are two corners, totaling four. Use your finger to poke in each of these corners. When you get done with all four, lay the flaps back down. Poke the corners in even more to make sure the edges of the poked in corners line up. You should now be left with what looks like a triangle.
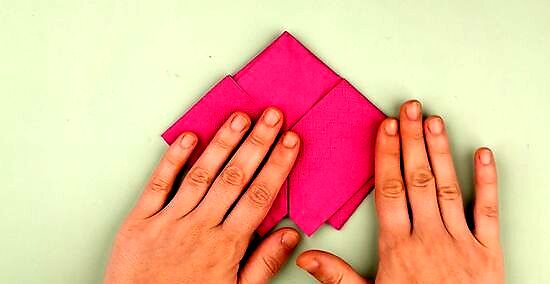
Open up the triangle. After you do this, grab the two sharp corners and pinch them together. While holding the corners together, press down on the rest of the napkin. Give the new edges a crease with your hands or a heavy object. You should now be left with what looks like a diamond.
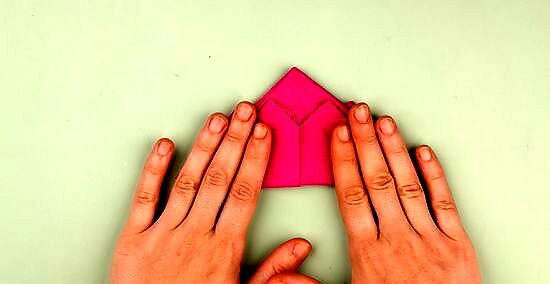
Grab the bottom corner of the diamond. The bottom corner is the corner with the two flaps, not the one that is simply a flat corner. Fold one of the bottom corners up, until you form a triangle. Flip the diamond around, and lift up the other bottom corner. You should now be left with what looks like a small hat (triangle).
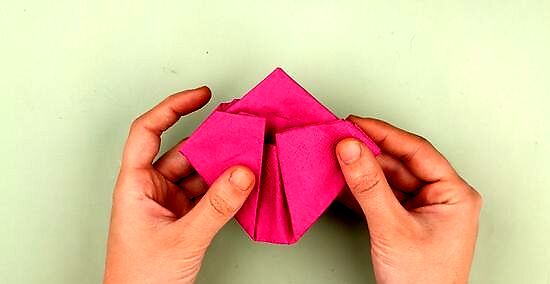
Open up the triangle. Just like you did before, open up the triangle, and pinch together the two sharp corners. Flatten out the rest of the napkin while you are pinching the corners. You are now left with a diamond shape again.
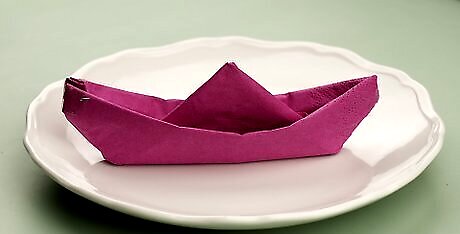
Pinch the top corners of the diamond. Slowly pull them open. Tape the corners together to maintain the sturdiness of your boat. You now have a napkin party sailboat. You can just lay them out as they are, or add in chips/candy into the open area of the boat.






Comments
0 comment