
Before Installation
Insert the Windows NT Installation Setup Floppy Disk 1 into the floppy disk drive.
Start the computer.
Installation
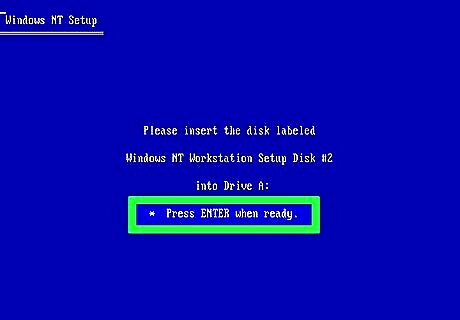
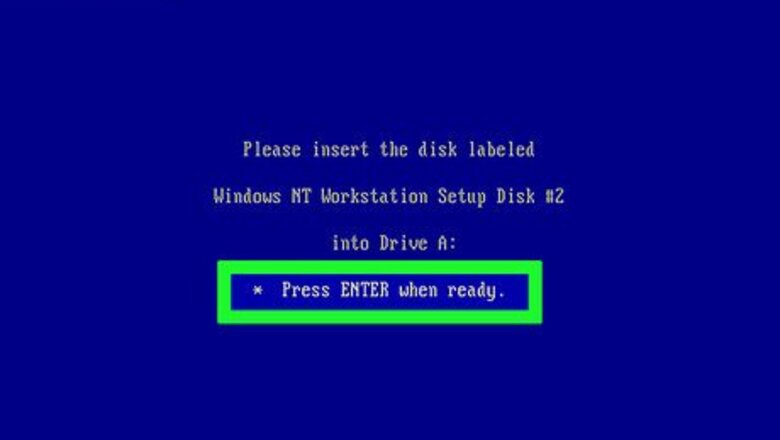
Insert the Windows NT Installation Setup Floppy Disk 2 and press Enter.
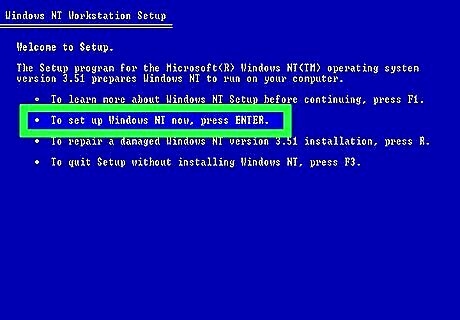
Press ↵ Enter to begin the installation process.
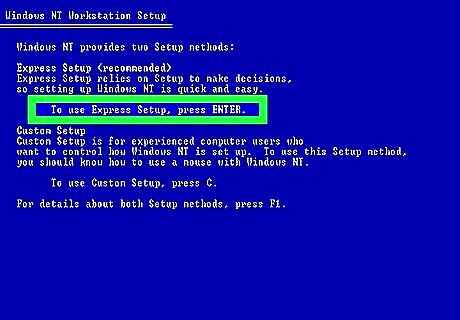
Choose which setup method you would like to use. All down to personal preference but the 'Express Setup' was used for this tutorial as it simplifies the installation process.
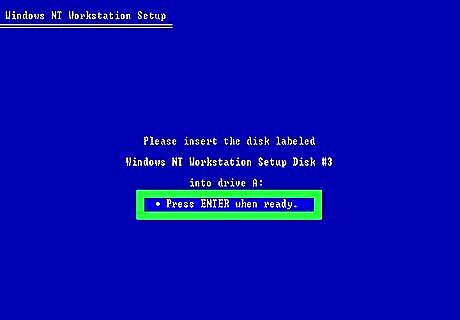
Insert the Windows NT Installation Setup Floppy Disk 3 and press Enter.
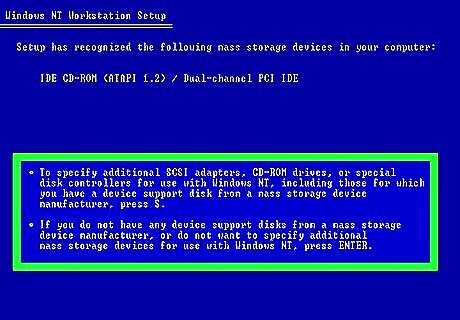
If you have any hardware that requires a separate installation, insert the disk for that hardware and press S else press ↵ Enter. We will not be installing any additional hardware in this tutorial (such as, a mouse, printer, speakers etc) so press ↵ Enter. You will be able to install such hardware at a later date if you cannot find the appropriate installation disk there and then.
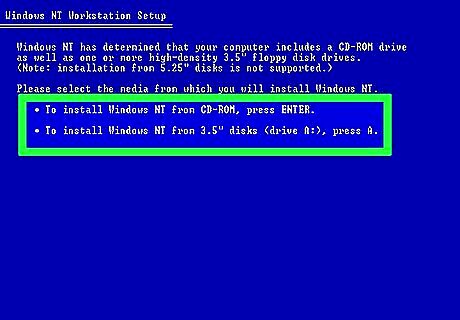
Choose whether to install from a CD-ROM or floppy disk. This is all down to personal preference but the CD was chosen in this tutorial.
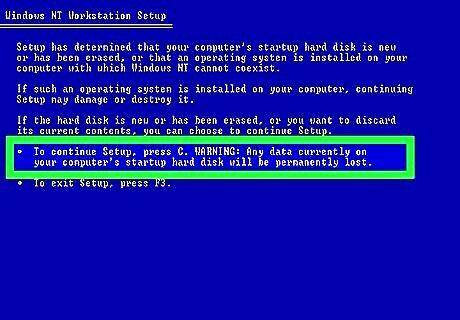
The tutorial was done using a completely formatted hard drive so C was pressed to continue with the installation. If in any doubt about the contents of your hard drive, quit the setup and make sure you've backed up your hard drive first before continuing with this step.
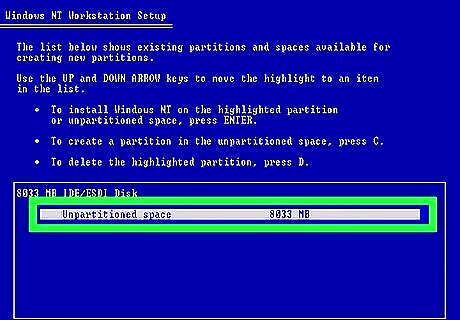
Choose which partitioning to install Windows on by using the arrow keys then pressing ↵ Enter. This tutorial was conducted on a recently formatted hard drive so the unpartitioned space was the only option and was, therefore, selected.
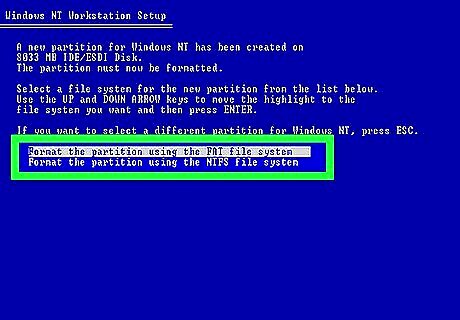
Select which file system you would like to format the hard drive as using the arrow keys and press ↵ Enter.. All down to personal preference but NTFS was chosen in the tutorial. Formatting it as FAT will make it easier to transfer files to and from Windows 9x systems.
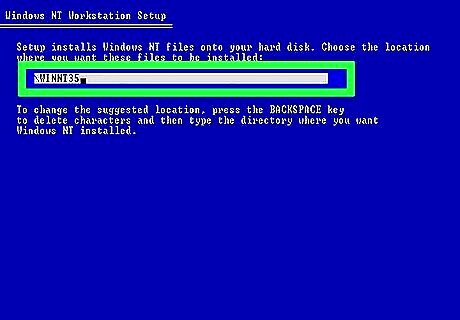
Select where to install Windows and press ↵ Enter. Normally, it is recommended to install Windows in the location Windows recommends.
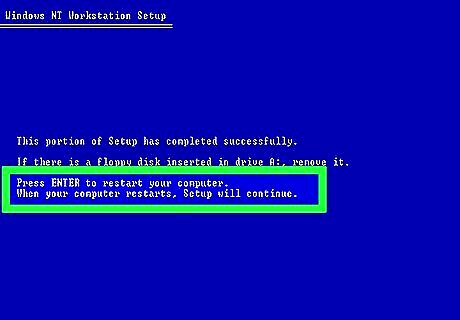
Remove any floppy disks inserted into the computer and press ↵ Enter to restart the computer. If you have the setup CD inserted into the computer, leave it in.
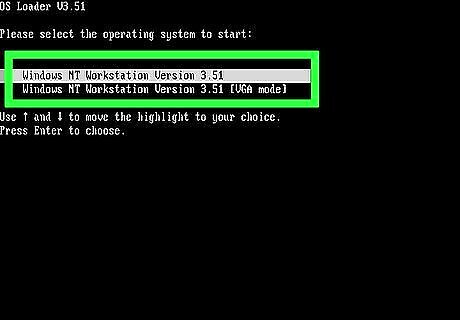
Make sure "Windows NT Workstation Version 3.51 is highlighted and press ↵ Enter. It may choose the operating system without your consent at this point (options appear on screen for less than a second in some cases). This is nothing to worry about. VGA mode only loads the minimal video drivers that Windows required. This is used if a broken or outdated video driver causes Windows to boot incorrectly
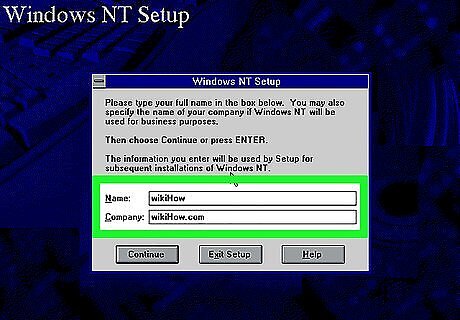
Type in your Name and (optional) a Company name and either click Continue or press ↵ Enter.
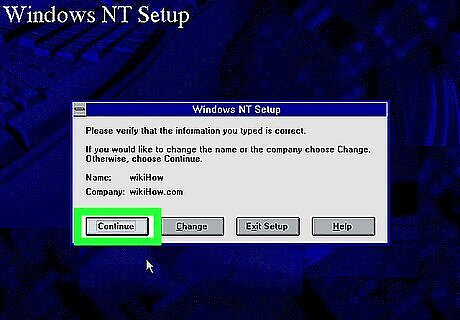
Confirm that the details you typed in are correct and then click Continue.
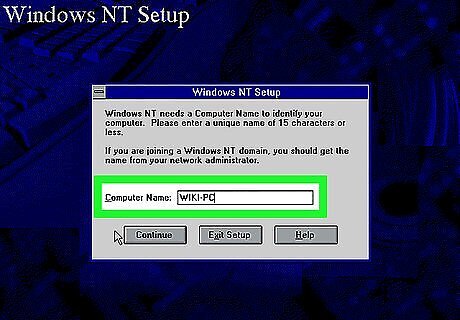
Type in a 'Computer Name' and click Continue. Type any name as long as it is different to your Name and Company.
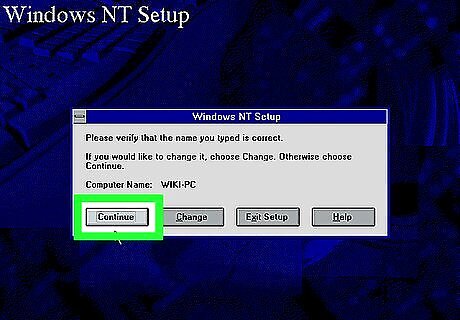
Confirm that the Computer Name you typed in is correct and click Continue.
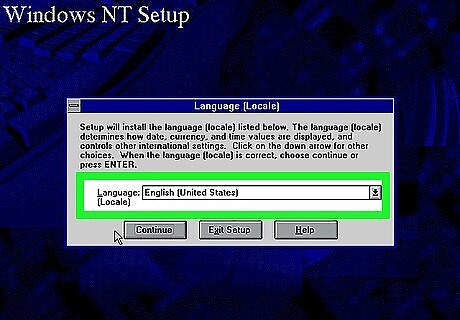
Choose your language from the drop box and click Continue.
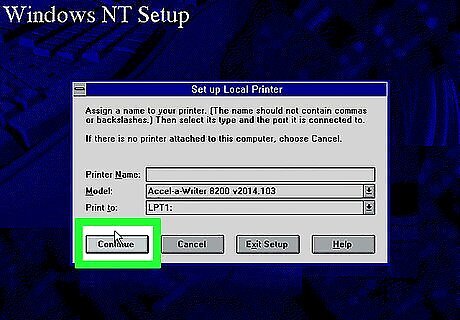
Set up your printer if required. If there is a printer attached to your computer, this page is dedicated to getting it set up. In this tutorial, no printer was connected so Cancel was pressed. You can setup a printer at any time.
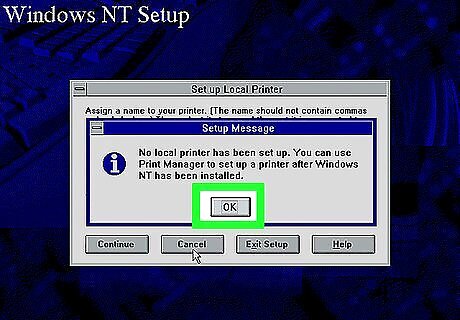
Click OK to continue.
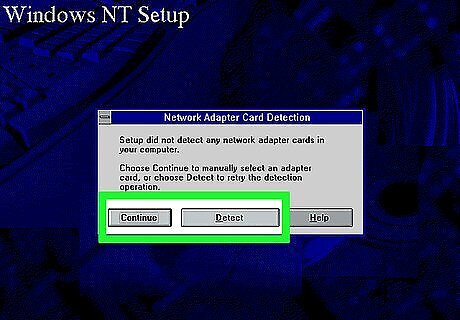
If you want to have a network connection, insert a network adapter into the computer and click Detect. In this tutorial, no network cards were inserted into the computer so Continue was clicked.
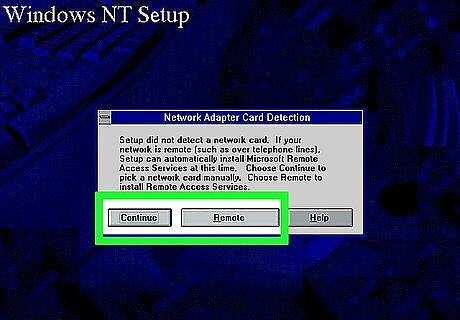
To install a remote network, click Remote. For this tutorial, Continue was selected as we're not using any remote networks.
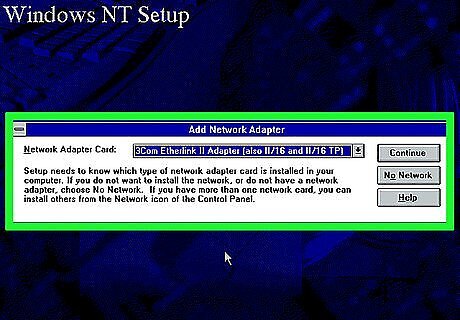
If you have a network adapter card installed on the computer, select the appropriate card from the drop down menu and click Continue. There was no network adapter installed in this tutorial so No Network was clicked.
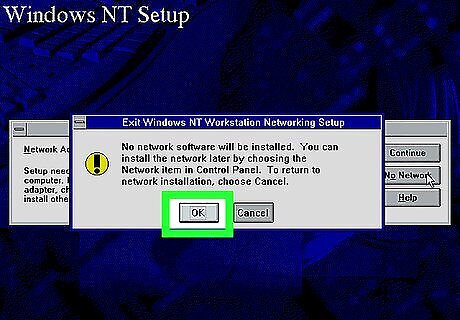
Click OK to not install a network otherwise click Cancel.
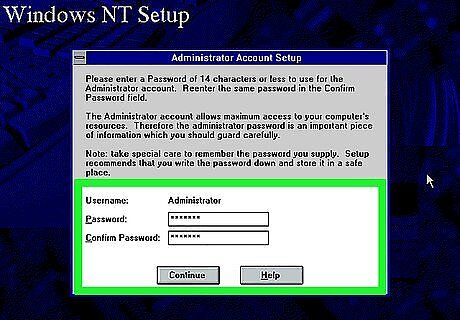
Type in your password and confirm your password and then click Continue.
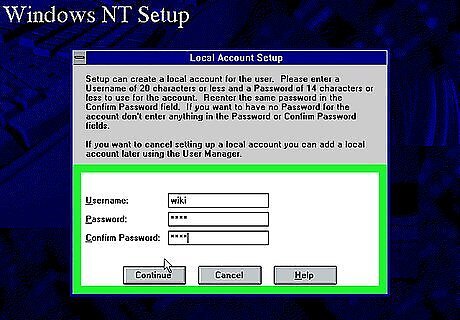
Choose to create a 'local account' if desired. To do so, fill in the fields below and click Continue. A local account was not setup in this tutorial so Cancel was clicked. You can make a local account at a later date.

Click OK if you don't want to set up a 'local account otherwise click Cancel.
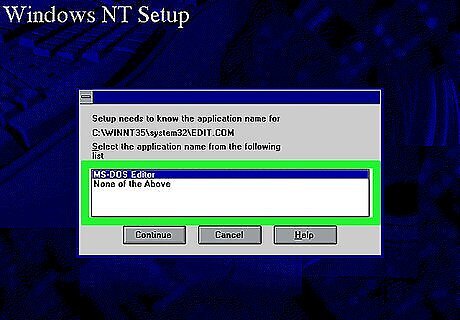
If confronted with this message about "EDIT.COM", make sure to highlight "MS-DOS Editor" and click Continue.
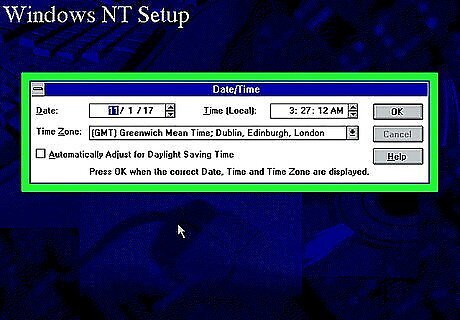
Ensure the Date and Time are set correctly and click OK.

Click OK to continue.

Ensure all your display settings are correctly set and click OK.
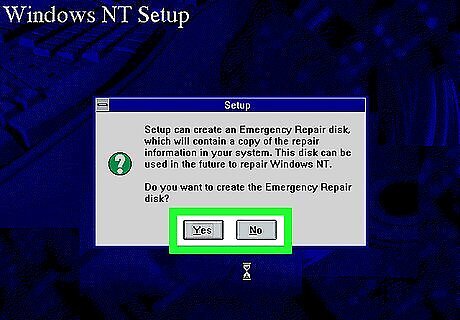
Create an Emergency Repair disk if desired. If your computer becomes inoperable due to software problems, the Emergency Repair disk can be inserted into your computer and attempt to fix problems. No Emergency Repair disk was created in this tutorial so No was clicked. There is no guarantee that the Emergency Repair disk will solve all problems.

Remove all floppy disks from the computer and click Restart Computer. If you have a installation CD inserted into the computer, leave this in.
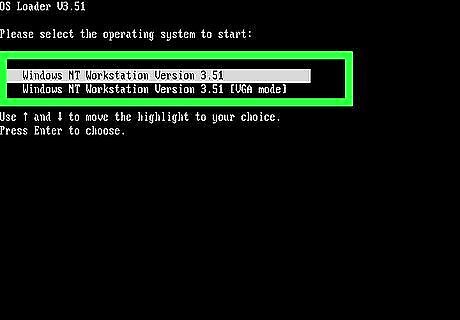
Ensure "Windows NT Workstation Version 3.51" is highlighted and press Enter.
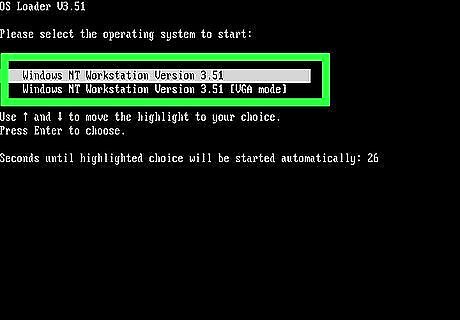
Ensure "Windows NT Workstation Version 3.51" is highlighted and press Enter.
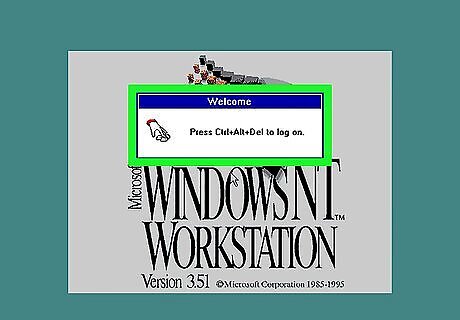
Press the Ctrl + Alt + Del keys.
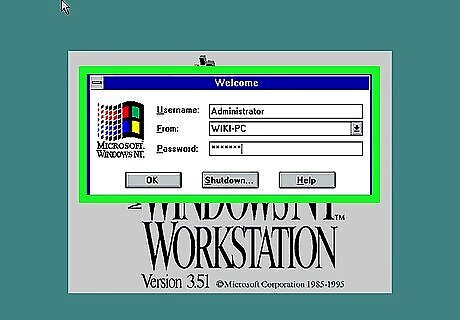
Type in your 'Username' and 'Password' and click OK. If you didn't create a local account, use the username "ADMINISTRATOR" and type in your password.
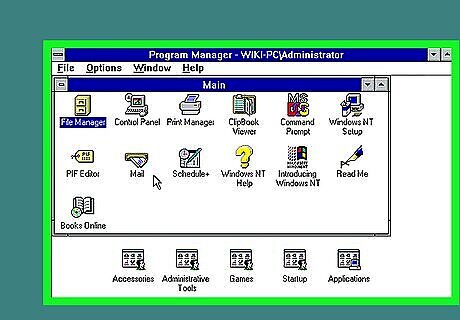
Setup is now complete. Enjoy all the Windows NT 3.51 has to offer.
Shutting Down
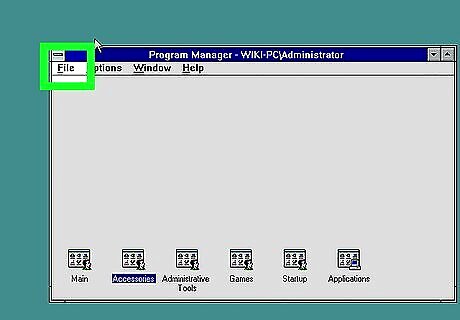
Click File.
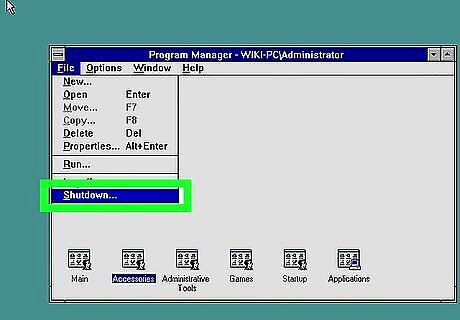
Click Shutdown...
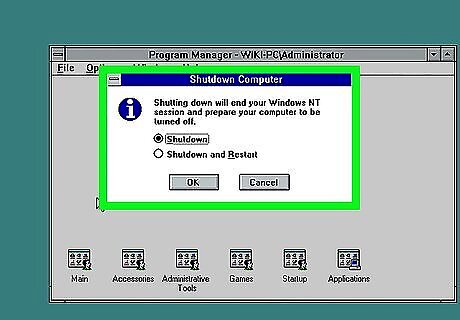
Ensure the "Shutdown" box has been selected and click OK.
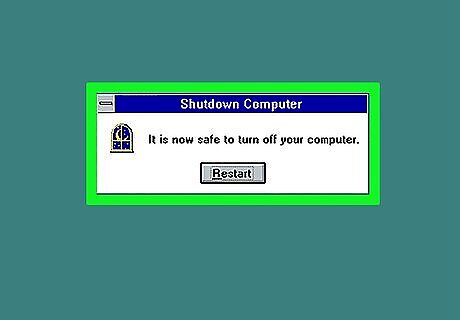
Turn off your computer from either the power button or from the plug.


Comments
0 comment