

Modifying the Clothespins
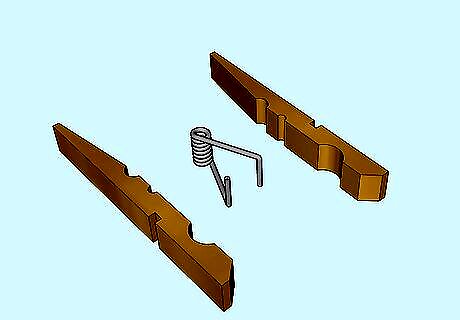
Separate the clothespin pieces. Pull the pieces of wood apart slightly while moving one piece sideways. This will help pop the spring loose. You can usually find wooden clothespins at any local grocery store. If wooden clothespins aren't available, plastic clothespins can also be used.
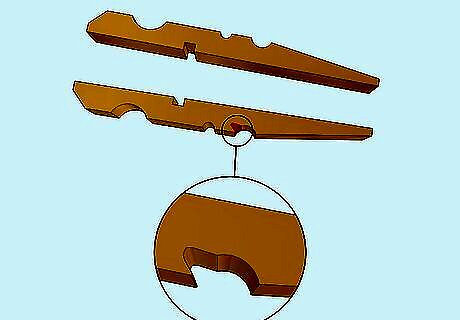
Take one of your clothespin pieces and enlarge the spring hole. Use a utility knife to carve a centimeter or two of wood away between the spring hole and the pointed end of the wood. Carve until you have expanded the spring hole by about a half inch toward the pointed end of the clothespin.
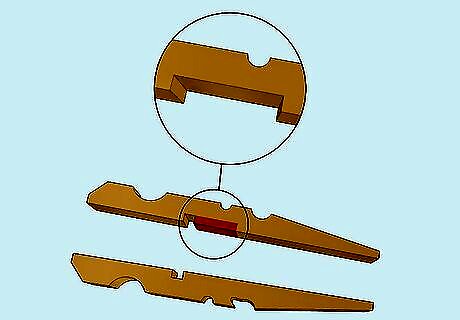
Expand the lip nearest to the narrow end of the other piece of wood. Find the first rounded indentation along the narrow end of the wood. Use your utility knife to cut away the wood from the curved corner closest to the spring hole until it is squared.
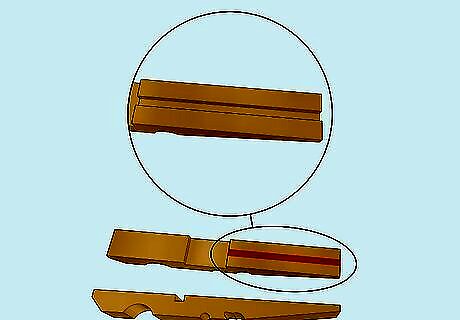
Carve out a barrel for the gun. Use your utility knife to carve a small channel from the spring hole to the pointed ends. It only needs to be a couple centimeters deep. Be sure it is center on the length of wood to create a straight canal on inside surface. Repeat this step on the other piece of wood. This will create a barrel for your gun so you can launch objects with more force since the wood won't be pressing against your ammo.
Building the Gun

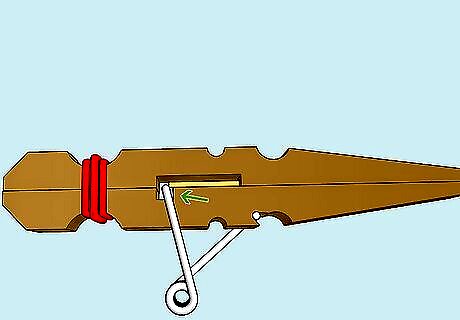
Use a rubber band to hold the two pieces together. Press the clothespin pieces back together so that both thick ends are on one side, and the thin ends are on the other. The flat surface of the clothespin pieces should be facing each other. Wrap the rubber band around both pieces of wood several times. Rotate the remainder of the rubber band in your hand halfway around after each layer. Continue until the rubber band keeps the wood pieces together securely. You can add an additional rubber band around the barrel of the gun to make the gun sturdier if you want. Alternatively, you can use wood or super glue. Apply glue to the flat surfaces of the clothespins. Squeeze the pieces together and wipe away any residue. Wait until the glue dries to proceed.

Reinstall the spring. Place one end of the spring into the front notch on the gun, and place the other end through the spring hole in between the pieces of wood. The coiled portion of the spring should be suspended just below the body of the gun. This will act as the trigger.
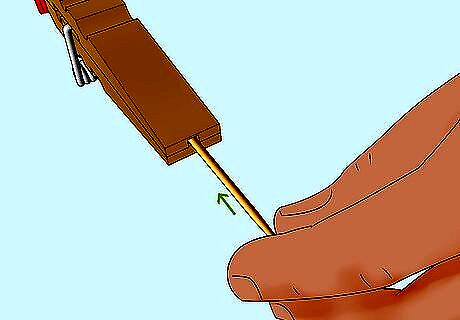
Load the gun. Slide a matchstick or toothpick into the hole at the narrow end of the gun. Keep pushing it until you reach the spring. You might want to break off the point on the side of the toothpick being loaded. The flatter surface will make it easier to push back the spring.
Cock the gun. Slide the toothpick or matchstick in until it pushes the spring back to the cocked position. Once the spring is secured in the back notch, your gun is ready to fire. For additional excitement, try using a strike anywhere match as your ammo and see if you can get it to ignite. You can also light your match before firing and go to battle with flaming artillery. Just be careful and don't play with fire indoors or near anything flammable or explosive. Warning: Be sure that no one is nearby when you select your target. You might think it's just a tiny piece of wood, but it could do some real damage if you accidentally hit someone in the eye.
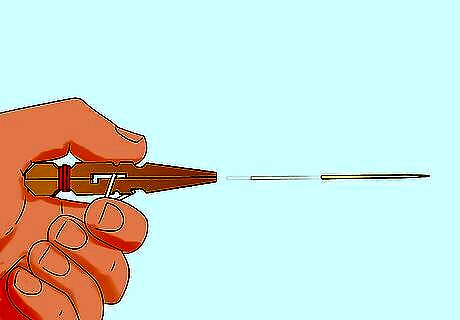
Pull the trigger. Use your index finger to pull back on the coiled spring and fire your artillery. The gun should be powerful enough to fire a toothpick or match up to 20 feet away. It can even penetrate the skin of apple.


Comments
0 comment