views
X
Expert Source
Jon RowlandPlant Specialist
Expert Interview. 7 September 2021.
You can make a single plant greenhouse or one that will hold multiple plants. This is a great way to make a practical or decorative addition to the greenery in your home.
Making a Mini Greenhouse From Bottles and Jars
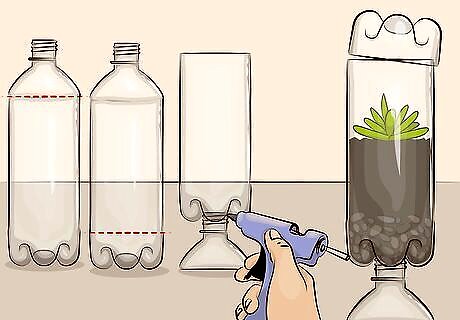
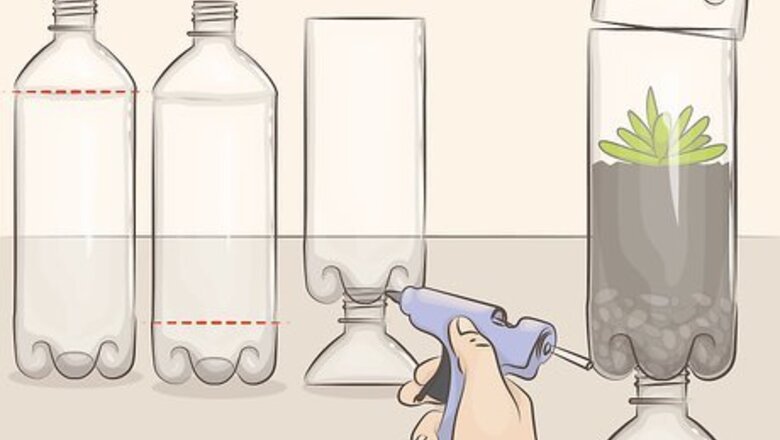
Use a 1 liter soda bottle. You can use a simple 1 liter plastic bottle to make a variety of greenhouses. These are ideal for growing a single, short, shallow-rooted plant. Examples would include an orchid, a small fern, or a cactus. Look for bottles in a variety of shapes, as this can give you more customization options. To make a complex soda bottle greenhouse, begin with two bottles. One should be slightly wider than the other if possible. Carefully cut the top off of the thinner bottle, just past the point where it curves to form the tube section. Cut as straight and clean as possible. Use hot glue to attach the opening of the bottle top you just cut to the bottom of the remainder of the bottle. This will form a vase-like base for your mini greenhouse. Smooth any rough edges so that it sits evenly on a table. Next, make the lid for the greenhouse by cutting the top off of the wider bottle, maybe a centimeter below where the top curves into the tube section. The top of this bottle then becomes a lid for the thinner bottle to which you glued the base. If using this style, be sure to put the proper growing materials at the bottom of your greenhouse. This style does not have drainage and will have to be treated more like a terrarium. A simpler method would be to cut the bottom from a 1 liter bottle and simply push the upper portion into the dirt or over a small pot but this will not look as nice as the method described above.
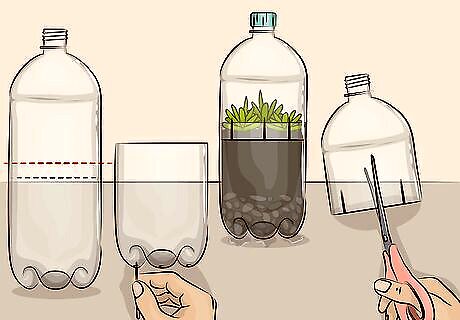
Use a 1 gallon soda bottle. You can use a 1 gallon bottle in much the same way as the 1 liter bottle. It will, however, need to be reasonably tube-like in shape (if going over a pot or making a vase structure). This bottle can accommodate up to three small plants of the same varieties used with the 1 liter jars. You can also use this bottle to create a base which drains, by puncturing the bottom and cutting 1” vertical lines into the bottom edge of the lid. Be sure to leave at least 1” of jar above the desired dirt line when cutting for the lid. This will keep the dirt from falling out when the bottle is opened.
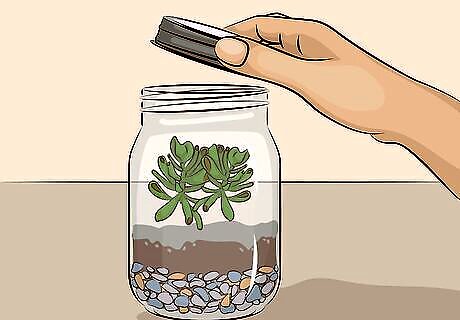
Use a mason jar. If you want to grow very small plants, you can use a lidded mason jar to create a small terrarium. Mason jars come in a variety of sizes and should be chosen appropriate to the size of the plant you intend to grow. Simply fill it with growing materials appropriate to a terrarium and you will have a beautiful tiny greenhouse.
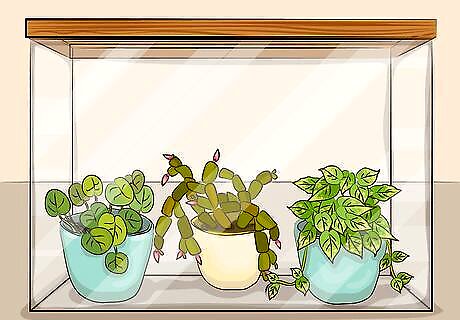
Use a fish tank. You can use a fish tank to make either a mini greenhouse or a terrarium. Either a square or rectangular tank can be used or you can use a fishbowl. It will depend on the size and number of the plants you intend to grow. A small plant in a bed can simply be covered with an upside-down, wide opening fishbowl. A right-side up fishbowl can be used like a terrarium, either covered with plastic or left open at the top. A large tank can be treated as a terrarium with no drainage, holes can be drilled in the bottom to provide drainage, or (if it has a glass bottom) it can be flipped upside-down to form a greenhouse. If left right-side up, a lid will need to be created from plastic wrap or using the wood-frame method described below.
Making a Mini Greenhouse From Picture Frames
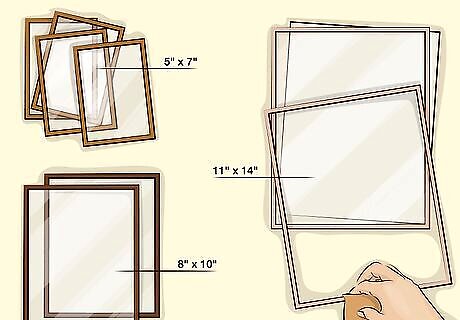
Get frames. You will need eight picture frames with glass or glass equivalent. The sizes and numbers you will need will be: four 5" x 7"s, two 8" x 10"s, and two 11" x 14"s. Sand the frames to remove any unwanted texture and paint. Frames like these can be purchased at a local drug or grocery store, at an art store, at a camera shop, or online from a variety of sources. You can also sometimes find used ones cheaply at thrift stores like Goodwill.
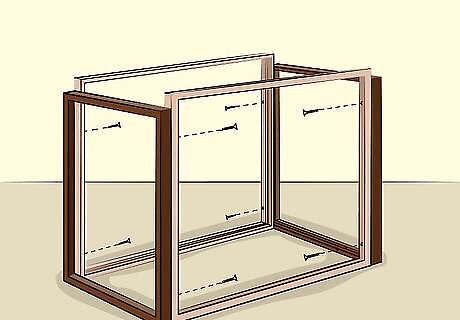
Form the main structure. Form the main body of the greenhouse by aligning a 11”x14” frame with the 8”x10” frame so that the 11” and 10” sides touch, the back side of the 10” frame pressed against the outer edge of the 11” frame. Attach the frames together by drilling a small hole through the inside edge of the larger frame and half-way into the smaller frame. Then use a screw of a size corresponding to the hole you drilled to join the frames securely. Continue joining the frames until you have a rectangle formed by the four largest frames (both 11”x14” frames and bother 8”x10” frames).
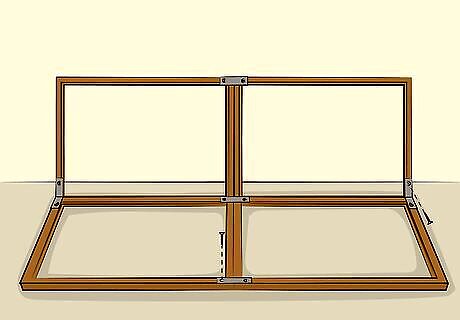
Form the roof. Form the roof of the greenhouse by joining together the four smaller, 5”x7” frames. They will be attached together in twos and then joined to form a triangle roof. A hinge will be attached to allow you to open the greenhouse to water the plants inside. Place two of the 5”x7” frames side-by-side, so that the short ends are touching. Then join them together by screwing 2” mending plates at each end of the joined edge. Drilling pilot holes first will make this easier. Repeat process with the other two 5”x7” frames. Join the smaller frame structures to each other, by placing them at a 90° angle along the long edge and screwing in a 90° angle brace to make them secure.
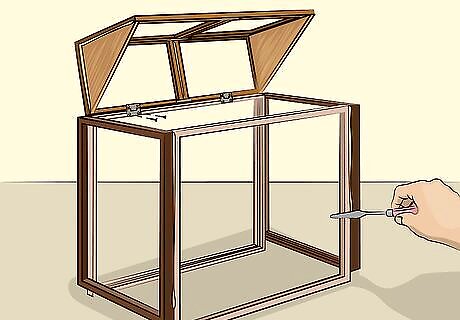
Fill and attach the roof. You will want to attach the roof to the rest of the greenhouse structure in such a way that you can get inside easily. You may be able to simply place it on top but joining it to the rest of the frame will be more secure. Be sure to eliminate large gaps by finding a filler for the ends of the roof. Join the roof to the structure by attaching two 1” utility hinges, evenly spaced, along the edges to be joined. Fill the triangular gap with material cut from the backing of the larger frame, plywood, foam, or another other material you think appropriate. Plywood or foam would need to be accordingly thick, to make them easier to attach to the frame. Whatever material you choose, simply trace the inside of the triangular end (if using plywood or foam) or the outside edge (if using the backing of the frame) and glue into place. The plywood can be nailed if desired.
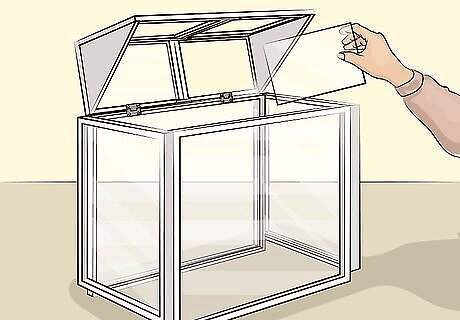
Finish. Finish the frame with whatever paint and decoration you desire and then reattach the glass to the frames. After this, feel free to fill your greenhouse with the appropriate plants. Use wood paint and be sure to do all of your painting before replacing the glass. Replace the glass from the inside of the greenhouse and attach it by hot gluing the corners. Once the glass is in, seal all the edges with more hot glue. You can even use plastic instead of glass frame.
Making a Mini Greenhouse From PVC Pipe
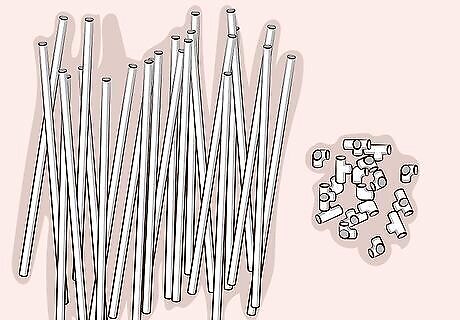
Get PVC pipe and joints. Since this greenhouse is modular and the size is completely up to you, the number and lengths of the necessary pipes will vary to a certain degree. You will need to measure the dimensions that you want and determine the amount of pipe that you need from that. Try to break up the larger structure into 2’ sections. This will give your greenhouse greater stability and strength. Use relatively thin PVC pipe, no more than 1.5” wide. A good size to use would be closer to ¾”. Also, be sure that your joints and PVC pipe are sized so that they will fit together. This should be labeled, but you can test in the hardware store to be sure or you can ask a hardware store employee for help and advice.
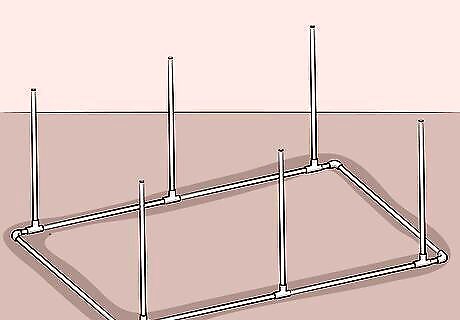
Connect wall pipes. You will form the base and the walls together, out of connected sections of pipe. Begin by connecting vertical pipe sections at two foot intervals to horizontal pipe sections with T pipe joints. Form corners in the horizontal bottom section by attaching a T joint to an elbow joint with a very small section of pipe. When you are done, you should have a horizontal rectangle or square base with posts coming up from the T joints at regular intervals. The corner posts should come from the the last T joint on the long sides, with the elbow joints and short side of the base protruding out from the “wall”.
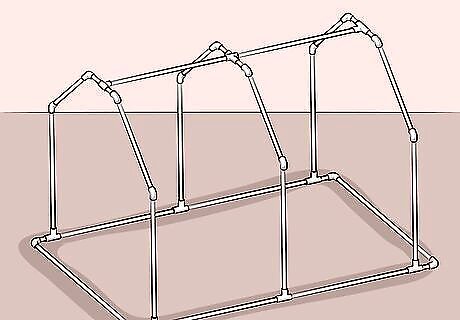
Connect roof pipes. Next, you will need to connect the wall pipes to the roof pipes and form a roof. It is important that the roof not be flat across, as this will diminish the amount of light which can get through, as well as cause rain and snow to build up on top of your structure. Form the central roof structure by creating a line of PVC pipe identical to one long side of the base. The pieces should be connected with four-way joints at the same intervals as your wall posts, except for the ends which will be capped in T joints. From the T joints and four-way joints, place short sections of pipe and cap them in 45° joints. Next, place 45° joints at the top of each of your wall posts. After that you will need to measure how much pipe you need to join the 45° joints of the wall to the 45° joints of the central roof structure. Cut this pipe once measured and fit it between each of the 45° joints.
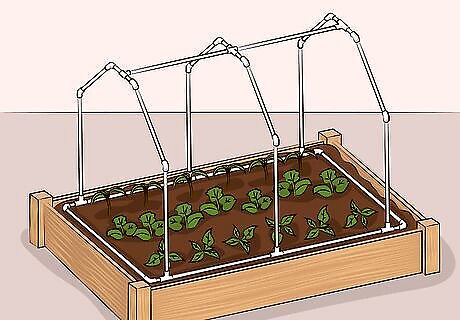
Place on the bed. Place the greenhouse on the raised or ground bed that you want to cover. You can attach it to the ground with stakes and ties or to a raised bed with a conduit anchor but be sure to only attach one long side. This will allow you to lift the structure to water and care for your plants.
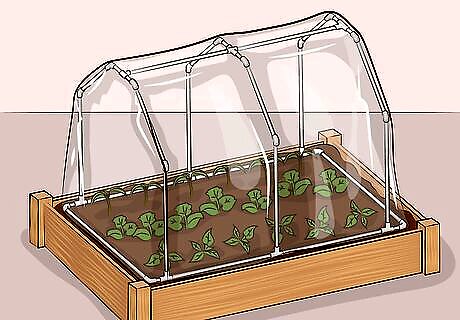
Cover. The final step will be to cover the structure with plastic or cloth, depending on why you need the cover to begin with. If using sheet plastic, use thin clear plastic and cover the whole structure with one large sheet if possible. Whatever material you use, wrap the structure and then secure with tape (duct or packaging). You’re done! Alternatively, you can search for mini greenhouse options available online. Buy a small greenhouse pack that contains all the materials, tools, and instructions for making it.




Comments
0 comment