views
- Select "Color Range" in the "Select" menu and select a color to convert to a vector. Right-click in the selection and click "Make Work Path." Immediately add a Solid Color layer.
- Use the Path tools, such as the Pen or the Shape tools, to create vector graphics in Photoshop. Use the Direct Select tool to edit the anchor points.
- Save the image as a Photoshop EPS file and ensure that "Include Vector Data" is checked to save the image as a vector image.
Converting Images to Vector
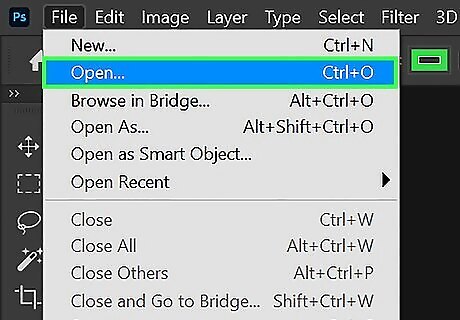
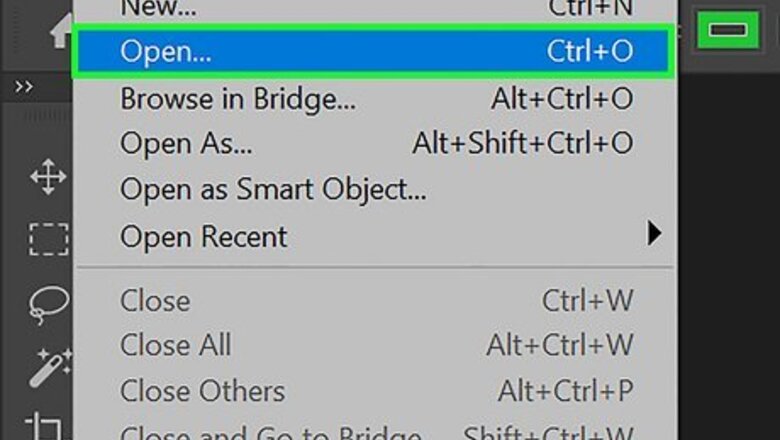
Open the image you want to vectorize. Since Photoshop doesn’t have open vector image formats, you'll need to open another file type (like a JPG or PNG) and convert it to a vector graphic. You can open by dragging and dropping the image you want to open on the Photoshop title screen, or by clicking File followed by Open. Select the image you want to open and click Open.
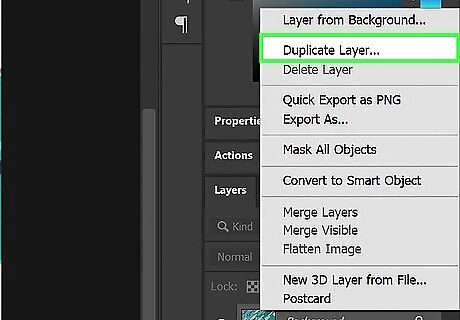
Duplicate the background layer. If your image opens up as a background layer, you'll want to duplicate it. This will allow you to save a copy of the original image in your Photoshop document that you can revert to if you mess up too badly. Use the following steps to duplicate your background layer: Right-click the background layer in the Layers panel. Click Duplicate Layer. Click the eyeball icon next to the background layer to hide the background layer.
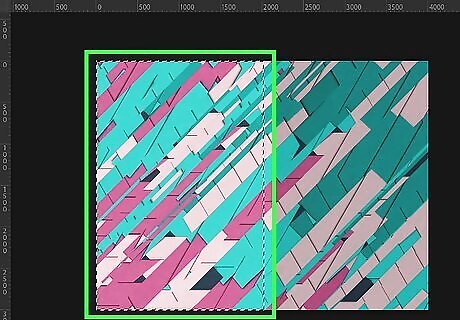
Select the part of the image you want to convert to a vector image. You can use any one of the selection tools in Photoshop to select the part of the image you want to vectorize. You can use the Marquee tool to select a rectangular part of an image. To select an object in an image, you can use the Magic Wand tool and trace the object you want to select. Alternatively, you can click Select Subject at the top of the page to allow Photoshop to select the object for you (this is only in newer versions of Photoshop).
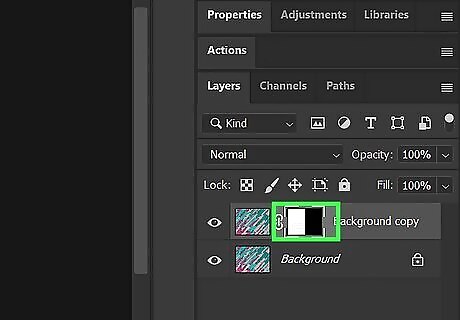
Isolate your selection. Use the following steps to do so: Click the Mask icon at the bottom of the Layers panel. It resembles a circle inside of a square.
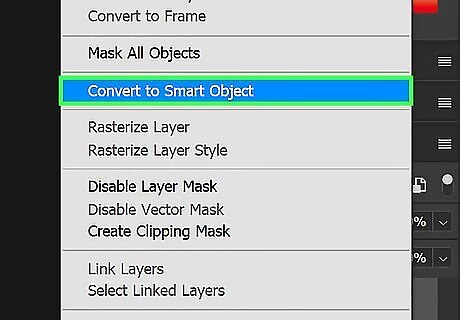
Convert your selection to a smart object. This will allow you to apply filters in a non-destructive way. To convert your selection to a smart object, right-click the layer with your selection in the Layers panel and click Convert to Smart Object.
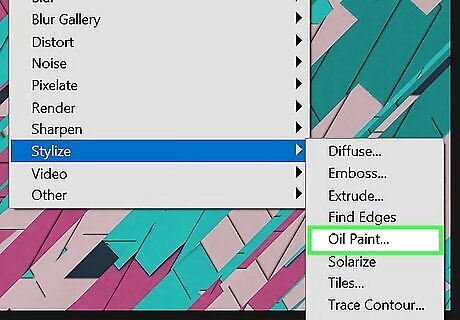
Apply filters to your image to make it look like a drawing or painting. You can find filters by clicking Filters in the menu bar at the top. Vector images are best with simple images that have relatively few colors. Converting your image into a drawing or painting image will make it easier to turn into a vector image. The way you do this will vary depending on the type of image you want to create. The following are a few filters you can try and use: Oil Paint: The Oil Paint filter will give your image a soft painting look. You can find the Oil Paint filter in the Stylize menu. Pallette Knife: The Pallette Knife filter simulates paint applied with a pallette knife. This creates sharp, textured edges and strokes. It's in the Artistic menu. Dry Brush: The Dry Brush filter reduces the amount of color in areas that have a common color. This can reduce the amount of detail needed to convert areas to paths when converting the image to a vector. It's in the Artistic menu. Poster Edges: The Poster Edges filter will add some dark, thick lines to your image. It's in the Artistic menu. Surface Blur: The Surface Blur filter makes textures appear smoother. This reduces the amount of detail in the image. It's in the Blur menu. Unsharp Mask: The Unsharp Mask filter will increase the sharpness and boost the details. It's in the Sharpen menu.
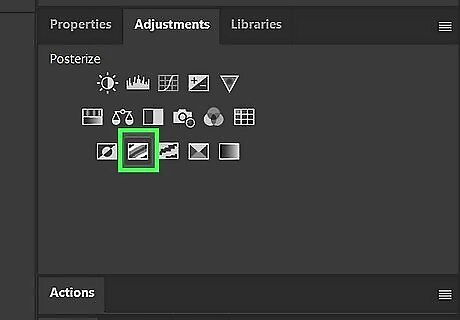
Add a Posturize adjustment. This will allow you to control the number of colors in the image by adjusting the adjustment level slider in the Layers panel. The fewer colors you can get away with, the better. To apply a Posturize adjustment, click your image layer and click the Posturize icon at the top of the Layers Panel. Then right-click the Posturize layer and click Create Clipping Mask. If you aren't happy with how the colors look, you can apply a Hue/Saturation or a Color Balance adjustment to adjust the color. Reduce the saturation all the way to turn it into black and white image.
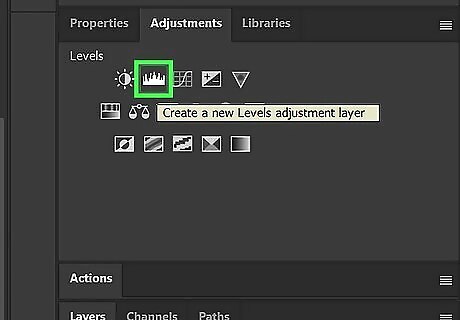
Apply a Levels adjustment. The Levels adjustment will allow you to adjust the highlights, midtones, and shadows by clicking and dragging the three arrow icons below the graph in the Layers panel. Click your image layer and then click the Levels icon to apply Levels. Then right-click the Levels layer and click Create clipping mask.
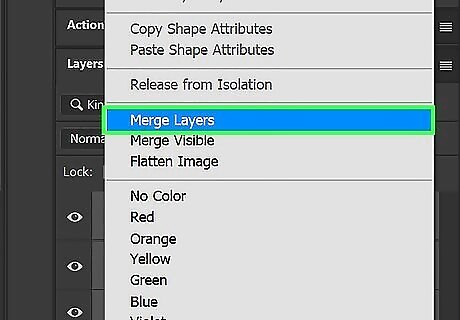
Merge all visible layers. Once you are happy with how your image looks, merge your visible layers. To do so, hold Shift and click to select all visible layers in the Layers panel. Then right-click any layer and click Merge Layers. This will merge all layers into a single layer. Do not merge the background Layer.
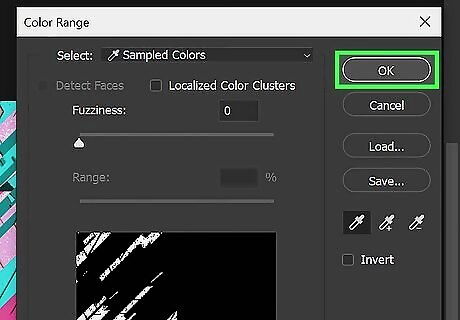
Select a color to vectorize. You'll need to do this for all colors in the image. Use the following steps to select a color. Click Select in the menu bar. Click Color Range. Make sure Fuzziness is set to 0. Make sure the Invert checkbox is not selected. Click Ok.
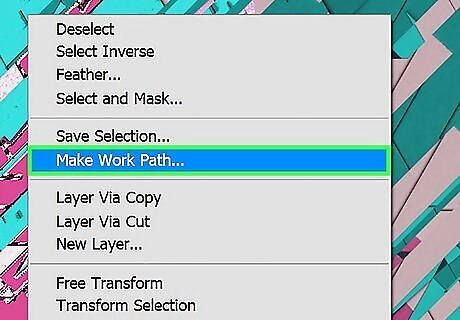
Create a work path for the color. Use the following steps to do so: Select any selection tool in the toolbar. Right-click within the selection. Click Make Work Path. Make sure tolerance is set to 2 or 3. Click Ok.
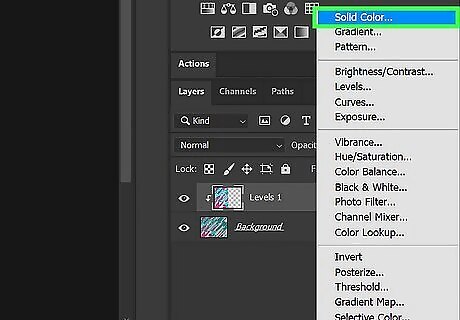
Create a new vector layer. This will create a new layer with the vector data. Use the following steps to do so: Click the Filter adjustment icon at the bottom of the Layers panel, which resembles a half-black and half-white circle. Click Solid Color. Click Ok.
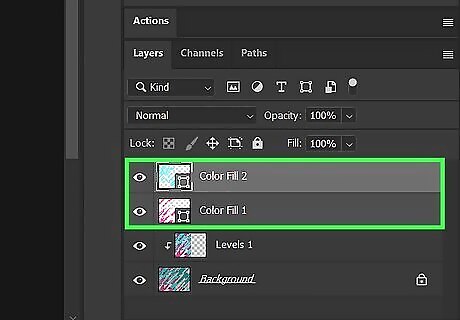
Repeat for all colors in the image. For each additional color, use the Color Range option to select the color. Right-click within the color using a selection tool and click Make Work Path. Then click the Adjustment filter icon in the Layers panel and click Solid Color. You can download free actions that will automate the process of vectorizing colors. You can make adjustments to the vectors using the Pen tool, the Convert Point Tool, the Direct Select, or the Path Select tools.
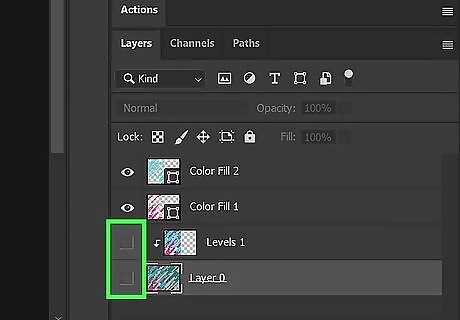
Delete or hide the raster layers. Once you are finished vectorizing all the colors in the image, delete or hide the raster layers. That way only the vector layers are visible.
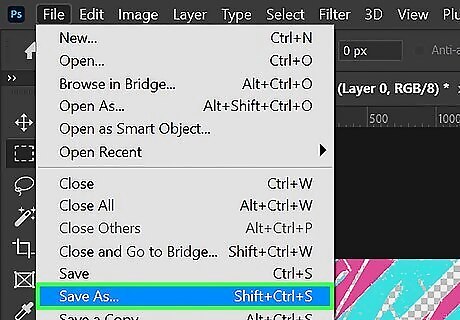
Save the image as a vector file. Use the following steps to do so: Click File in the menu bar at the top. Click Save as. Select "Photoshop EPS" from the drop-down menu next to "Format." Click Save. Ensure "Include Vector Data" is checked. Click Ok.
Creating and Editing Vector Graphics
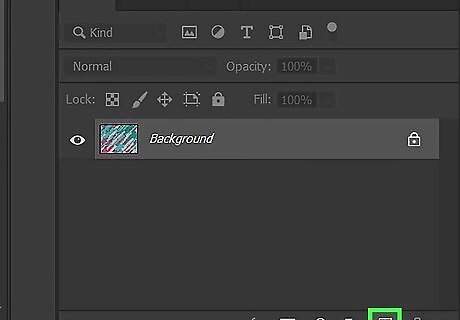
Create a new layer. When adding elements to an image, it's always best to do that in a new layer. Click the icon that resembles a page at the bottom of the Layers panel. Then click your new layer. You can turn off the background layer by clicking the eyeball icon next to the Background layer in the Layers panel.
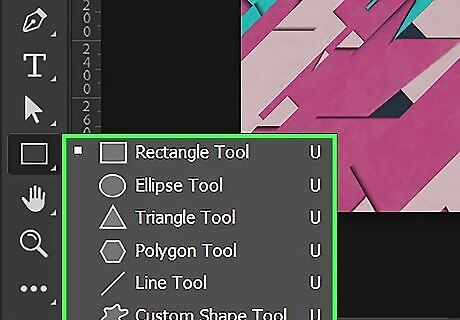
Select one of the shape tools. The Shape tools are vector path tools that create shapes using vectors. Click and hold the Rectangle tool in the toolbar, and then click the shape tool you want to use. The shape tools include the rectangle tool, the rounded rectangle tool (with rounded corners), the ellipse tool (for creating circles and ovals), the polygon tool, the line tool, and the custom shape tool. The custom shape tool allows you to select a shape from a menu bar at the top.

Click and drag to create your shape. You can make the shape any size you want. If you want your shape to be proportional, press the Shift key while clicking and dragging.
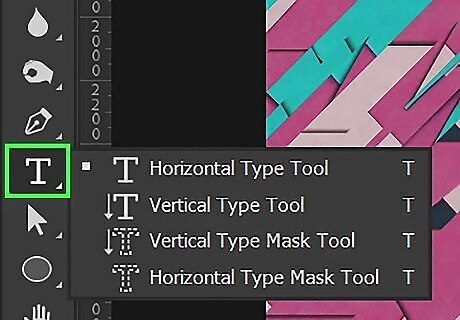
Use the text tool to add text. The text tool is used to add text to your image. Text is usually in a vector format. Click the icon that resembles a "T" in the toolbar and click where you want to add text. Then type the text you want to add. You can use the menu bars at the top of the page to select your font, font style, text size, text color, and alignment.
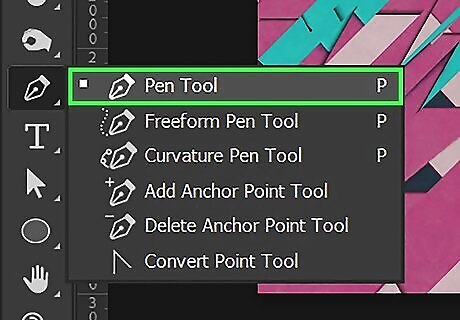
Use the Pen tool to draw your own vector shapes. The Pen tool has an icon that resembles a fountain pen in the toolbar. Click the Pen tool and use it to draw your own custom shapes. To draw a straight line with the Pen tool, click once to place an anchor point. Then click again in a new place to create another anchor point with a straight line between the two anchor points. To create a curved line with the Pen tool, click once to create an anchor point. Then click and drag the mouse in another location to create a curved line between the two anchor points. The direction and distance you drag the line will determine the direction and distance you drag the mouse. To complete a shape with the Pen tool, click the original anchor point you started. The Freeform Pen tool allows you to draw shapes the way you would with a brush tool. To access the Freeform Pen tool, click and hold the Pen tool in the toolbar and click the Freeform Pen tool.
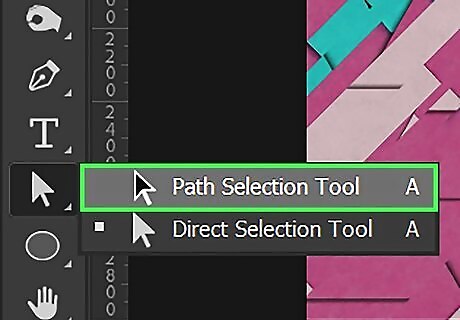
Use the Path Select tool to move vector objects. The Path Select tool is the icon that resembles a black mouse cursor. Click it and then click one of your vector shapes to select it. Click and drag to move the vector shape.
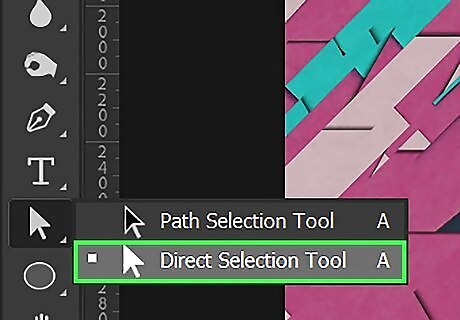
Use the Direct Select tool to adjust anchor points. This will adjust the shape of your vector objects. To select the Direct Select tool, click and hold the Path Select tool in the toolbar. Click the icon that resembles a white mouse cursor. Click an anchor point in one of your vector objects to select it. Click and drag to move the anchor point.
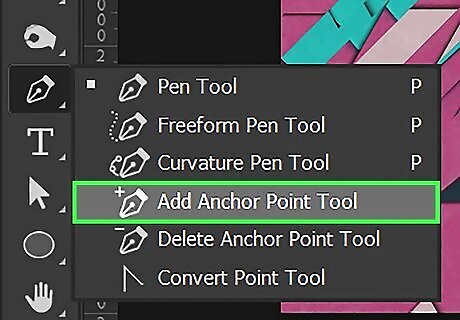
Add or remove anchor points. Click and hold the Pen tool in the toolbar, and select the Add Anchor Point tool, or the Delete Anchor Point tool. Use one of the following steps to add or remove an anchor point from one of your vector objects: To add an anchor point to a vector object, click the Add Anchor Point tool under the Pen tool submenu in the toolbar. Click along the path (line) of a vector object to add an anchor point To remove an anchor point from a vector object, click the Delete Anchor Point tool under the Pen tool submenu in the toolbar. Click an anchor point in a vector object to delete it.
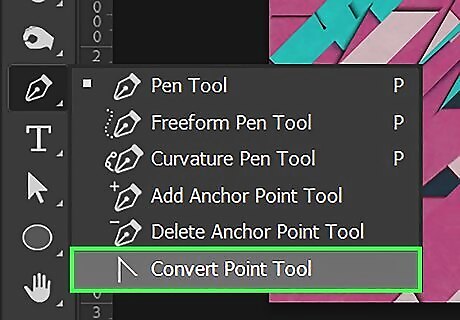
Use the Convert Point tool to adjust the curve of a line. Click and hold the Pen tool in the toolbar to display a submenu. Then click the Convert Point tool. Click and anchor point one of your vector objects to display bezier curve lies. Click and drag the points at the top of the bezier curve lines to adjust the curve of the line.
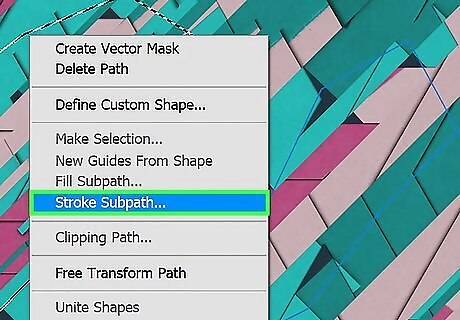
Add a stroke to your vector object. This will create a solid outline around your vector object. Use the following steps to add a stroke to one of your vector objects: Select a foreground color using the colored square in the toolbar or in the Color panel. Select the Pen tool. Right-click the path of a vector object. Click Stroke subpath. Select a tool type in the drop-down menu (i.e. Pencil tool, Brush tool, etc) Click Ok.
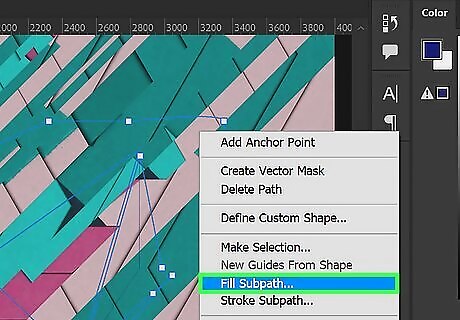
Add a color fill to your vector objects. This will fill the inside of your vector object with a color. Use the following steps to add a color fill to a vector object. Select a foreground color using the colored square in the toolbar or in the Color panel. Select the Pen tool. Right-click the path of a vector object. Click Fill Subpath. Make sure Foreground Color is selected in the drop-down menu. Click Ok.
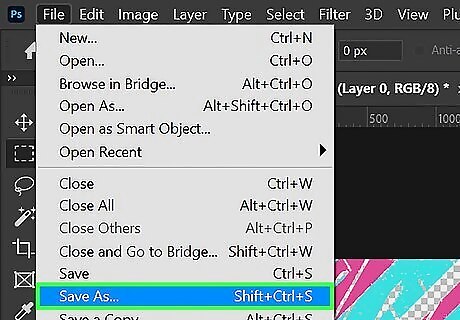
Save the image as a vector file. Use the following steps to do so: Click File in the menu bar at the top. Click Save as. Select "Photoshop EPS" from the drop-down menu next to "Format." Click Save. Ensure "Include Vector Data" is checked. Click Ok.


Comments
0 comment