views
- You can easily open TCP and UDP ports in any Linux-based firewall product.
- Iptables is preinstalled on most Linux distributions and is very easy to configure.
- If you're using Firewalld, adding the --permanent flag to firewall-cmd commands ensures your changes won't be undone when you stop and restart the firewall.
Iptables
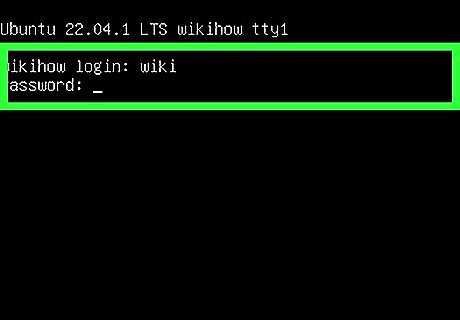
Log in to your Linux server and/or open a Terminal window. Most Linux distributions, including Ubuntu, Debian, CentOS, Fedora, and Red Hat, come with IPtables already installed. You can open ports in Iptables using simple commands.
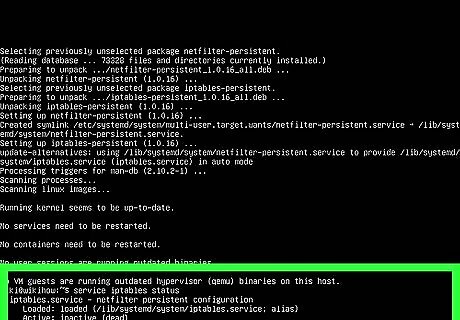
Run service iptables status to make sure your firewall is active. If the firewall isn't running, start it using service iptables start.
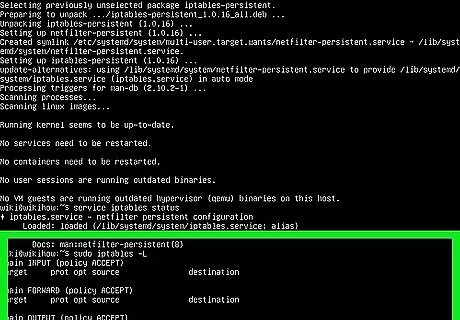
Use sudo iptables -L to list the current firewall rules. The rules are broken into chains: The INPUT chain for inbound connections to the host system. The FORWARD chain is used for routing. The OUTPUT chain is used for outbound data leaving the host system. Each chain has a policy that determines what happens to packets. When you open a port, you'll need to specify the chain. For example, to open incoming SSH connections, you'd use the INPUT chain.
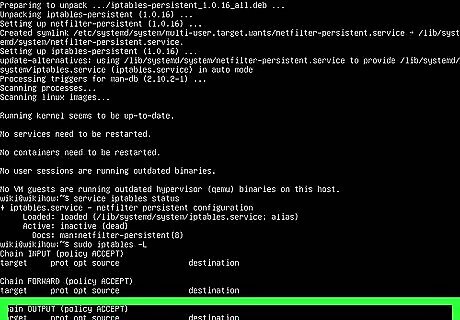
Use sudo iptables -I INPUT -p tcp -m tcp --dport 22 -j ACCEPT to open a port. In this example, we're opening incoming connections to port 22, but you can replace 22 with the port you want to open. If you're opening an outbound port, replace INPUT with OUTPUT. If opening a UDP port, replace tcp with udp. To only open the port to a particular IP address or subnet, use sudo iptables -I INPUT -s xxx.xxx.xxx.xxx -p tcp -m tcp --dport 22 -j ACCEPT
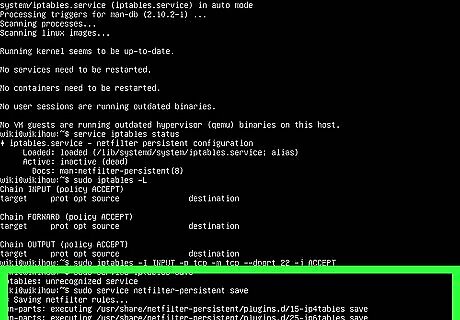
Use sudo service iptables save to save your changes. If that doesn't work, try one of these commands: sudo /sbin/iptables-save for Ubuntu and Debian. /sbin/service iptables save for CentOS, Red Hat, and Fedora. To close a port, use iptables -I INPUT -p tcp –-dport 22 -j REJECT. Replace "22" with the port you want to close—and definitely don't close port 22 if you're currently SSH'd into the server!
Uncomplicated Firewall
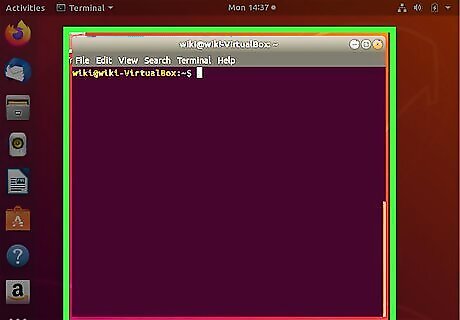
Log in to your Ubuntu server. UFW is preinstalled on all Ubuntu systems. If you're logged in to the GUI interface, open a terminal window.
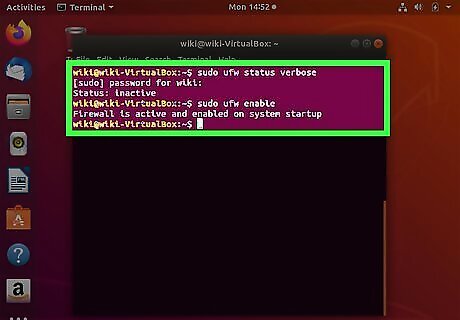
Type sudo ufw status verbose and press ↵ Enter. If UFW is already running, you'll see a status message, as well as a list of any firewall rules (including opened ports) that already exist. If you see a message that says Status: inactive, you'll need to enable the firewall: Type sudo ufw enable and press Enter to start the firewall. To turn on firewall logging, use sudo ufw logging on.
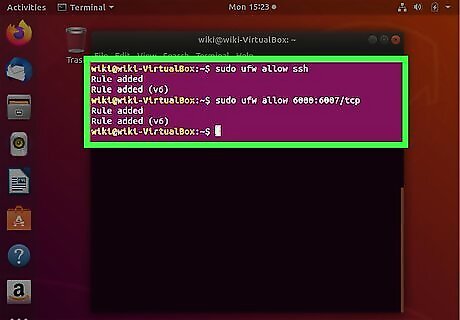
Use sudo ufw allow [port number] to open a port. For example, if you want to open the SSH port (22), you'd type kbd and press Enter to open the port. There's no need to restart the firewall, as the change will take effect immediately. If the port you're opening is for a service listed in /etc/services, you can just type the service's name instead of the port number. Example: sudo ufw allow ssh. To open a specific range of ports, use the syntax sudo ufw allow 6000:6007/tcp, replacing 6000:6007 with the actual range. If the range is UDP ports, replace tcp with udp. To specify an IP address that can access the port, use this syntax: sudo ufw allow from 10.0.0.1 to any port 22. Replace 10.0.0.1 with the IP address, and 22 with the port you want to open to that address. To close a port, use sudo ufw deny 22, replacing 22 with the port you want to close.
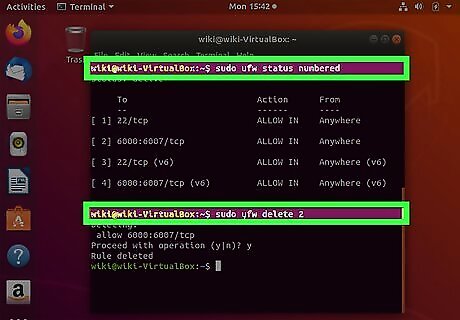
Delete firewall rules that aren't needed. Any ports that aren’t specifically opened are blocked by default. If you open a port and decide you want to close it, use these steps: Type sudo ufw status numbered and press Enter. This displays a list of all firewall rules, each beginning with a number to represent it in the list. Identify the number at the beginning of rule you want to delete. For example, let's say you want to remove the rule that opens port 22 (don't do this if you're currently using SSH to access the server), and that rule is listed on line 2. Type sudo ufw delete 2 and press Enter to remove the rule at line 2.
Firewalld
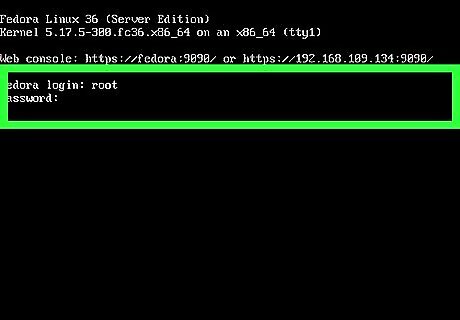
Log in to your server. If you're using Firewalld on your CentOS, Red Hat Enterprise, SUSE, or Fedora system, you can easily open ports from the command line. Firewalld is the default firewall solution for all of these distributions.
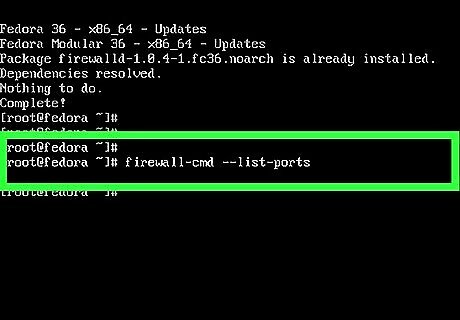
Run firewall-cmd --list-ports to view all open ports. The PUBLIC zone is Alternatively, you can view the entire firewalld configuration and view all allowed and denied ports and services by running sudo firewall-cmd --list-all.
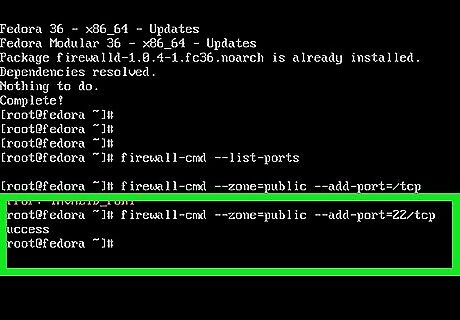
Use the firewall-cmd command to open a port. In this example, we'll show you how to open the SSH port (22) to remote access: firewall-cmd --zone=public --add-port=22/tcp instantly opens the port, but does not make the change permanent. To make the change permanent, add the --permanent flag to the command: firewall-cmd --zone=public --permanent --add-port=22/tcp. To open a UDP port, replace tcp with udp. To open the port by service name, use firewall-cmd --zone=public --permanent.
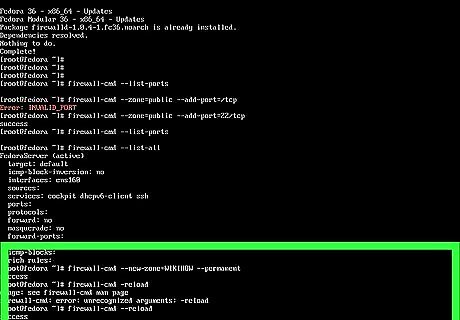
Open a port for a specific IP address. If you only want to allow connections to or from one IP, you'll need to create a new firewall zone for that address. To create a new zone, use firewall-cmd --new-zone=MYZONENAME --permanent. Then, run firewall-cmd –reload to refresh your configuration. Run firewall-cmd --get-zones to view your zones—you'll see your new zone now. To link the IP address to the zone, use firewall-cmd --zone=MYZONENAME --add-source=10.0.0.1 --permanent. Replace the same IP address with the proper address. Then, open the port to the zone by specifying the zone name instead of "public:" firewall-cmd --zone=MYZONENAME --permanent --add-port=22/tcp.
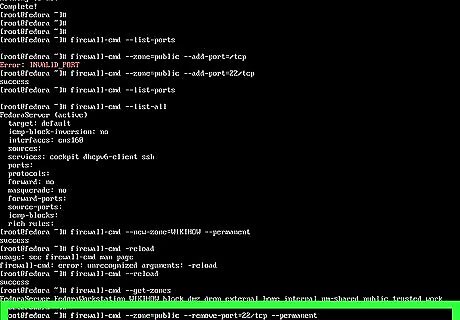
Close a port. If you need to close a port, you can do so using different flags with the firewall-cmd command. In this example, we'll close port 22 to the public permanently: firewall-cmd --zone=public --remove-port=22/tcp --permanent.
ConfigServer Firewall
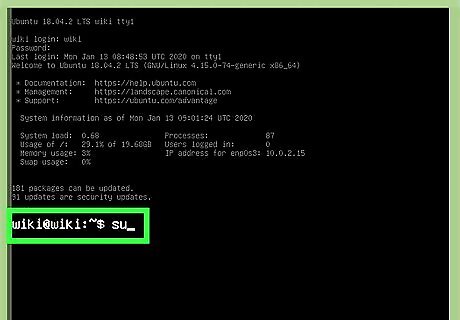
Log in to your server. If you're not logged in as the root user, you can su to root to adjust your configuration, or preface commands with sudo.
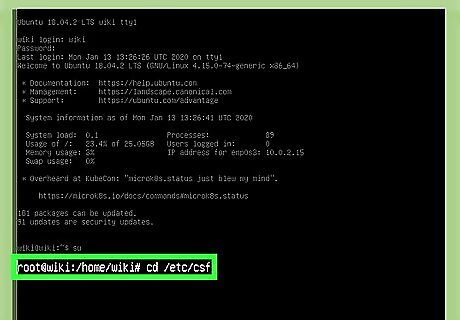
Go to directory that contains your CSF config file. The file is called csf.conf, and it's saved to /etc/csf/csf.conf by default. To do this, type cd /etc/csf and press ↵ Enter.
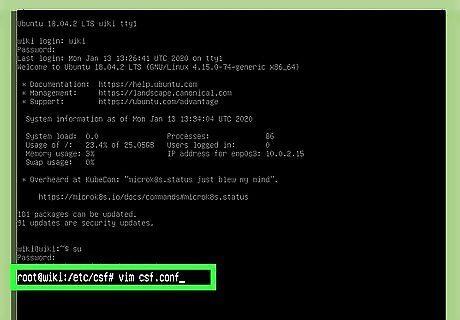
Open csf.conf in a text editor. You can use any text editor you wish, such as vim or nano. To open csf.conf in vim, type vim csf.config and press ↵ Enter.
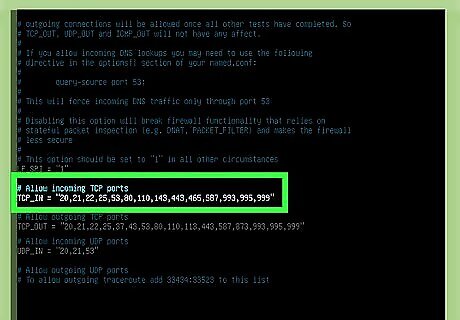
Add an incoming port to the TCP_IN list. TCP ports. Once you have the file open, you will see TCP_IN and TCP_OUT sections. The TCP_IN section lists open inbound TCP ports separated by commas. The ports are in numerical order to make things easy, but it's not required that the ports you stick to the order. You can add ports to the end of the sequence, just separate them with commas. For example, let's say you want to open port 999, and the current open ports are 20, 21, 22, 25, 53, 80, 110, 143, 443, 465, 587, 993, 995. After adding port 999 to the list, it will look like this: 20, 21, 22, 25, 53, 80, 110, 143, 443, 465, 587, 993, 995, 999. To get into insertion/typing mode in vim, press the i key on the keyboard.
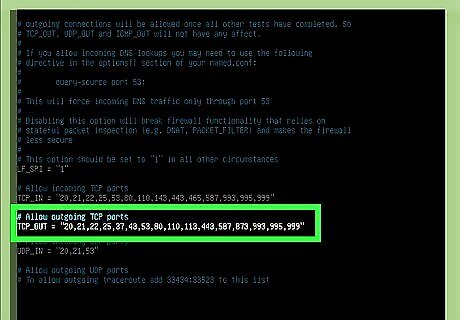
Allow outgoing TCP to the TCP_OUT list. Just as you did with the incoming port, add any outbound TCP ports you'd like to open to the TCP_OUT list.
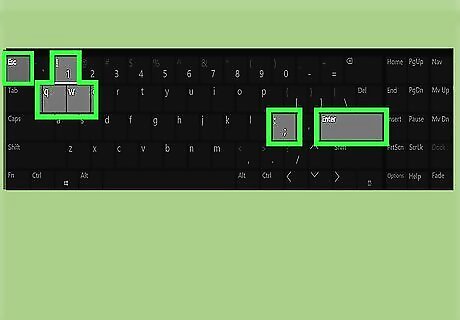
Save your changes and exit the file. Follow these steps to save and exit the file: Press the Esc key. Type :wq!. Press ↵ Enter.
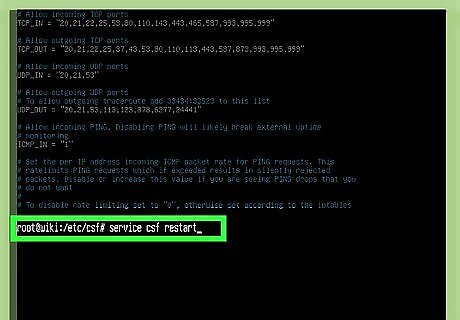
Type service csf restart and press ↵ Enter. This restarts the firewall and opens the new ports. To deny a port, re-open the file, delete the port, save the file, and then re-start the firewall.
Advanced Policy Firewall
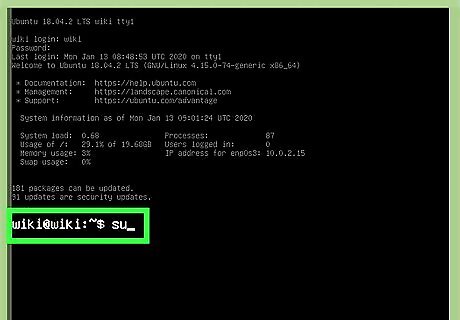
Log in to your Linux server. If you're using APF on your Linux system, you'll make changes to your firewall configuration in the APF configuration file.
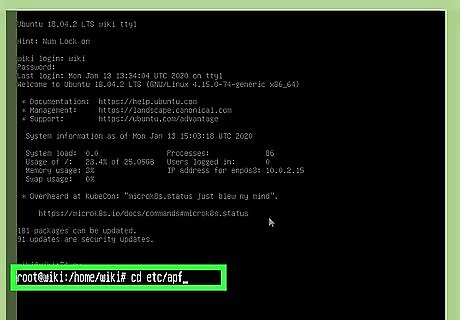
Go to the directory that contains your APF config file. The file you're looking for is called conf.apf, and it'll be in /etc/apf by default. Type cd /etc/apf to enter that directory.
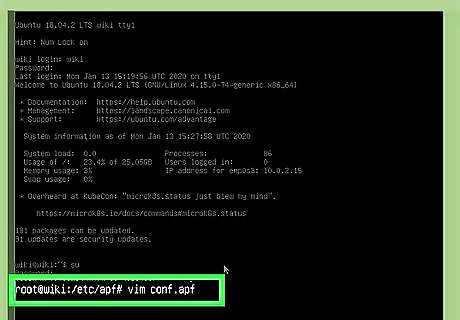
Open /etc/apf/conf.apf in a text editor. You can use any text editor you wish, such as vim or nano. To open conf.apf in vim, you'd type sudo vim /etc/apf/conf.apf and press Enter.
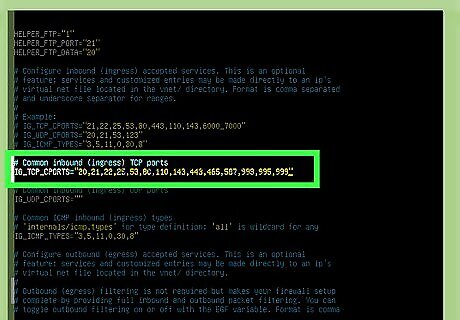
Add inbound ports to the IG_TCP_CPORTS list. Once you have the file open, you will see IG_TCP_CPORTS and EG_TCP_CPORTS sections. The IG_TCP_CPORTS section lists open inbound ports separated by commas. The ports are listed in numerical order to make things easy, but it's not required to stick with it. You can add ports to the end of the sequence, just separate them with commas. For example, let's say you want to open port 999, and the current open ports are 20, 21, 22, 25, 53, 80, 110, 143, 443, 465, 587, 993, 995. After adding port 999 to the IG_TCP_CPORTS list, it will look like this: 20, 21, 22, 25, 53, 80, 110, 143, 443, 465, 587, 993, 995, 999. To get into insertion/typing mode in vim, press the i key on the keyboard.
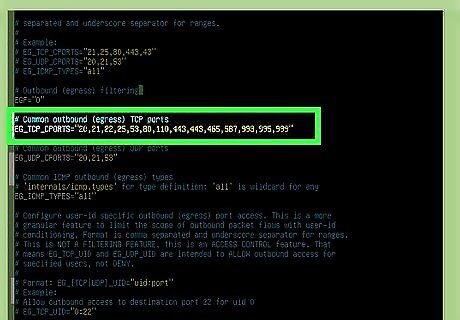
Allow outbound ports to the EG_TCP_CPORTS list. Just as you did with the incoming port, add any outbound TCP ports you'd like to open to the EG_TCP_CPORTS list.
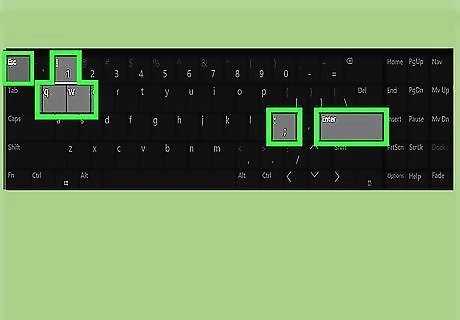
Save your changes and exit the file. Follow these steps to save and exit the file: Press the Esc key. Type :wq!. Press Enter.
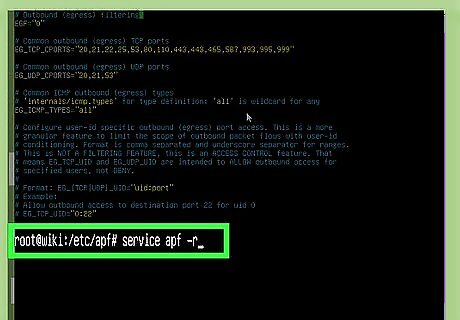
Type service apf -r and press ↵ Enter. This restarts the APF firewall and opens the new ports. To deny a port, re-open the file, delete the port, save the file, and then re-start the firewall.


Comments
0 comment