
Getting Started
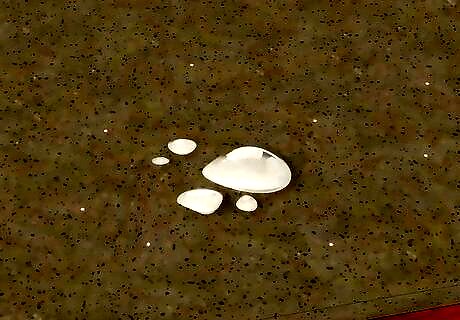
Test whether the granite needs sealing. Although you may find that many countertops do not require being sealed, applying a sealer is common practice. To test your surface, leave a few drops of water or a wet paper towel on the granite for 10 to 15 minutes, doing this in an inconspicuous area. If the water begins to soak into and darken the countertop, continue to the next step to begin sealing. If the water remains beaded on the surface, the countertop is already stain-resistant, and should not be sealed. If the granite will be exposed to petroleum-based products, repeat the test with a few drops of mineral oil. Seal if either test darkens the granite. If the water doesn't soak in, don't seal it anyway "just in case." The sealer needs to soak into the stone to be effective, and if it can't, it may build-up and leave excess residue.
Avoid ever putting lemon juice on your countertop. The "lemon juice test" is commonly referenced on internet blogs; however, according to the Natural Stone Institute, acidic products such as vinegar and lemon juice can dull or etch your surface. Granite is vulnerable to acidic or alkaline-based products, and products such as lemon juice and vinegar are capable of chemically damaging your surface and its underlying resins.
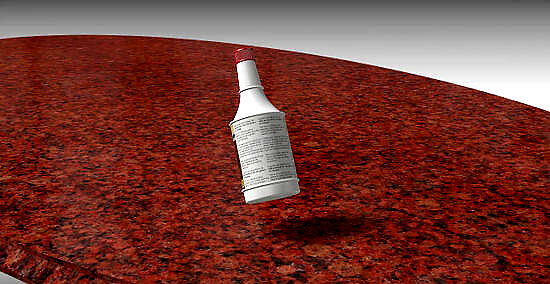
Select a penetrating sealer for natural stone. Only use products specifically designed for natural stone, and ideally for granite specifically. A penetrating or "impregnating" sealer will soak into the countertop to reduce absorption. This works to effectively defend your surface from stains over a prolonged period of time. These guidelines are enough to prevent harm to your countertop, but you can dive into the fine print if you're interested: To make sure you get the right sealer, check with a stone supplier in your area to see what sealer they recommend for your particular stone. For best results, choose a carbon resin sealer. Look for one that mentions "fluorocarbon aliphatic resin" on the label. These can provide years of good protection, but are also the most expensive. The next best options use "siloxane" or "silane," which tend to be a little worse at repelling oil. Avoid silicone-based sealers or linseed-based sealers. They are the least durable and will need to be resealed every eight months or so, and can sometimes even cause color deterioration. Some sealant chemicals can be either water-based or solvent-based. Experts disagree on which is best; both are adequate, but water-based sealer is easier to apply and better for the environment. Consider following-up with cleaning solutions containing ioSeal Protectants, as they work to enhance and maintain the effects of impregnating sealers without building up.
Read the instructions on the label. There are many varieties of sealer, and it's best to follow the specific instructions if available. The method below provides more detail than most labels will give you, but always go with the label if the two sets of instructions contradict each other.
Sealing the Granite Countertop

Clean the granite. Wipe off the granite with water and dish soap or a specialized stone cleaner like Tenax, then wipe with a dry towel or cloth, preferably lint-free. Use a degreasing product, then do a final clean with denatured alcohol. Wait 24 hours to allow the granite to dry completely and return to its original color before continuing, or 8 hours if a strong breeze is blowing across it. If the counters were just installed or other construction projects are happening in the same room, it's best to wait until after they're finished. Dust from construction can interfere with the sealer's protection.

Wear gloves and ventilate the area. Solvent-based sealers may produce unpleasant or harmful vapors during application, so open a window and put on a pair of gloves. Don't worry; the sealer will not leave any harmful chemicals in your kitchen.
Test in a small corner. Choose an unobtrusive corner of the granite, perhaps where a microwave or other appliance is normally located. Follow the steps below on a tiny area first, to make sure the sealer is compatible with the granite. If the sealer leaves a hazy residue or discolors the granite, find a different product. While the advice in the preparation section should prevent most of these problems, the extreme variety found among granite surfaces makes it impossible to reduce the chance to zero.

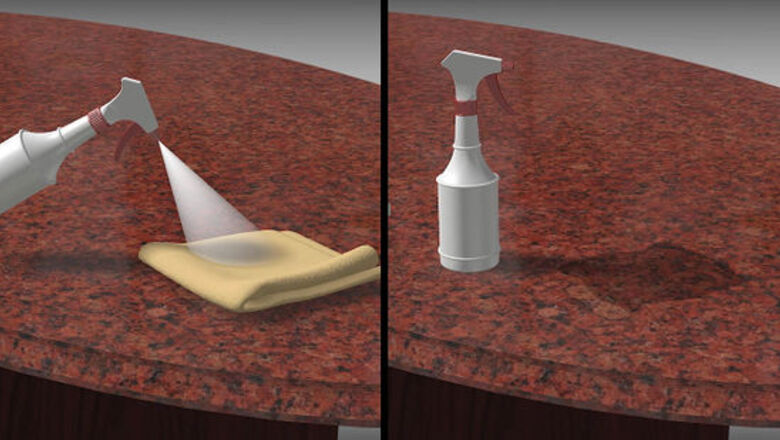
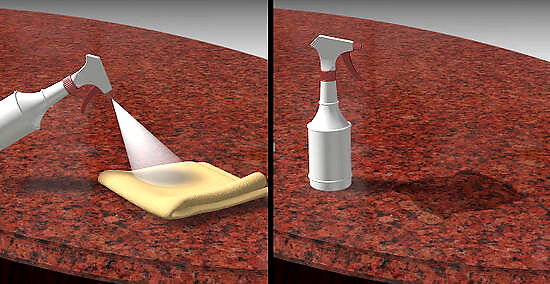
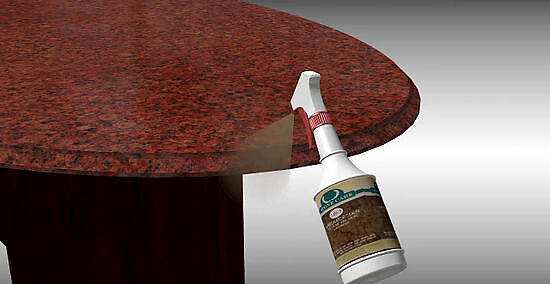
Apply the sealer evenly. Cover the surface evenly with the spray bottle, or using a completely clean, sealer-dampened, lint-free cloth or brush if the sealer is not in a spray bottle. The entire surface should be damp, but not soaked.

Let the sealer absorb into the stone. Check your instructions for the exact time, as leaving it on too long can cause discoloration. Typically, the sealer needs about 20 minutes to soak into the stone, but trust the label for this one.

Apply a second coat if necessary. If the label directs you to add a second coat, this is usually done when the first coat is almost, but not completely dry. Wipe this over the surface to ensure even application.

Wipe up the sealer. After you leave the sealer on for twenty minutes or as long as the label direct, wipe up the remaining sealer with a clean rag. Too much sealer left on the counter can cause an unattractive haze.

Leave the counter alone for 48 hours. This is another number that depends on the exact product, but the sealer will need to "cure" for some length of time before it is effective. Some products cure after an hour or two, but it's still a good idea to avoid washing the counter for the first 48 hours after application.
Consider future maintenance and re-sealing. Many installers recommend re-sealing annually; however, oftentimes this is unnecessary. Different types of stones need to be sealed at different frequencies. Additionally, the need to re-seal can be removed simply by cleaning your surface with products containing ioSeal Protectants, which progressively seal to enhance and maintain your surface's protection. Various conditions influence how often your surface needs to be sealed. The most relevant conditions are color, porosity, quality of the sealer, and whether or not ioSeal has been used.


Comments
0 comment