
- Use a digital food thermometer to check that the thickest part of your chicken is at least 165 °F (74 °C). This is the best way to tell if it’s cooked.
- Look for other signs of doneness like a firm texture, clear or white-ish juices running from the chicken, and a white or very light pink internal meat color.
- Allow a few extra minutes of cooking time for bone-in pieces. If the chicken is frozen, lower the temperature and double the cook time to ensure it’s done.
Using a Thermometer

Opt for a digital meat thermometer. Digital thermometers provide the most accurate temperature readings, but an analog thermometer will give you a good approximation in a pinch, too. Choose an instant-read digital thermometer to check your chicken toward the end of its cook time, or go for a leave-in digital thermometer to watch the temperature continuously during cooking. Keep an analog thermometer as a backup in case the batteries in your digital one die.
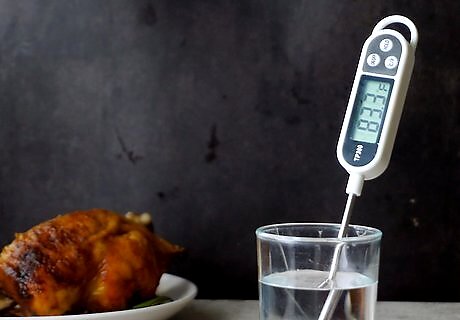
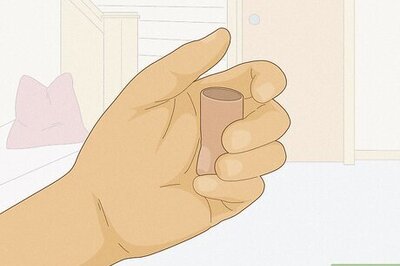
Calibrate your thermometer by sticking it in ice water for 30 seconds. Fill a large pitcher with ice and cold tap water, then stir until the ice is distributed evenly. Place your thermometer into the pitcher of ice water (making sure it’s not touching the bottom or sides) and wait 30 seconds (or until the temperature reading settles on one number). A calibrated thermometer will read 32 °F (0 °C). If your analog thermometer is off, flip it over and adjust the dial gauge by twisting the nut with pliers. Then, test it in the ice water pitcher again. Digital thermometers can’t be adjusted if the readings are off. To correct for this, note how many degrees off the thermometer is, then add or subtract that number later. For example, if the thermometer reads 38 °F (3 °C) when it should read 32 °F (0 °C), subtract 6 degrees for the right temperature.
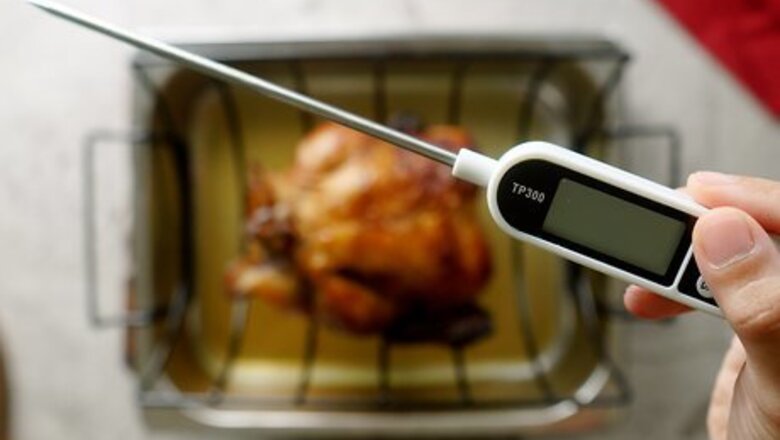
Find the thickest part of the chicken. Identify which area of the chicken has the most meat on it, usually toward the center of the piece. If you’re cooking a whole chicken, the thickest parts will be the breast or thigh. Always test the temperature of the thickest part of the meat to ensure the entire piece is cooked, and not just the thin portions.
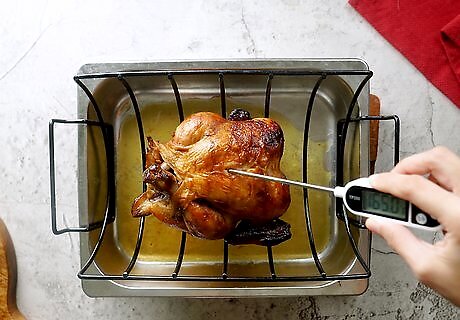
Push the thermometer into the thickest section of meat for 30 seconds. Stab your thermometer about 2 in (5.1 cm) into the chicken, making sure that the end of the thermometer stays near the middle of the piece and isn’t touching fat or bone. Wait about 30 seconds, or until your thermometer reading becomes steady, to get an accurate temperature reading. Chicken (and all poultry) should be cooked until its internal temperature is 165 °F (74 °C). Dark meat is safe to eat at this temperature, but may have a better texture if it’s slightly hotter (175–190 °F (79–88 °C)). If your chicken is above this temperature, it may be overcooked. If it’s under, put it back on the heat until it hits 165 °F (74 °C). If you have a thin piece of chicken, like a chicken breast, insert the thermometer sideways.
Checking Doneness without a Thermometer
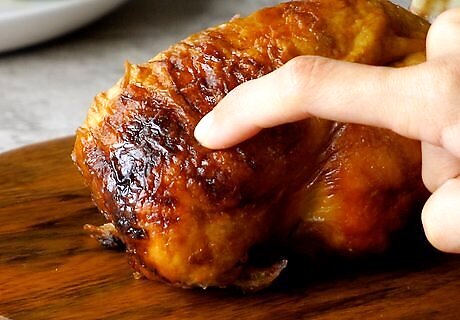
Poke the chicken with your finger to see if it’s firm. As it cooks, chicken loses moisture and tightens up. Raw chicken feels rubbery or wobbly, while cooked chicken feels firmer and springs back from your touch. Give your chicken a poke in a thick spot that doesn’t have a bone underneath to see if it has a firm, cooked texture. Undercooked chicken will feel quite dense or give a “snap” when you bite into it. Cooked chicken feels and looks more fibrous or almost stringy. To get an idea of what cooked chicken feels like, keep your hand limp and press your middle finger to your thumb. If your chicken has bones in it, the meat will fall off fairly easily if it’s fully cooked.
Look for clear or white-ish juice running from your chicken. Check the drippings or juice that collected in the pan or dish that your chicken is cooking in. Clear or white juice indicates a cooked chicken, while a more pink liquid means your bird needs more time. If you don’t see any juice in the pan, make a small incision at the thickest part of the meat and see what color juice runs out. Checking the color of the juice to test whether the meat is done is a trick that only works for chicken and not other types of meat. Instead of pouring out all those tasty drippings, try using them to make gravy to serve with your chicken!
Check if your chicken has shrunk in size. Uncooked chicken holds a lot of moisture which runs or evaporates away during the cooking process. Meat also tends to shrink while cooking because the muscle fibers contract when heated. When your chicken is fully cooked, it’ll be about 25% smaller than it looked when it was raw. The exact amount of shrinkage depends on how much moisture and fat the raw piece of chicken has. Extra fatty or juicy pieces will shrink more compared to lean cuts.
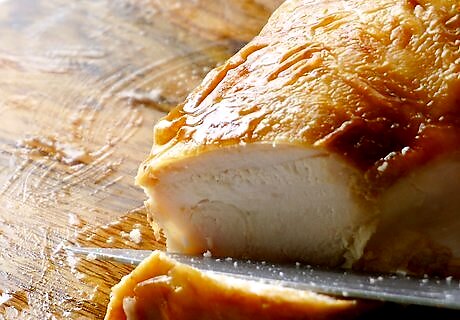
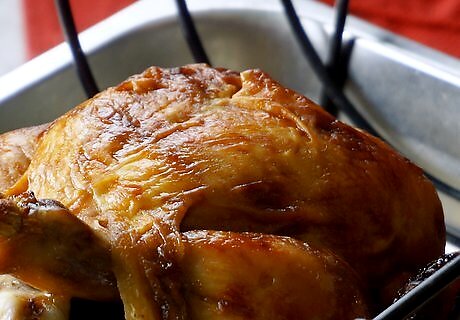
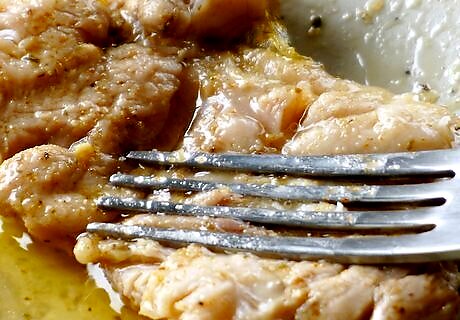
Make a cut and look for a white-ish meat color inside the chicken. Slice open the thickest part of your chicken and check the color—cooked chicken should be white, very light pink, or light tan on the inside with no glaring, shiny pink areas. If there are large pink areas, the chicken needs more time. It’s possible that chicken will still have a slightly pinkish hue even when it’s fully cooked. Always confirm doneness with your meat thermometer if you see some pink to avoid overcooking your chicken.
Double check that the recommended cooking time has passed. Keep your chicken on the heat for the entire time your recipe suggests (unless it’s burning—then, take it off the heat). If you’re going without a recipe, compare your cut to a chicken cooking time chart for an estimated time. For example, at 350 °F (177 °C), most boneless breasts should cook for 35-45 minutes while whole, unstuffed chickens roast for about 1 hour and 40 minutes. Remember that the exact time it takes to thoroughly cook chicken depends on the cooking temperature and the size of the pieces being cooked. Chicken pieces with the bone in will take a few minutes longer to cook than boneless cuts. If you’re cooking from frozen, double the cook time for breasts, thighs, or other pieces. Increase the cook time by 50% for frozen whole chickens. Because of the longer cook time, lower your temperature to prevent burning. For example, if you’d normally roast a thawed chicken at 425 °F (218 °C), adjust the temperature to 375 °F (191 °C).


Comments
0 comment