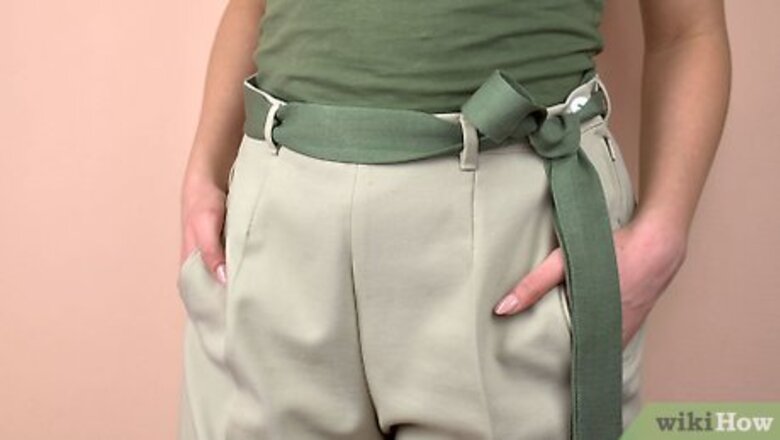
views
Creating a Half Bow
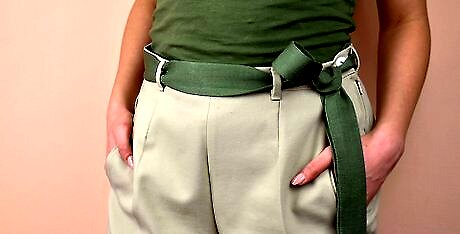
Tie the bow in the center of your body or off to the side. Choose to tie your pants bow in the center for a neater, more symmetrical ensemble. For a more relaxed, chic look, plan on tying it off to the side. If you aren’t sure which look you prefer, try them both and take a photo of yourself with each option. Then look at the photos and decide which one you like the best.
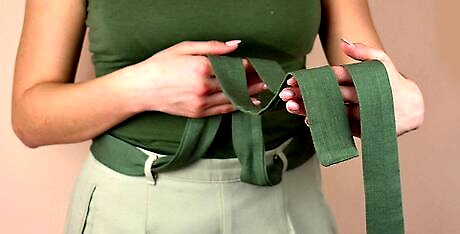
Hold the fabric belt so one end is 6 inches (15 cm) longer than the other. If your belt isn’t long enough to have that much excess fabric on one side, just try to position it so that one end is a little longer than the other. When you’re finished tying the half bow, both sides will be about even. Pants bows are really popular on linen pants, but they can work with an array of other materials.Tip: Pants bows work much better with fabric belts rather than leather ones. The fabric needs to be soft enough that it can be looped into a bow and tied off without the risk of the bow falling out.
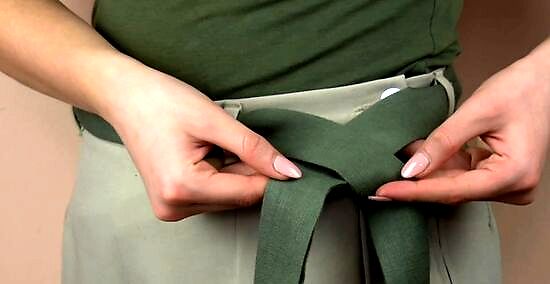
Cross the short end over the long end. Hold one end of the belt in each hand. Take the shorter end and bring it over top of the longer end. Do your best to keep the material straight so it doesn’t get twisted at this stage. It may help to tie your bow while standing in front of a mirror! It can make it easier to see what you are doing.
Pull the long end up through the opening to tie a basic knot. Tuck the longer end up underneath the short end. Pull both ends tightly to secure the knot. How tight you make the knot now is about how tight the belt will be at the end. If it feels uncomfortable, make it a little looser.
Create a loop with the long end as if you were about to tie a bow. You can let go of the short end now. Fold the long end into a small loop and hold it together with one hand. You’ll be able to adjust how big the bow is later if you want to.
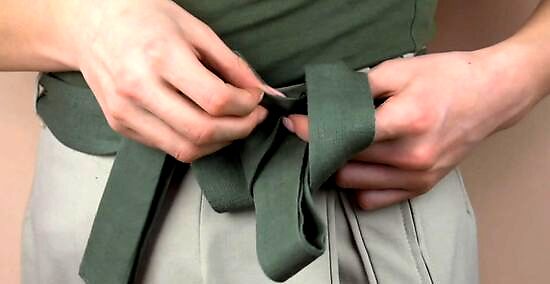
Wrap the short end of the belt around the bow and through the loop you created. Make sure to pull the end through the loop you just created around the half bow rather than down through the inside of the belt. If you make a mistake, just undo what you did and try again! It can take a few tries to get the half-bow technique down. Give yourself some extra time to practice when you’re getting ready to go out.
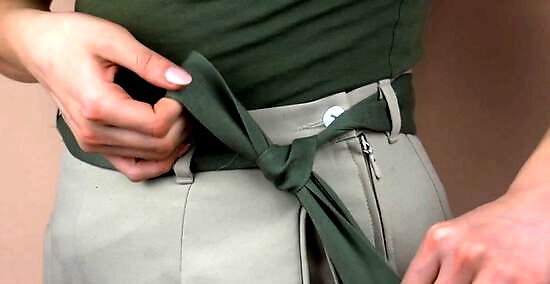
Tug the bow to make it bigger or smaller and tighten the knot. To make the bow bigger, pull on one side of the loop; to make it smaller, pull on the end of the loop. Tug both the short end and the bow at the same time to tighten the knot. Create different sizes of the half bow and play around with positioning it in the center or off to the side to see which variation you like the best.
Tying a Traditional Bow
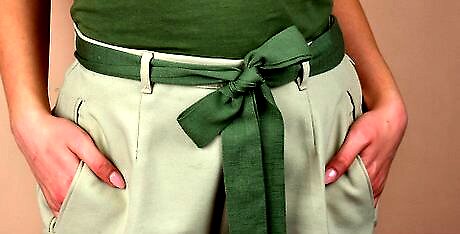
Decide if you want your bow to be in the center or off to the side. Placing the bow in the center will give your outfit a neater, more symmetrical look. Tying it off to the side will create a more relaxed and eclectic vibe. Try both options to see which one best fits your personal aesthetic.
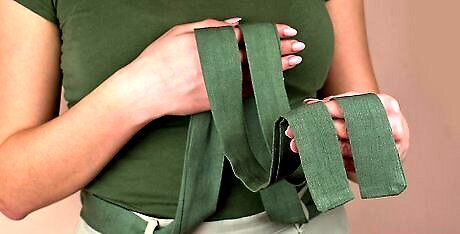
Position the fabric belt so that the two ends are at equal lengths. If you have ends that are different lengths, your bow will be lopsided and won’t look quite right. Use a fabric belt rather than a leather one so that the bow will stay in place and not come undone during the day. Linen and silk belts are great options for tying bows.
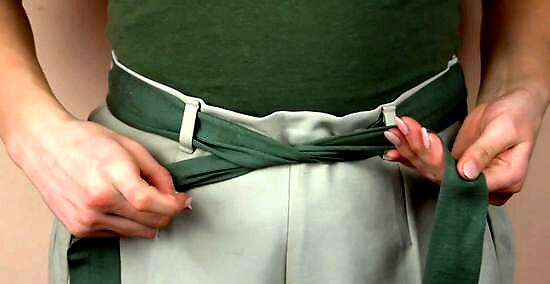
Cross one end over the other and create a knot. Bring one end of the belt over the other, then pull the top end up under the belt. Pull both ends to tighten the knot. Make sure the tightness of the belt is comfortable both when you’re standing and sitting.
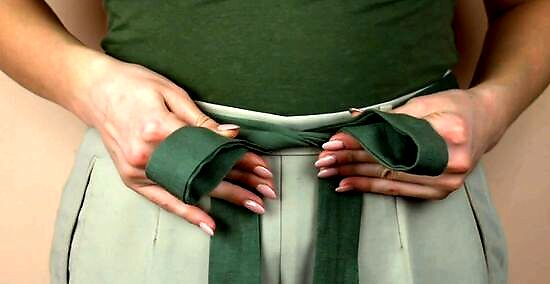
Create a loop with each end of the belt. Do your best to make the loops equal sizes. Hold one loop in each hand. You can adjust the size of the loops throughout the tying process, so don’t worry if you aren’t sure of how it looks right now. This bow is a little different from the types of bow you might use to wrap a present or tie your shoes. It looks a little more elegant but requires a slightly different technique.
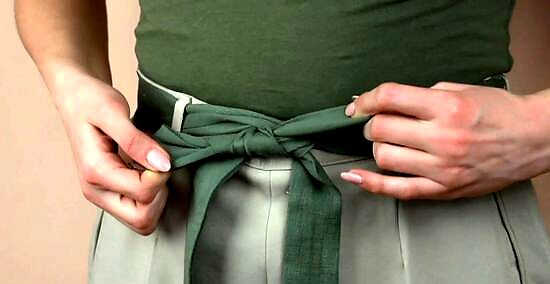
Wrap one loop around the other and tuck it up under the belt. Bring one loop around the top of the other. Pull it back up under the entire belt so it is poking out. Check to make sure you can see two discernible loops. You may need to tug the loops to the side so they’re extending out to the sides rather than up and down.
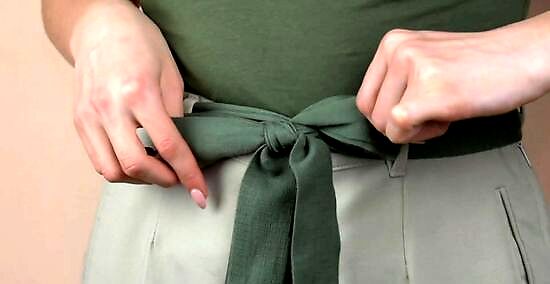
Adjust the size of the bow and tighten the knot once you’re done. Make the bow bigger by pulling the loops out a little. Make the bow smaller by pulling at the ends. Tighten the knot by tugging both loops at the same time. Be patient if it takes a little while to get the bow-tying technique down. For a lot of people, it’s a new look that might feel strange, but wear it confidently and you’ll soon have a new favorite way of styling your pants!
Styling Bow Tie Pants
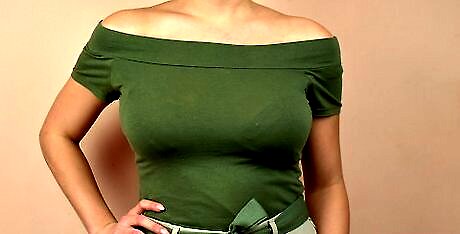
Pair the pants with a more form-fitting top. Because the bow is usually a little floppy and sticks out from your pants, a tighter top will keep your outfit from looking frumpy. Remember that the bow is meant to be seen! For colder weather, pair your pants and top with a blazer or cardigan.
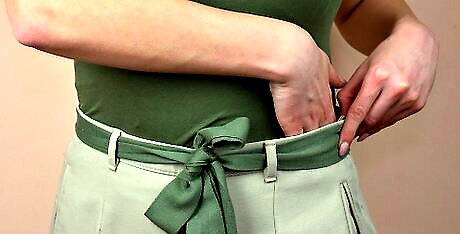
Tuck in your top so the bow doesn’t get lost under your shirt. This helps create a cleaner look for your outfit. Otherwise, you’ll look like you have a bumpy mass of fabric under your top. An alternative is to wear a really short top or a crop top.
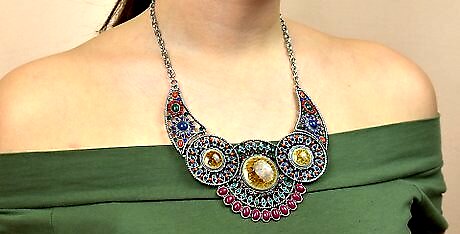
Add a statement necklace or pair of earrings to your outfit. The bow draws the eye to your waist. To even out your look, add some fun jewelry to bring the eyes back up. Big, dangly earrings or a chunky necklace are fun options to complement your outfit. Jewelry can also help take your look from casual to glam, making your bow tie pants appropriate for the office or a night out on the town.
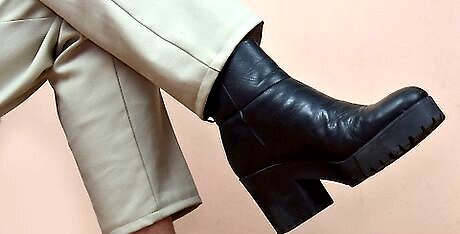
Wear a pair of heels or fancy flats to finish your outfit. Skip the casual shoes and dress up your bow tie pants with a fun pair of heels or flats. If your outfit is fairly monochrome, choose shoes with a pop of color. Or keep things classy with black or tan shoes. Ultimately, though, do what makes you feel best about your look. Fashion is open to interpretation and the most important thing is that you like how you look.






Comments
0 comment