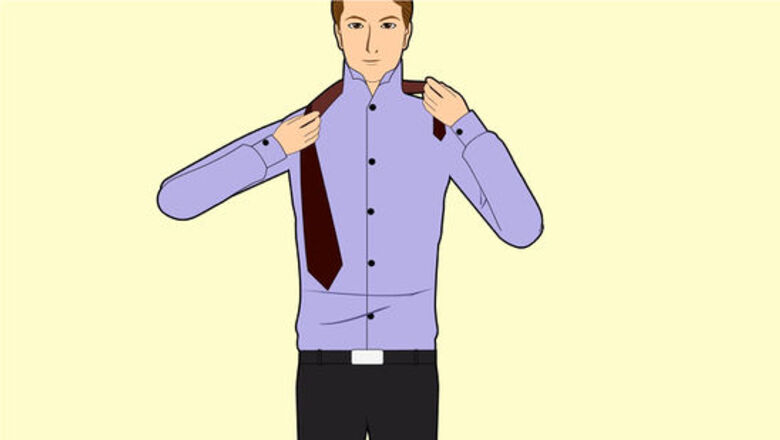
views
- Drape the tie around your neck so the wide end is longer. Bring the wide end over to make an X.
- Feed the wide end of the tie up through the collar loop to start the knot.
- Wrap the wide end of the tie behind the knot and feed it through the top of the neck loop. Then bring the wide end across the front of the knot.
- Feed the tie’s wide end through the bottom of the neck loop. Pull the wide end through the front of the knot to tighten and secure it.
Drape the tie around your neck.
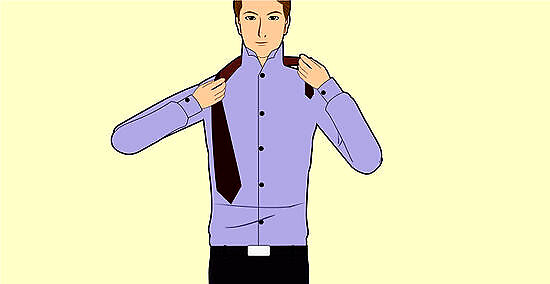
Leave the wide end longer than the narrow end. Drape your tie so the wide end hangs over your right shoulder. Adjust the length of the tie so the narrower end sits just above your ribcage and the wide end is by your belly button. If you’re left-handed, start with the wide end over your left shoulder instead. Be sure to coordinate your tie with the color or pattern of your outfit so you can look your best.
Cross the wide end over the narrow end.
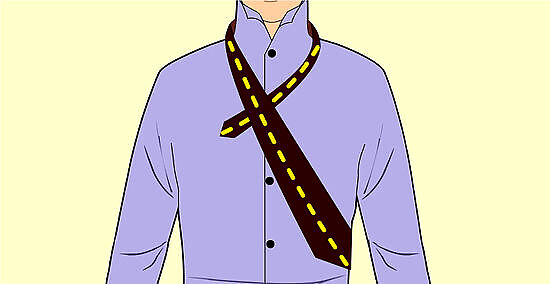
Crossing the ends forms a loop around your neck. Hold the narrow end of the tie in place with your left hand. Try to keep the point where your tie overlaps close to your collar so the knot stays tight. The wide end is now on your left side and the narrow end is on your right. Leave a little bit of slack when you first tie your tie, or else it might get too tight and make it difficult to breathe or swallow.
Feed the wide end through the neck loop.
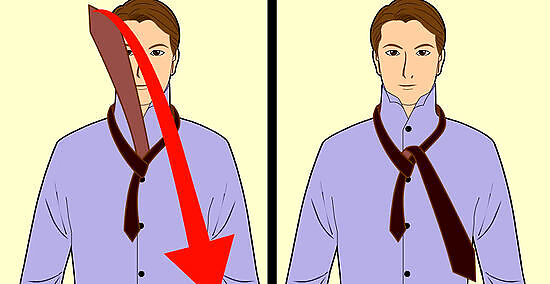
Looping the tie through forms one half of the Windsor knot. Pull the wide end up through the bottom of the neck loop right where the tie overlaps at your collar. Drape the wide end back down over the top of the neck loop to form one side of the knot. The wide end will be right-side up. Practice tying your tie in front of a mirror since it’ll be a lot easier to see what you’re doing.
Wrap the wide end behind the knot.
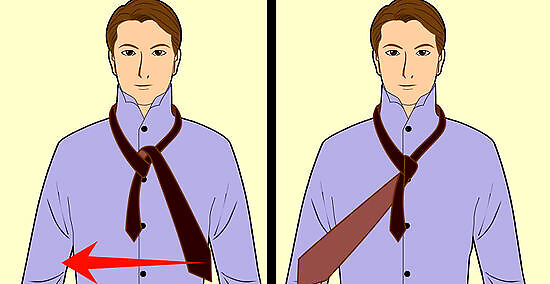
Wrapping the tie around the knot makes it more secure. Take the wide on the left side of your chest, and bring it behind the knot in the center. Use your left hand to hold the tie against the back of the knot so it stays in place. The wide end should be upside-down on your right side and underneath the knot and narrow end. Make sure you pull the tie as tight as you comfortably can so the knot looks clean when you’re done.
Guide the wide end through the top of the neck loop.
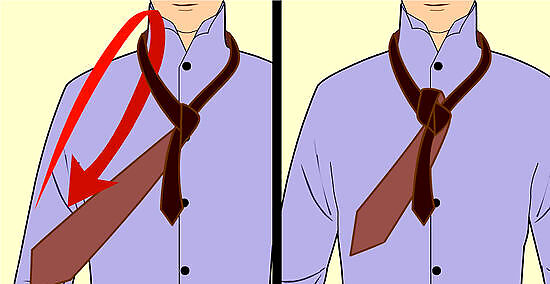
Feeding the tie through the neck loop finishes the base of the knot. Pull the wide end over the right side of the neck loop and feed it through the top. Pull the wide end down through the neck loop so it’s upside-down and on your right side when you’re finished. The knot near your collar now has a symmetrical cone shape on each side. If the shapes are not symmetrical, undo your tie and try starting over so your knot doesn’t look messy.
Fold the wide end over the front of the knot.
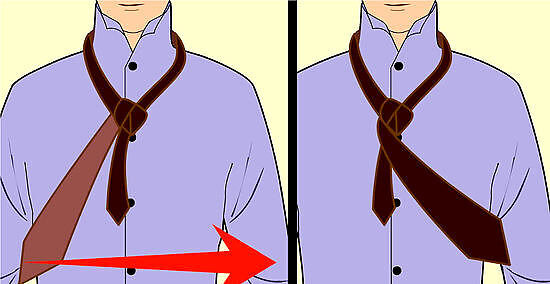
Smooth out your tie to give the front of the knot a clean, classy look. Bring the wide end from right to left across the front of the knot. Pull your tie tight so the knot doesn’t have any wrinkles or creases. Hold the tie in place with your left hand so it doesn’t get loose. Straighten out your tie so it lays flat and doesn’t hang backward or crooked when you finish tying it.
Bring the tie through the bottom of the neck loop.
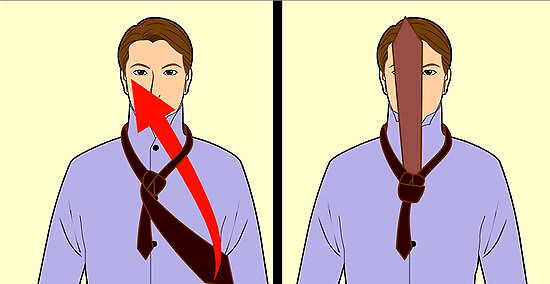
Pulling the tie through the neck loop again secures the knot in place. Fold the wide end up through the bottom of the neck loop on the left side of your body. Pull your tie completely through the neck loop. Tilt your head up to make it easier to work with your tie.
Pull the tie down through the loop in front of the knot.
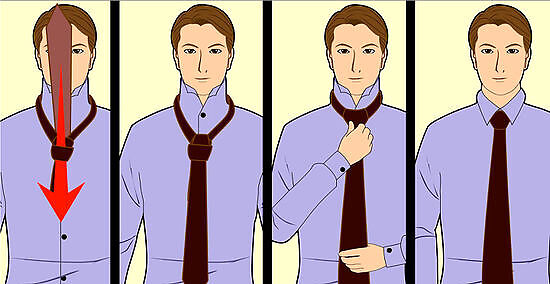
Pulling the tie through the knot lets you tighten and resize it. Grab the wide end of the tie and make sure it’s facing right-side up. Push the wind end through the space between the knot and part of the tie wrapped around the front of it. Hold the narrow end with one hand and pull the knot up toward your collar until it’s comfortable to tighten and adjust the length. Fit your tie so the wide end reaches your waistband when you’re finished tying a Windsor knot. If the tie is too short, undo your tie and shorten the narrow end before trying again. If your tie was too long, shorten the wide end.





Comments
0 comment