views
- Wiping or formatting a hard drive will remove all your device's data.
- You'll need to connect your external hard drive to your Windows or Mac device.
- Back up any important data before formatting as it will be nearly impossible to restore.
Formatting on Windows 10
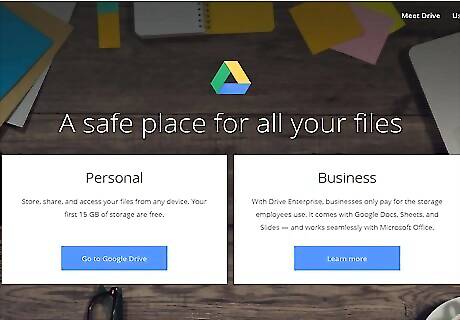
Back up important data. If there is data on the drive you need to keep, make sure to save it on another hard drive. You can transfer files to your computer's internal hard drive, use a USB flash drive, or upload to a cloud storage service such as Google Drive, DropBox, OneDrive, or iCloud.
Connect your external hard drive to your computer. Most external hard drives can be connected to your computer using a USB or firewire cable. In some cases, an external hard drive may need to be plugged in using an AC adapter.
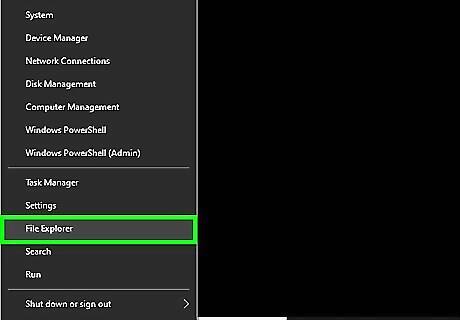
Open File Explorer Windows File Explorer. It has an icon that resembles a folder with a blue clip. You can usually find File Explorer in your taskbar at the bottom of the screen. If you don't see it, press ⊞ Win+E to open it.
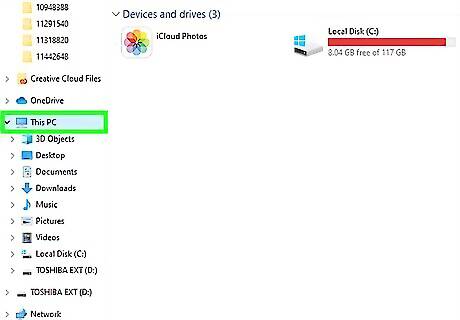
Click This PC. It's in the sidebar menu to the left. This displays all external and internal hard drives connected to your computer. If you don't see "This PC", look for the name of your computer. It's next to an icon that resembles a computer monitor.
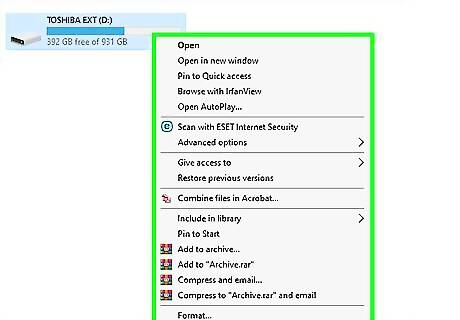
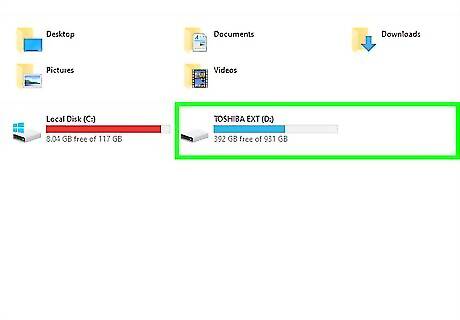
Right-click your external hard drive. This displays a pop-up menu next to the hard drive. If your external hard drive has a specific name, it will be listed in File Explorer. Otherwise, it may be listed as "USB Drive" or the make and model of your hard drive. The amount of space each hard drive has is listed below the drive name in File Explorer. Right-click the hard drive with the amount of space that matches your external hard drive.
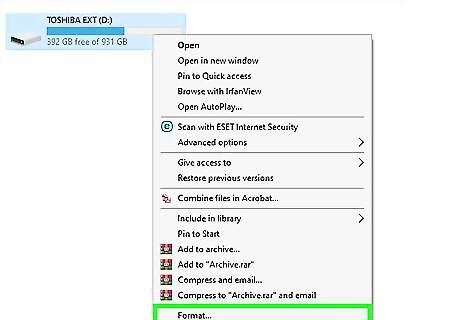
Click Format…. It's in the menu that appears when you right-click on your hard drive.
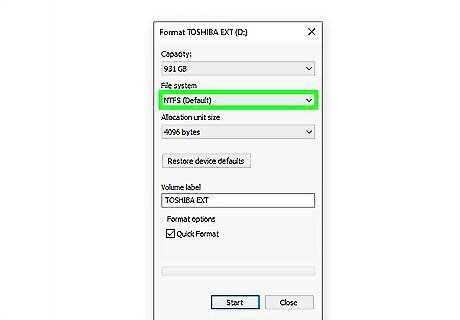
Select a file system. Use the drop-down menu below "File System" to select the file system you want for your external hard drive. There are three main file systems you can choose from. They are as follows: NTFS: This file system works well with Windows, but may not be writeable on Mac or other systems. Select this option if you only plan on using your external drive on Windows computers. exFAT: This is usually the default file system. It works well with all versions of Windows and recent versions of macOS. It may require additional software on Linux, but is still supported by more devices than NTFS. Select this option if you plan on storing large file sizes and plan on accessing your external drive on other devices, such as macOS. FAT32: This is an older file system that can only store files that are less than 4 GB. It is, however, compatible with more devices. Select this option if you don't have any large files and need the largest compatibility across multiple devices.
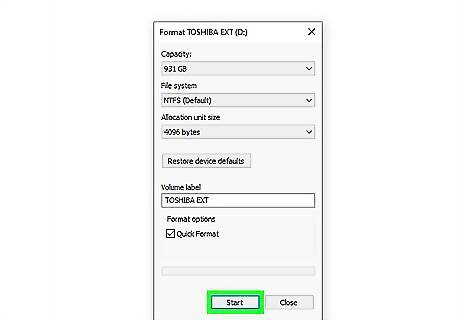
Click Start. It's at the bottom of the Format menu. This displays a pop-up warning.
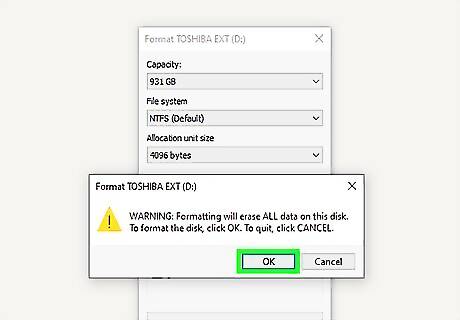
Click Ok. It's in the pop-up warning. The pop-up warning informs you that all data on the external drive will be erased. This acknowledges the warning and formats your drive. It may take several minutes depending on your computer hardware and the size of your external hard drive.
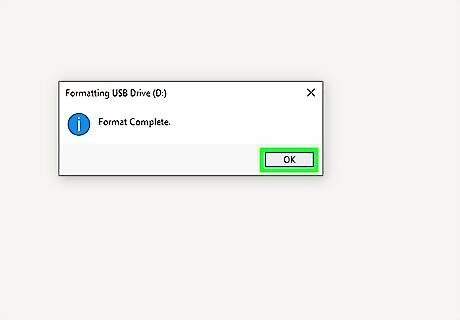
Click Ok. This appears in a window that pops up when the drive is finished formatting.
Formatting on macOS
Back up important data. If there is data on the drive you need to keep, make sure to save it on another hard drive. You can transfer files to your computer's internal hard drive, use a USB flash drive, or upload to a cloud storage service such as Google Drive, DropBox, OneDrive, or iCloud.
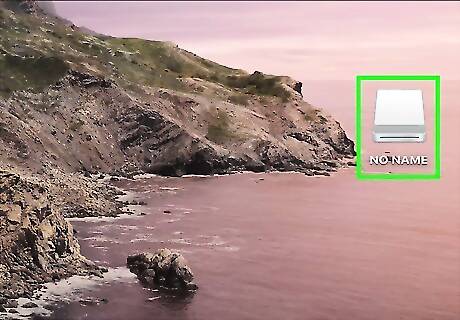
Connect your external hard drive to your computer. Most external hard drives can be connected to your computer using a USB or firewire cable. In some cases, an external hard drive may need to be plugged in using an AC adapter.
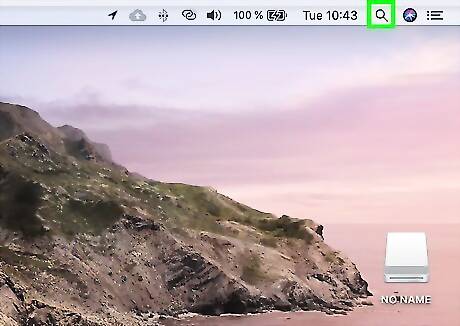
Click the magnifying glass icon Mac Spotlight. It's in the upper-right corner of the menu bar at the top of the screen. This displays a search bar.
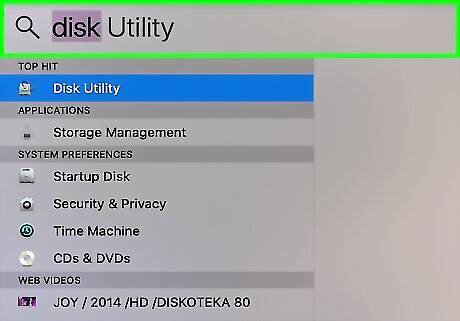
Type Disk Utility.app in the search bar and press ↵ Enter. This opens the Disk Utility app. Alternatively, you can find the Disk Utility app in the Utilities folder, which is inside the Applications folder in Finder.
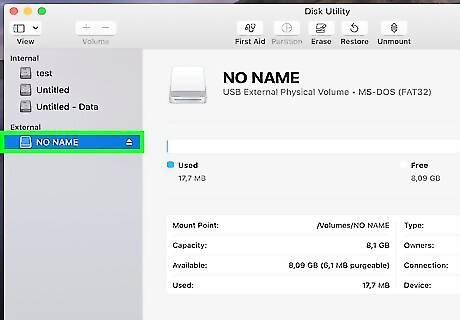
Select your external hard drive. All external hard drives are listed below "External" in the sidebar to the left in Disk Utility.
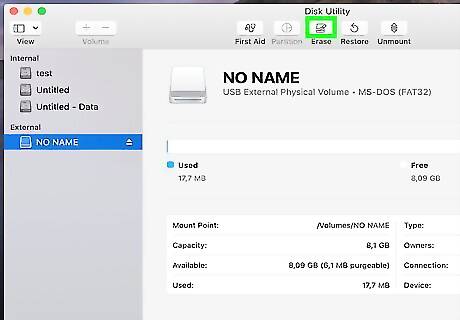
Click Erase. It's in the button in the middle at the top of the Disk Utility app window.
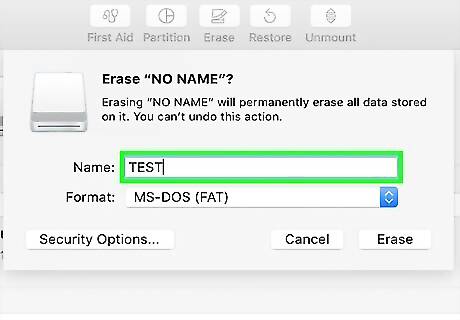
Type a name for the external hard drive. This is the name the hard drive will be renamed to once it is formatted.
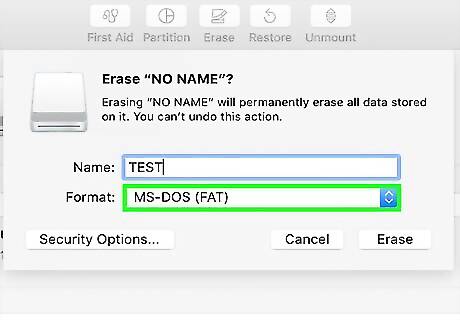
Select a file format system. Use the drop-down menu next to "Format" to select a file system: APFS:. This is the newest Apple file system optimized for Solid State Drives (SSDs) and Flash Drives. Select this option only if you have an SSD or flash drive and plan to only use the drive on Mac OS High Sierra or newer. Mac OS Extended: This has been the standard Apple file system since 1998. Select this option if you have a mechanical or hybrid hard drive, if you are using an older version of Mac OS, and only plan on using your external hard drive on Mac computers. exFAT: Select this option if you need your hard drive to be compatible with multiple devices, including Windows computers.
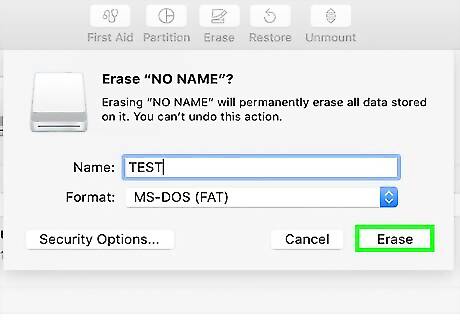
Click Erase. It's in the lower-right corner of the Format window in Disk Utility. This begins formatting your external hard drive. It may take a while depending on your Mac's hardware and the size of your hard drive.
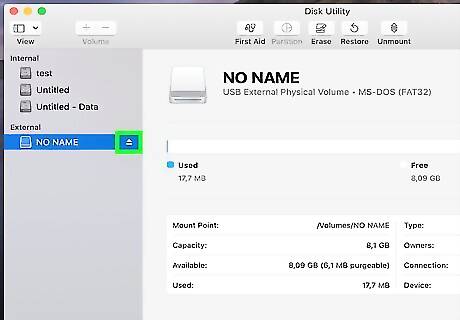
Click the Eject button next to your external hard drive. When you are finished with your external hard drive. Click the eject button next to your hard drive name in the sidebar to the left in Disk Utility. Do not remove your flash drive until it is completely ejected.
Using Disk Cleaning Software
Back up important data. If there is data on the drive you need to keep, make sure to save it on another hard drive. You can transfer files to your computer's internal hard drive, use a USB flash drive, or upload to a cloud storage service such as Google Drive, DropBox, OneDrive, or iCloud.
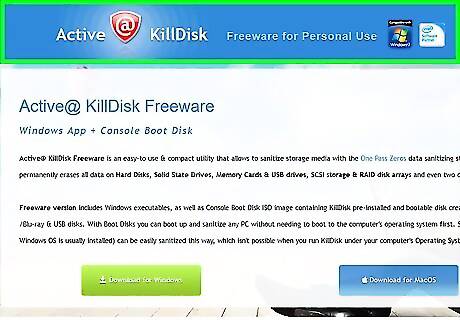
Go to http://killdisk.com/killdisk-freeware.htm in a browser. This is the website for Killdisk, a free disk-cleaning app that works on Windows and Mac, as well as both mechanical and solid-state drives. Disk cleaning programs like KillDisk provide extra security by overwriting the old data with random data that prevents the old from being accessed with data forensics tools. Some other popular data-cleaning tools are DBAN Drive Cleanser by Acronis, and CBL Data Shredder.
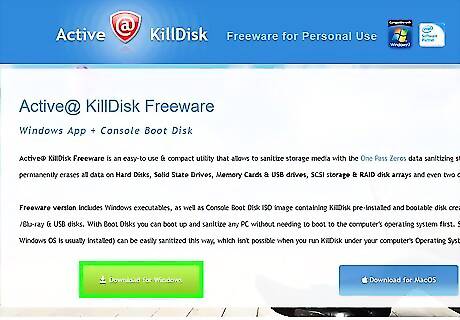
Click Download for Windows or Download for MacOS. Click the download button that corresponds to the operating system you are using.
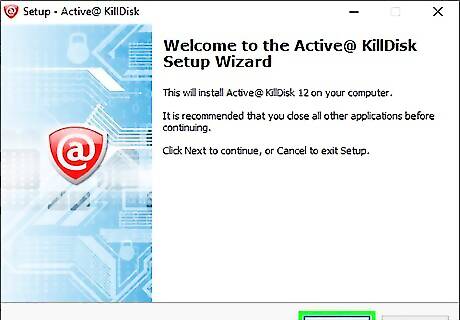
Install KillDisk. By default, your downloaded files can be found in your Downloads folder on both PC and Mac. Double-click the ".exe" file for Killdisk on Windows, or the ".dmg" file for Killdisk on Mac, and then follow the on-screen instructions to install.
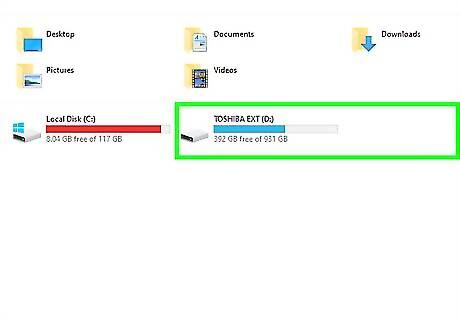
Connect your external hard drive to your computer. Most external hard drives can be connected to your computer using a USB or firewire cable. In some cases, an external hard drive may need to be plugged in using an AC adapter.
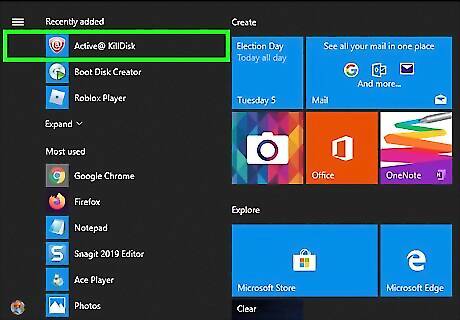
Open KillDisk. KillDisk has an icon that resembles a red disk with a while "@" sign on the front. Double-click this Killdisk icon in the Windows Start menu or the Applications folder on Mac.
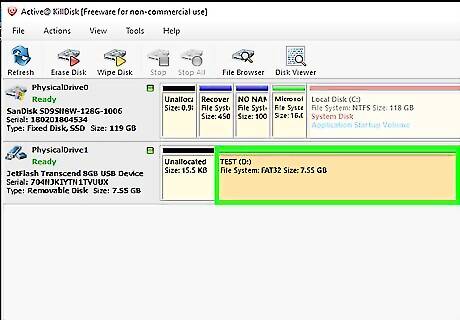
Click the drive you want to erase. All disks connected to your computer are listed on the main menu for KillDisk. The drive you select will highlight in orange. Be careful not to select a disk drive you need, such as your Windows installation drive.
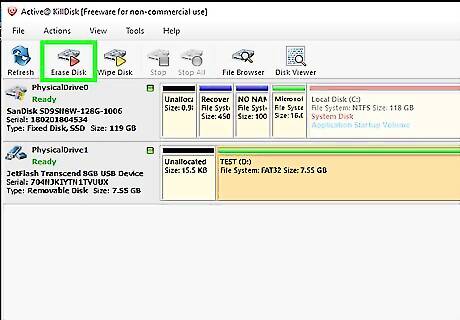
Click Erase Disk. It's at the top of the KillDisk app. It has an icon that resembles a hard drive with a red triangle.
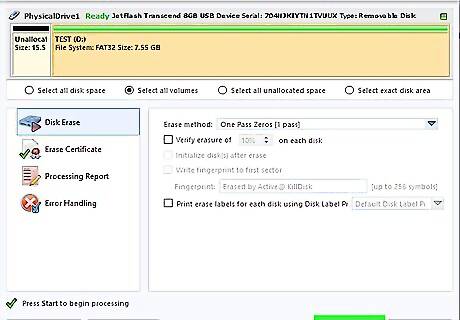
Click Start. It's in the lower-left corner of the pop-up window. If you have the registered version of KillDisk, you can select more accurate erasure methods using the drop-down menu next to "Erase Method". You can also check "Verify erasure of [disk percentage] of each disk."
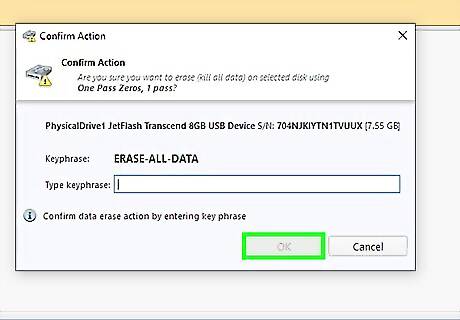
Type the keyphrase and click Ok. The keyphrase is above the field where you enter the keyphrase. Enter it exactly as displayed in the window and click Ok. This begins the process of erasing your disk. Since this method overwrites your old data with random data, it will take considerably longer than other methods of formatting your drive.




Comments
0 comment