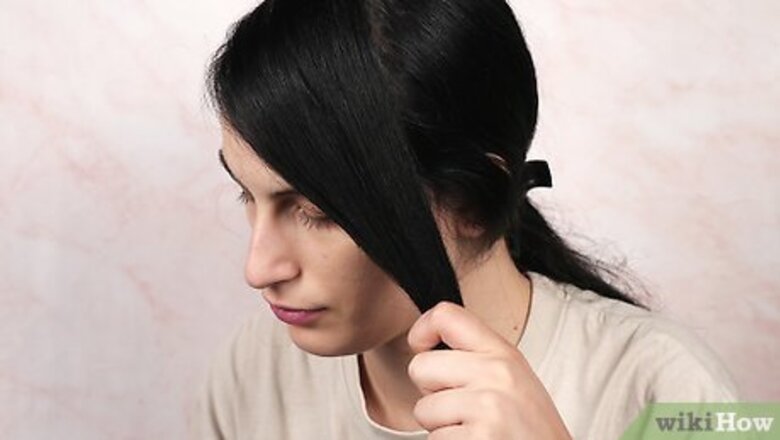
views
- French-braid and Dutch-braid your bangs by gradually adding more hair into each of the three braid strands.
- Go for a simplistic style by twisting your bangs into a basic braid with three alternating strands.
- Twist-braid your bangs by teasing the hair, dividing it into two sections, and twisting those two sections around each other.
French Braid

Part and section your hair. Use a comb to create a deep side part in line with the outer edge of your eyebrow. There should be more hair on one side of your head than the other. Section off your bangs from the rest of your hair with the comb. Pull the rest of your hair back in a low ponytail or secure the hair to your head with a duck bill clip. Your part can be to the right or the left.
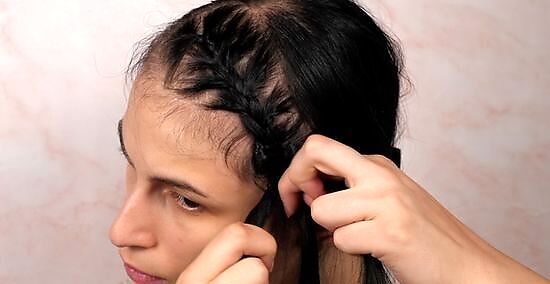
French braid your bangs. If you are looking for a stylish way to keep your bangs out of your eyes, consider a French braid. Create a one inch section of hair at the top of your bangs. Divide this 1 inch section into three even strands. Twist the back strand over the center strand, and then he front strand over the center strand. Repeat this process two or three times. Add a small amount of hair from the back of the bangs to the back strand. Bring the newly thickened back strand over the center strand. Add a small amount of hair from the front of the bangs to the front strand. Bring the newly thickened front strand over the center strand. Repeat this step until your bangs are secured and you are satisfied with the length of the french braid.
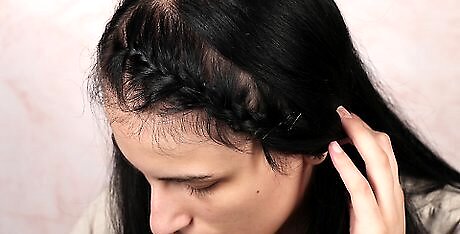
Secure the braid. There are several possible ways to finish the French braid. You may pin the braid directly to your head. Insert bobby pins in an “X” pattern to lock them in place. You may secure the braid with a rubber band. You may braid the remainder of the section in a French, traditional, or mermaid style braid. Secure the ends of the hair with a rubber band.
Dutch Braid

Part and section your hair. Create a deep side part that is in line with the outer edge of your eyebrow—the part may be on the right or left side. With a comb or your fingers, separate your bangs from the rest of your hair. Pull the remainder of your hair into a low ponytail or secure it to your head with a duck bill clip. If you have slippery hair, spray your bangs with dry shampoo. This product will remove any excess oil from your tresses and add texture to your locks.

Braid your hair. Like a French braid, a Dutch Braid will sufficiently prevent your bangs from falling over your eyes. Grab a small section of your bangs along your deep side part. Divide this section into three equal strands. Pull the back strand under the center strand. Pull the front strand under the right strand. Add a small amount of hair from the back of the bangs to the back strand. Bring the back strand under the center strand. Add a small amount of hair from the front of the bangs to the front strand. Bring the front strand under the center strand. Repeat the above step until your bangs are secured in a Dutch braid and the braid reaches the top of your ear.
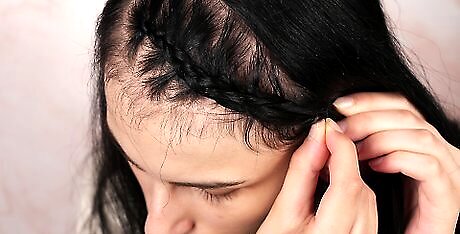
Secure and stretch the Dutch braid. Once you have completed the braid, secure it in place with a small rubber band or clips. To create the illusion of a thicker braid, carefully separate the individual strands of the braid. Choose a tool that is clear or matches color of your hair.
Basic Braid

Section off your bangs. Use a comb to divide your bangs from the rest of your hair. Comb through your bangs to remove any snarls or kinks. If you are in a pinch, use your fingers instead of a comb.

Braid your bangs. Pull your bangs straight up from your head. Twist the hair away from your face. Twisting your bangs will ensure that your braid will rest along your hairline instead of across your forehead. Divide your bangs into three equal sections and then proceed to braid your hair. Stop once the braid is 4 to 5 inches long.

Secure the braid in place. With one hand, hold the braid in place against your head; with the other hand, insert one bobby pin downwards through the braid. Retrieve a second bobby pin and insert it into the braid so that it forms an “X” with the first pin. This will prevent the pins from slipping.
Twist Braid

Part and section your hair. Use a comb to part your hair on either the left or right side. Section off your bangs from the rest of your hair with the comb. Pull the rest of your hair back in a low ponytail or secure it to your head with a duck bill clip. If you would prefer a thicker twist braid, you can include more hair in the section.
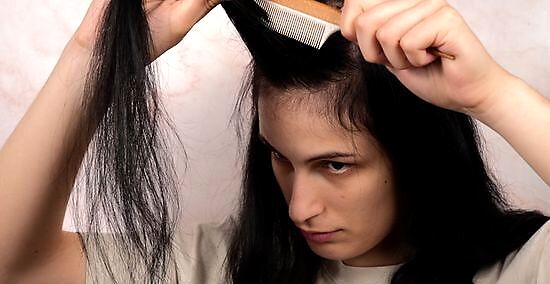
Tease the bang section. Retrieve a long tail comb and backcomb the entire section of bangs. Place the comb three to four inches from the roots and pull it up the hair shaft towards your scalp. Once you reach the roots, remove the comb and repeat the process. After the section is thoroughly teased, comb through the top layer of your tresses to mask the teased section with smooth hair.
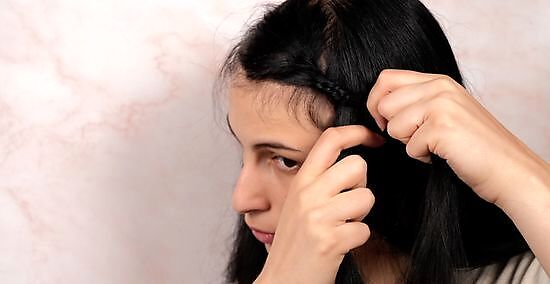
Twist your hair and secure it in place. When creating a twist braid, you will need to divide your hair into two sub-sections instead of three. Like a french braid, you will continue to add more hair to each sub-section as you progress towards the end of the shafts. Use your comb to create a ¼ inch section of hair along the inner edge of your side part. Divide this thin sub-section in half so that there is a front strand and a back strand. Twist the front strand over and around the back. The back strand is now in front. Grab another small sub-section of hair, similar in size to the first, and it to the strand currently in front. Twist the front strand over and around the back. Repeat this step until you are satisfied with the length of the twist braid. Insert several pins into the end of the braid to secure it in place.

Finish




Comments
0 comment