
Making a Subframe
See how the desk chair's seat is attached to its mount. In particular, measure how far forward the center of the base is from the inside surface of the chair back (i.e., where the tailbone area would rest when one is sitting in the chair). Because the seat back, torso, and buttocks are heavier than the seat front and legs, the mount is probably attached close to the back of the seat for balance. Arrange the new subframe you will make and the car seat's mounting on it to approximately preserve this distance, reducing the chance that the chair will tip backwards.
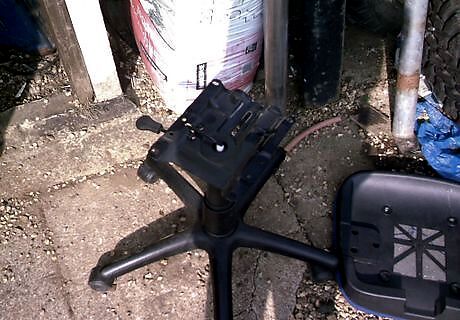
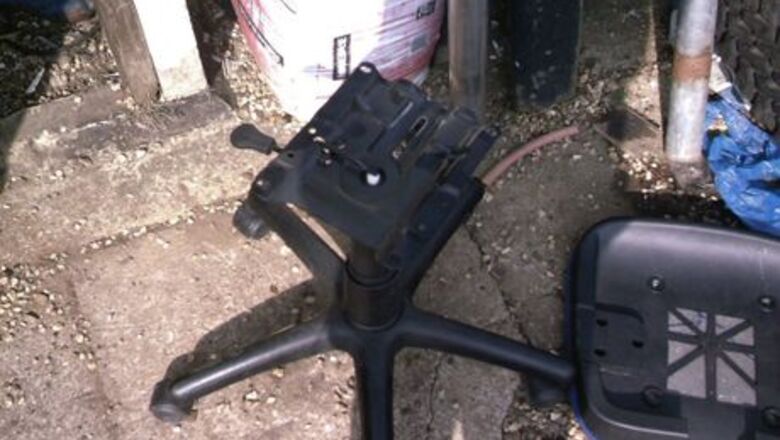
Remove the padding (seat and back) from the desk chair. This usually unbolts or unscrews. Sometimes the back support will be held on by a separate piece of steel; save yourself some time and cut this off, rather than fiddling around to remove it. Dispose of the old padding in an ecologically sound manner.
Unbolt the seat rails from your car seat. This is usually four, slightly fiddly, bolts. Keep the bolts, as you'll need them later.
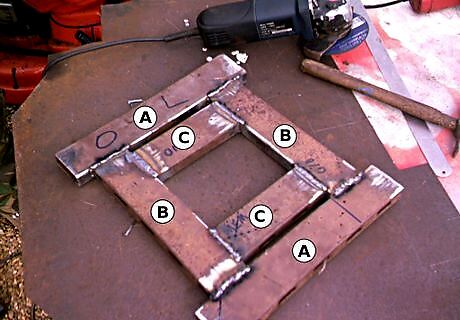
Measure the distance between the bolt holes for the seat rail, from front to rear. Add about 20mm (just under an inch) to this number, then mark two of these lengths on your steel box-section. Write on the box-section what this length is for. We'll call these lengths "Lengths A".
Measure the distance between the bolt holes from side to side. Subtract from this two times the width of the widest side of your steel box-section. For example, if your box section is 62mm, and the distance is 355mm, then you want 355 - 62 - 62 = 231 mm. Mark two of these lengths on your steel box-section. These will be "Lengths B".
Go back to your stripped-down desk chair. Measure the distance, front to back, of the steel plate that your padding used to be sitting on. Write down this distance on a piece of paper (you'll need it later). Then, subtract one widest-side dimension of your box section from this. For example, if it's 195mm, and your widest side of your box section is 62mm, then it's 133mm. Mark out two of these lengths on your box section. These will be "Lengths C".
Cut out the lengths you have marked on your box section. The easiest and quickest way is to use a band saw. Failing that, use an angle grinder; use the cutting discs to cut the sections out, then a grinding disc to clean up afterwards. Failing that, use a hacksaw. You will now have six small lengths of steel box section.
Lay these sections down on a flat surface, widest length down, and position them. Lengths A should be on the sides, pointing away from you. Lengths B should be between them, at right angles, with their centers as far apart as the measurement you wrote down in step 5 of this section. If there is significant rust or paint on your box section, note where sections A and B meet and clean them to bare metal with a wire brush (or with your angle grinder, delicately).
Make sure the sections are positioned accurately then weld them together. It might be a good idea to spot-weld them first then "dry run" them on your desk chair base to make sure everything's in order; it's easier to grind away and break a spot weld if you notice it's wrong.
Measure the width of the base plate of your desk chair (the opposite measurement to the one you took in step 5) and write it down. Go back to your subframe and position lengths C between lengths B, at right angles to it. You'll likely find that one or more will be slightly too long and won't fit; if this is the case, grind or cut them back. The centers of these sections should be as far apart as the distance you just measured. As above, clean up the mating surfaces then weld them in place. Your subframe is now finished.
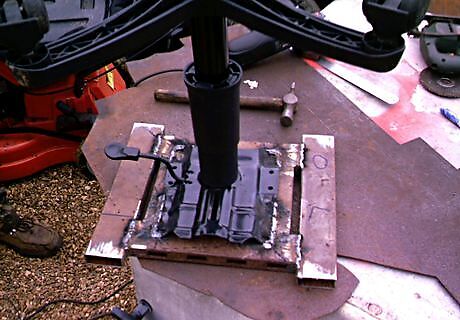
Take your old desk chair base. Turn it upside down and lay it on top of your subframe. Clean off any paint from the base where the two meet. Put on your safety gear, because it's not uncommon for the paint at the base to catch fire. Have a fire extinguisher ready. Weld the base onto your subframe.
Finally, and optionally, use your angle grinder to clean up any messy welds. Be gentle!
Making the Mounts
Mark out three rectangles on your steel plate. These should be roughly an inch and a half wide by two or three inches down.
Mark a bolt hole near the top of each of these. To do this, measure the thickness of the bolts that used to hold the seat rails in place (you did save them, right?). As a rough guide, the centers of the holes should be about one and a half bolt-widths away from the top of the rectangle. They should be slightly off-centre; again, about one and a half bolt-widths from the edge.
Drill these holes out. Use a slightly larger (by 2mm or so) drill bit than your bolts; this gives us a margin of error in case we position them slightly wrong later on. This will take rather a long time.
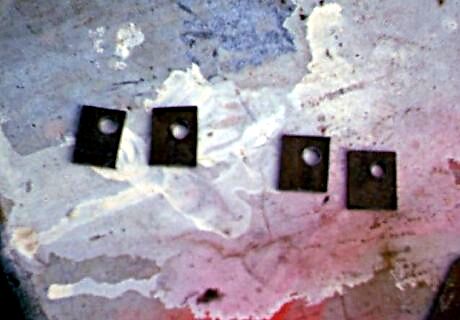
Cut out your rectangles. By far, the easiest, quickest, and most accurate way of doing this is to use an angle grinder with a cutting disc fitted. After cutting them out, wait for them to cool (cutting them can get them surprisingly hot), use a bolt to align the bolt holes on all four and then clamp them together in a vice or a pair of mole grips ("locking pliers"). Use a grinding disc to make them all the same size. You will want to make the top corners as rounded as possible to give you the maximum clearance. Again, wait for them to cool before releasing them and handling them.
Position your mounts on the subframe. They will be sitting on the corners of lengths A, with the bolt holes facing outwards, the off-centred side closest to the bolt holes facing towards the ends. Measure the distance between the bolt holes, front to rear, of your car seat and make sure that the bolt holes on the rectangular mounts are the same distance apart. The mounts should be sitting a couple of millimetres from the edge in the other direction.
Weld the mounts into place. Wait for them to cool. Optionally, paint your subframe and your mounts in black paint.
Finishing Up
Bolt your subframe to your car seat. Usually, it's best to bolt on the front first, then the rear, since the front ones are often harder to access than the rear ones. Unless your measurements and positioning were perfect (they never are), you'll likely find that the bolt holes on your mounts don't line up perfectly with the bolt holes on the car seat; if this is the case, drill the holes out a little larger. Alternatively, you can force the bolt in at an angle ("cross-threading", though this might make it difficult to re-use the same chair on another base later on), or use a smaller bolt with a nut and washer on the other side (if you can access it).
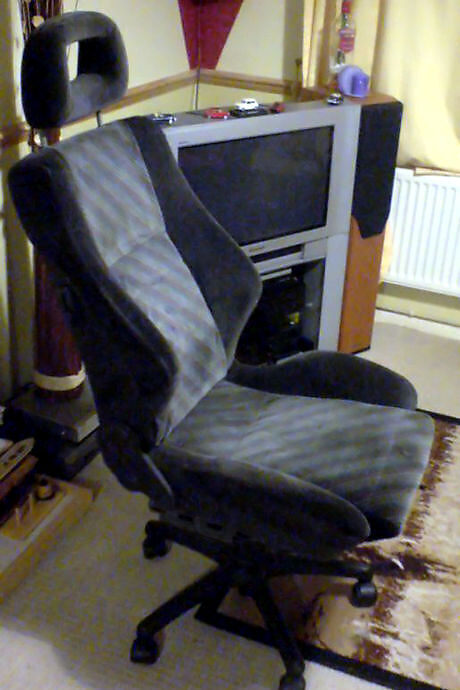
Clean up the car seat. You're finished!


Comments
0 comment