
Curling Iron or Wand
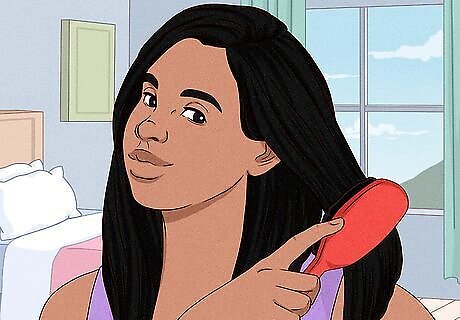
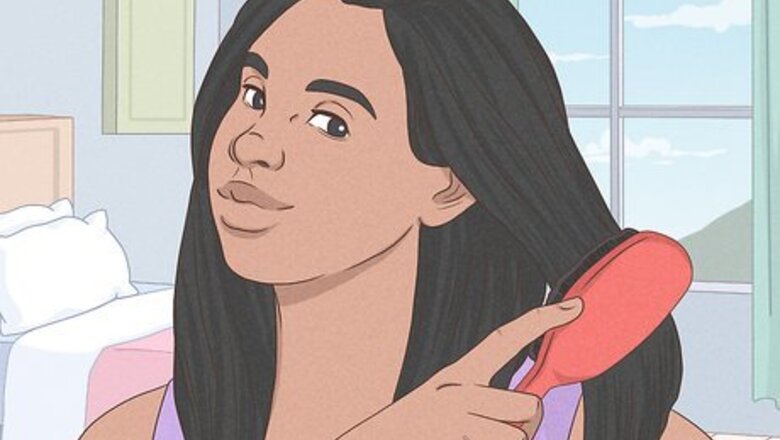
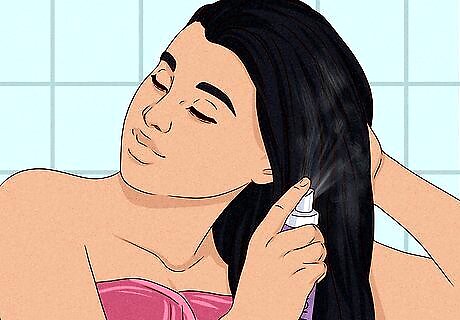
Apply a heat protectant to your hair while heating up your curling iron to 325ºF (162ºC). Most curling irons need 1-5 minutes to heat up. If you try to curl your hair before it reaches the correct temperature, your curls will not hold. Ensure your hair is completely dry. Run a blowdryer over any damp spots. Professional Hair Stylist Gina Almona recommends brushing out tangles and applying a heat protection spray. A good rule of thumb for your iron’s temperature is 325º F (162º C) for fine hair, 390ºF (198ºC) for coarse or thick, or 410ºF (210ºC) for curly or coily hair. Heat protectant spray will protect your hair from damage caused by exposure to high temperatures and prevent it from becoming dry and frizzy. Spray it liberally all over your hair before curling. Expert Answer Q A wikiHow reader asked: "How can I make my hair hold curls?" Laura Martin Laura Martin Licensed Cosmetologist Laura Martin is a Licensed Cosmetologist in Georgia. She has been a hair stylist since 2007 and a cosmetology teacher since 2013. Laura Martin EXPERT ADVICE Answer from Laura Martin: Laura Martin, a licensed cosmetologist, recommends: "Apply a thermal protectant product to your hair before styling. Then, curl sections no larger than the iron and use a heat setting appropriate for your hair type. Mist your hair with hairspray afterward."
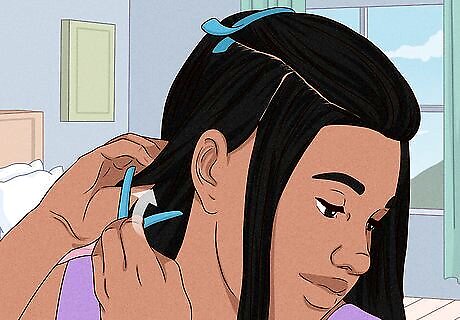
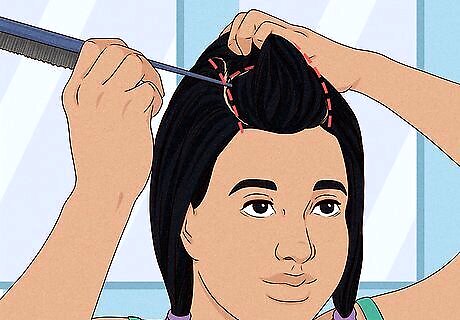
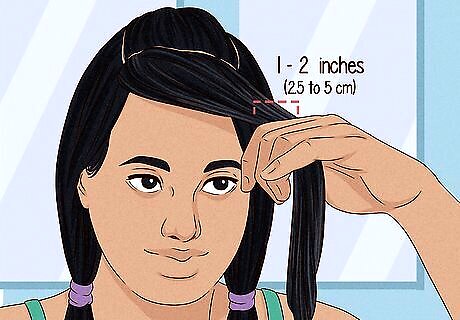
Split your hair into sections smaller than the diameter of the iron. With your thumbs, grab all of the above the top of your ears and clip it on top of your head. Split the lower section of your hair into sections slightly smaller than the iron itself and continue. For instance, if you’re working with a 2-inch (5 cm) curling iron or wand, use 1.5-inch (3.8 cm) sections of hair. Even if you have thin hair, you’ll get better results working with small sections of hair. This will ensure you’re curling everything in a uniform style. Using bigger sections of hair will result in bigger, looser curls, while using smaller sections will give you smaller, tighter ringlets.
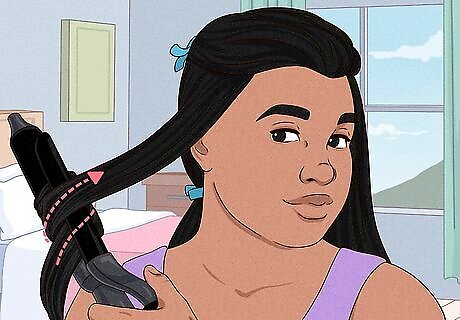
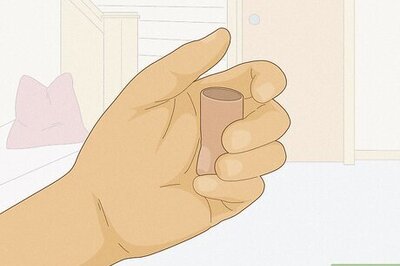
Wrap a small section of hair around the curling iron or wand. To use a curling iron with a clamp, open it and position the ends of your hair at the lower end of the barrel (near the handle), then close the clamp to secure it. Wrap that section of hair around the iron by rolling it upwards towards your roots. Stop rolling when you’re an inch away from the roots to prevent burning your scalp. For curling wands, start near the top of your hair and use your hand to wrap a piece of hair around the iron. Hold the end of your hair in place while that section curls. Use safety gloves to avoid burning your hands. EXPERT TIP Yan Kandkhorov Yan Kandkhorov Hair Stylist Yan Kandkhorov is a Hair Stylist and Owner of K&S Salon, a hair salon based in New York City's Meatpacking District. Yan has over 20 years of experience in the hair industry, is best known for paving the way for iconic hair trends in the industry, and has operated his salon since 2017. His hair salon has been voted one of the Best Hair Salons in New York City in 2019 by Expertise. Yan and K&S Salon has collaborated with leading fashion magazines and celebrities such as Marie Clair USA, Lucy Magazine, and Resident Magazine. Yan Kandkhorov Yan Kandkhorov Hair Stylist The way you wrap the hair will determine the look of your curls. For a stronger curl, wrap your hair around the iron from the bottom up. For looser waves, start curling from the middle, then let the ends stay out straight. Either way, the style typically looks best if you curl your hair away from your face rather than towards it. Also, keep your wrist relaxed while holding the curling iron so you don't get creases in your hair.
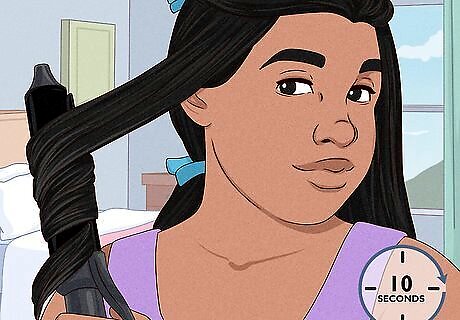
Hold the iron in place for ten seconds to create thick waves or s-curls. Keep your hair wrapped around the iron for at least 10 seconds. Afterward, let go of your hair to release the curl.
Continue curling small sections of your hair. Work your way around the bottom section, then release the rest of your hair from the clip or tie. Divide it into small sections and curl each one. For a uniform look, wrap all the curls around the iron in the same direction. However, for a more natural effect, you can alternate the direction of each wrap. If your hair is flat, try pinning each curl with a bobby pin. Once your hair cools down, remove the pins.

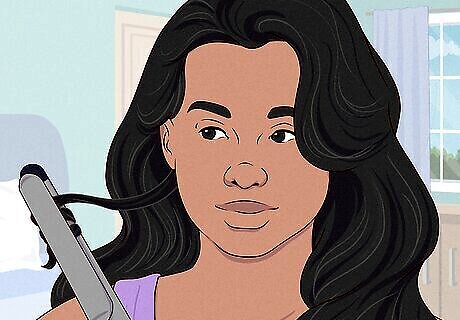
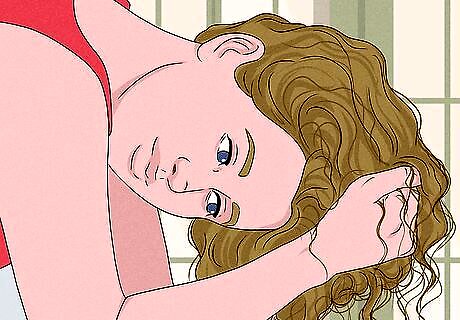
Loosen your curls for a softer look. Once your hair is all curled and has cooled down, run your fingers through the curls a few times. The curls will pull down and loosen up as you do. You can also turn your head upside down and use your fingers to separate the curls. If you loosen your curls with a hairbrush, your hair will look more wavy rather than curly.
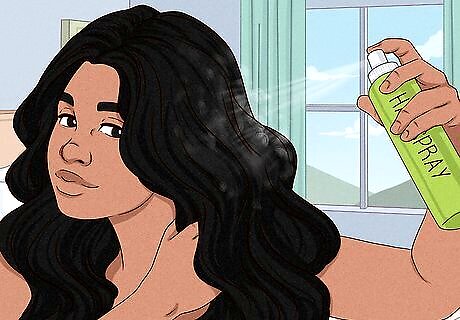
Set your hair with hairspray for a stronger hold. If you’re worried about your curls turning frizzy or falling out throughout the day, mist some hairspray over your curls. Hold the can about 12-14 inches (30.5 cm - 35.5 cm) away from your head and spray evenly around your hair. Be careful not to apply too much. To maintain tight curls, spray each curl individually. For a looser style, wait until the curls have relaxed a little and spray them. Choose a loose hold hairspray so your curls aren't too stiff and your hair doesn't feel too "crunchy.” Never apply hairspray to the curls while still wrapped around the iron. Combining the heat from the irons and the alcohol in the hairspray can damage your hair.
Flat Iron
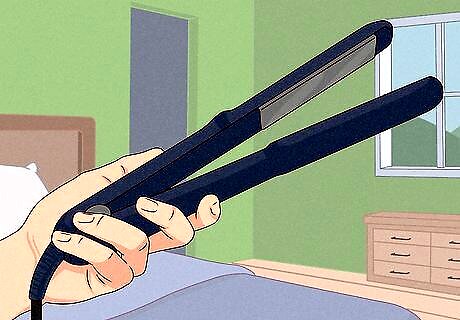
Choose a narrow flat iron with rounded edges to make spiral curls. A flat paddle-style iron may not curl your hair the way you want, so opt for a flat iron with rounded edges that are 1 to 2 inches in width (2.5-5 cm). Set the iron to 325ºF (162ºC) for fine hair. Lightly coat your hair with heat protectant spray and make sure it's totally dry before applying heat. Add a volumizing mousse to your hair before drying it, which will help give you bouncy curls and prevent your hair from looking flat once styled. Curling hair with a flat iron is best for spiral curls, crimped hair, or beach waves.

Curl one small section at a time. Pin the top section of your hair to your head, revealing the bottom layer. For large curls, use sections that are at least 2 inches (5 cm) wide. For tighter ringlets, use sections less than 2 inches (5 cm) wide. Clamp the flat iron around the hair, giving it a half turn so your hair is in a U-shape. Hold the flat iron horizontally as you move it down the section to the end. The position of the flat iron will determine what kind of curls you end up with. If you want your hair curled from the root to the tip, position the flat iron as close to your scalp as possible without burning it. If you want to curl the ends of your hair, position the flat iron about halfway down the hair to begin. This is called a flick. The slower you move the iron, the tighter the curls. Moving the iron down the hair quickly will make your curls soft and loose.
Style your waves with your fingers and hairspray. If you want a more beachy wave look, run your fingers through your curls a few times. Wait until your hair has completely cooled so your hard work doesn’t go to waste. Once you’re satisfied with the loo, spray a can of hairspray 12-14 inches (30.5 cm - 35.5 cm) away from your head. You can also turn your head upside down to fluff it up and separate the curls.
Hair Rollers
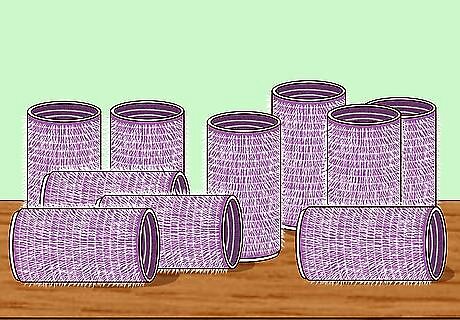
Select hot, Velcro, or foam rollers to curl your hair. Hair rollers come in many different types, shapes, and sizes. For instance, use large hair rollers to create big curls that mimic a blow out. Or, use medium to small-sized rollers to create defined ringlet curls. Hot rollers will curl hair more quickly and can only be applied to completely dry hair to avoid damage. Velcro rollers or foam rollers take longer to set. Professional Hair Stylist Gina Almona suggests putting the rollers in wet hair before bed and sleeping with them overnight.
Apply a heat protectant or setting spray to your hair. Before rolling your hair, opt for a volumizing hairspray to prevent your curls from falling flat. A smoothing cream or serum can help minimize frizz if your hair is wet. For hot rollers, use a heat protection product, like a mist or dry oil, to prevent your hair from being damaged.
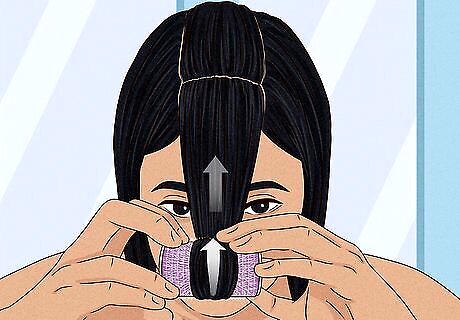
Divide your hair into sections. Using hair ties or claw clips, section your hair to be the same width as the rollers you plan to use. Create a central “mohawk” section along the top and back of your head. Then, section off 2-4 vertical rows along the sides of your head. Start at the top and release sections as you work.
Use 1 to 2 in (2.5 to 5.1 cm) sections per roller. Resist the urge to grab sections too large for the curls; you’ll end up with a small curl at the bottom. The section of hair should be no wider than the roller. If your rollers have various sizes, use the large ones on the top of the head and the smaller ones as you approach your hairline.
Wrap your hair around the roller. Starting at the bottom, hold the tips of your hair firmly against the roller with a finger. Then, roll it up along the hair (towards your face) smoothly and tightly. Tension is the key to creating a good curl. If you’re using hot rollers, be careful not to burn your fingers on the ends of each roller. Find a cool spot to grip the roller, or wear heat-resistant safety gloves. Make sure your hair has no lumps or bumps to create smooth, consistent curls.
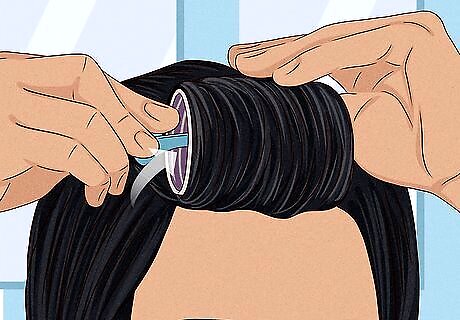
Secure the roller with bobby pins. Pin the roller so that the straight side of the bobby pin presses against your scalp. The crimped side should cradle the roller at the side of your head. Be aware that these pins aren't secure. They might fall loose if you move your head too quickly or suddenly. Alternatively, butterfly clips will also work to hold the hair in place. To avoid an indentation from the clip on your hair, try placing a tissue between the pin and the hair.
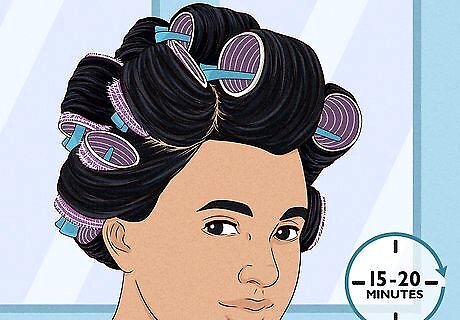
Leave your hair to set for 15 minutes. If you’re working with hot rollers or using Velcro rollers on damp hair, allow the rollers to sit for 15 minutes. With Velcro rollers, blast some heat with a hair dry and allow the hair to cool. However, the longer you leave them in, the tighter the curls will be. Don’t leave hot rollers in longer than the manufacturer’s recommended time to prevent damage to your hair. Wet set rollers will need to be left in until all of your hair is completely dry, which may take several hours or overnight. The dampest parts of the hair are the ends tucked inside the curls, so give your hair plenty of time to dry.
Remove the rollers from bottom to top. Start with the rollers near your neck and ears first, then move to the ones at the top of your hair. Aloma recommends using a wide-tooth comb or your fingers to loosen the curls, if necessary. Set the curls with hairspray and apply serum to your hair to add shine and reduce frizz.
Hair Scrunching
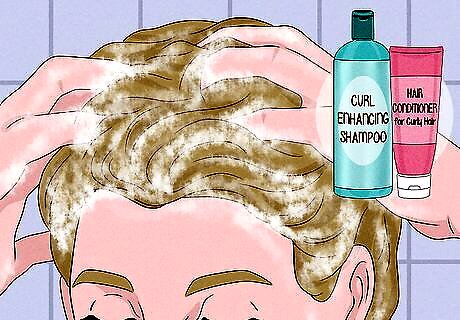
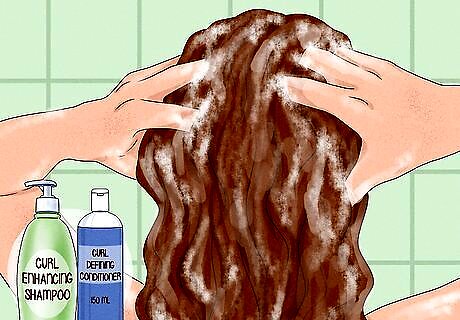
Wash and condition your hair. Scrunching only works on wet hair, so lather your hair with a volumizing or curl-enhancing shampoo. Work a small amount of conditioner into the ends and mid-lengths of your hair. After you apply conditioner, brush your hair with a wide-toothed comb to get out any knots. The conditioner will make the tangles easier to tackle and prevent you from causing damage to your hair. Ensure you rinse your hair thoroughly afterward, as the excess product can weigh your hair down.
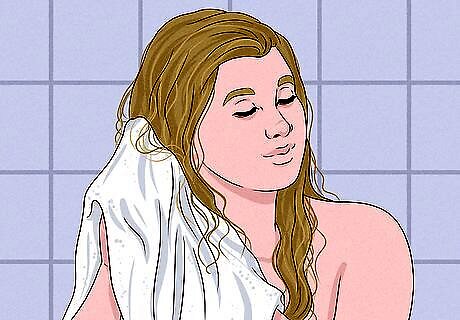
Use an absorbent towel to pat dry your hair. Squeeze the ends of your hair to get excess water out. Any product you apply drips out if your hair is too wet. Avoid rubbing your hair with the towel, as this can damage it and cause it to look frizzy. Avoid using a hair dryer since this will blow and straighten the hair, making curling more difficult.
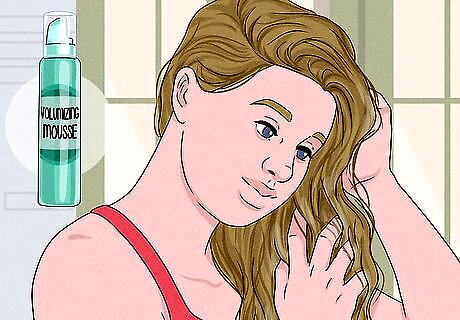
Comb your hair and apply mousse. Before you start to scrunch, use a wide-tooth comb to get smaller knots out of your hair. Always brush or comb from the ends of your hair to cause less damage to wet hair. Then, apply a golf ball-sized amount of curling mousse to the palm of your hands. Turn your head upside down, working the product evenly into your hair with both hands. Only apply mousse to the ends and mid-lengths of your hair. Avoid applying it to the roots of your hair, as this may weigh your hair down or cause it to look greasy. If you have stubborn knots, use a detangling mist.
Scrunch your hair in small sections, crumpling it towards your scalp. Keep your head upside down and scrunch sections of hair all over your head. Keep doing it for a minute, then flip your head and scrunch until you’re happy with the style. The same technique can be used regardless of what kind of curling product you use. Adjust the amount of product according to the instructions on the bottle and the length of your hair. Scrunching is recommended for a more natural.
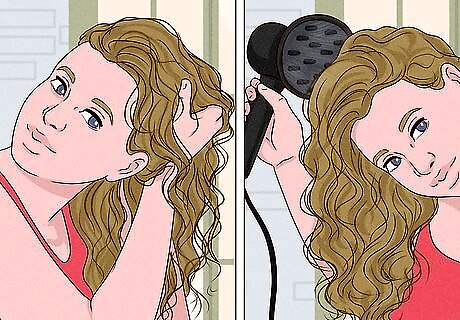
Use a diffuser to set the curls. Attach a long-finger diffuser to your hairdryer, then set it to its lowest heat and speed setting. Use the scrunching method as you dry your hair to help the formation of the curls. You can also allow your hair to dry naturally, using the scrunching motion every five minutes until it’s dry. The air-dry method will usually work fine if your hair is naturally curly or wavy. However, if your hair is naturally straight or flat, using the diffuser will help give your hair a little extra "oomph!"
Braiding
Wash your hair and leave it wet. The braiding method works best if your hair is wet or damp. Use a volumizing shampoo and conditioner, rinsing your hair well afterward. Brush your hair in the shower while you still have the conditioner in to cause less damage. Then, pat it dry with an absorbent towel. Apply curl-enhancing products to your hair, like volumizing gels, sprays, or mousses. If you want looser, less structured curls, you can skip this.
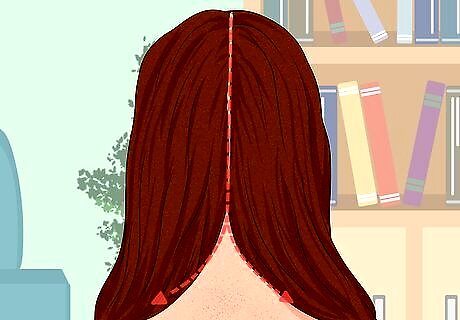
Part your hair into sections. The number of braids you put in your hair will determine how your curls look. More braids mean tighter waves. Use a comb to part a straight line from your forehead to the back of your neck. Then, divide each half into however many sections you like. You can separate your hair into two sections for loose curls.
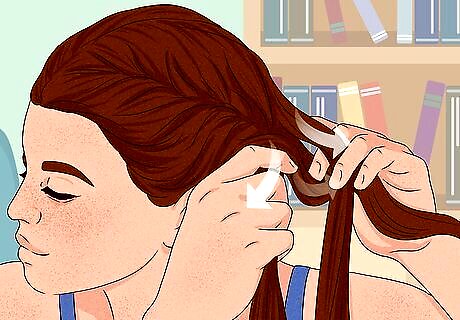
Braid each section. To make a standard braid, section your hair into three even parts to have a right, middle, and left section. Cross the right section over the middle. Then, cross the left to the new middle section. Repeat this process, alternating right and left sides. If you’re doing French braids, gather a chunk of hair from the top of one section. Separate the chunk into three pieces, and make a few rows of a standard braid. Then, incorporate a small strand of hair to each section before you cross it over. So, before you cross the right section over the middle, grab more hair to make the braid thicker. Alternate right and left sides, incorporating another small piece of hair until all of it has been incorporated.
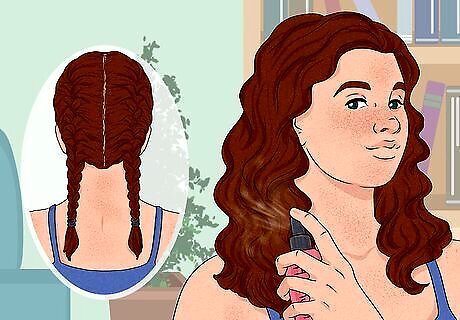
Leave the braids in for several hours or overnight. Tie off each braid with a non-rubber hair elastic to keep them in place. If you sleep with them, you can also use a hair wrap to prevent frizzing. After your hair has had 6 to 8 hours to dry, gently undo the braids. Run your fingers through your hair several times to get any knots out. Avoid brushing your hair as it will make it fluffy. Set your curls with a spritz of hairspray.
Bantu Knots
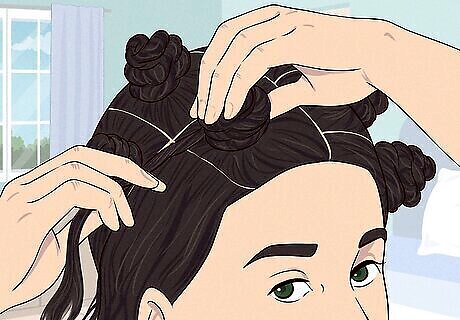
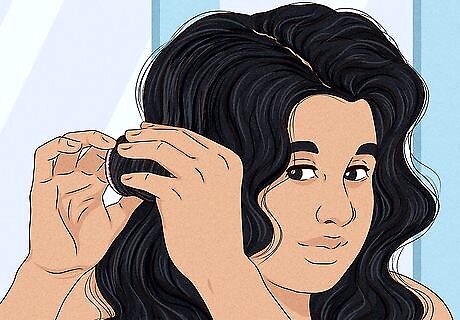
Create big, soft beach curls by twisting your hair into bantu knots. Bantu knots are tiny buns originally used in Africa. Start with damp hair, spritzing it with a spray bottle or allowing it to air dry partially after you wash it. Divide the hair into four roughly equal sections: straight down the middle vertically, then across your head from ear to ear.
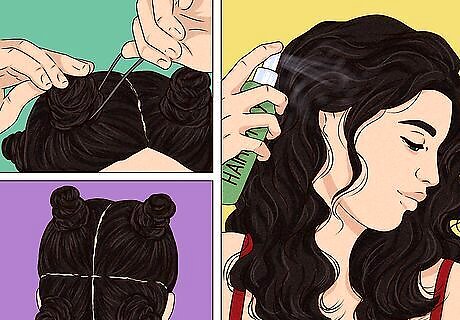
Twist each section in any direction. You can go counter-clockwise or clockwise. However, twisting the sections in different directions from each other can help create a more natural look. To make a Bantu knot, coil each twisted section into a tight bun, pinning it with a bobby pin or securing it with a scrunchie. If you have afro-textured hair, you can tuck the ends under the Bantu knot without pins.
Let your hair dry, then undo the buns. Blow dry each bun until completely dry or allow it to air dry. Then, release each section and gently loosen the curls with your fingers once your hair is completely cool. Use a little hair spray to lock in the style.
Heatless Silk Foam Roller
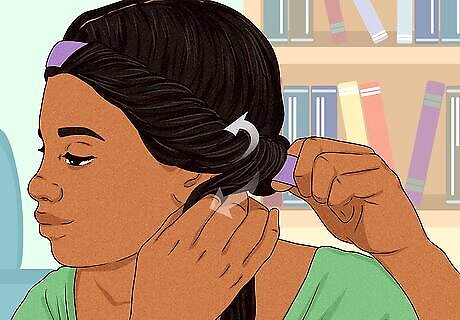
Create waves by twisting your hair around a silk foam roller, socks, or a headband. A silk curler filled with foam is a great tool. Dampen your hair with a spray bottle before clipping the curler to the middle of your hair with a claw clip. Use socks, headbands, or leggings instead of a heatless foam roller.
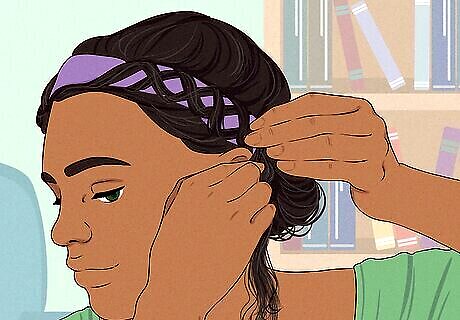
Twist your hair around the roller. Part your hair into two sections on either side of your head. Begin twisting the hair on one side, working from the top. Crossing over the roller, grab a piece of hair closest to your face. Wrap another piece of hair (further from your face) towards your face, creating an X shape over the roller. Weave in additional hair, as you would with a French braid, and continue making the X shape. Tie your hair to the roller with a silk elastic band. The smaller you make each wrap, the tighter your curls will be.
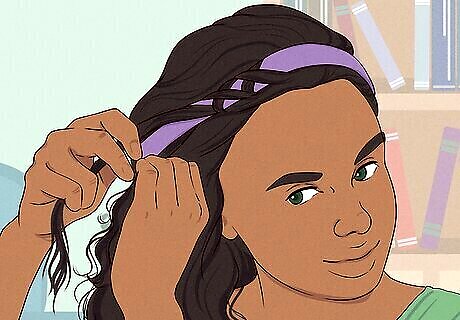
Allow your hair to dry, then remove the roller. Let your hair dry for a few hours, overnight, or speed up the process with a blowdryer. Once your hair is dry, release the twisted sections from the headband. Loosen your curls with your fingers, and scrunch with a small amount of hair texturizer.


Comments
0 comment