

- Choose an injection site in your arm, if possible. Your hands, legs, and feet are also viable options, but you shouldn’t inject into your neck or groin.
- Always use a sterile and new needle to prevent infection and disease.
- Insert the needle at a slanted, 15- to 45-degree angle to make sure the medication goes into your vein.
- Pull back (or “register”) the syringe to make sure that you successfully hit a vein.
Assemble all of your supplies.
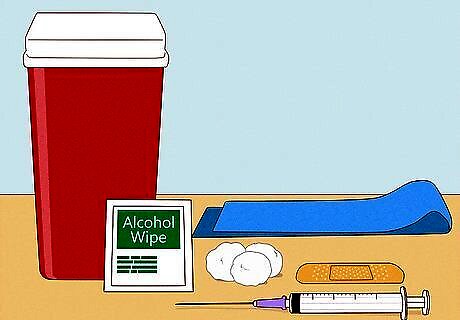
Lay out all of your supplies in front of you so they’re easily accessible. Grab a clean syringe, a tourniquet, an alcohol wipe, a cotton ball or tissue, a bandage, and a secure container with a lid. When you’re self-injecting, you need to be totally focused on what you’re doing—you don’t want to be scrambling around and looking for supplies. Always try to do self-injections in a safe, clean place when you aren’t crunched for time (like right before work).
Wash your hands thoroughly.
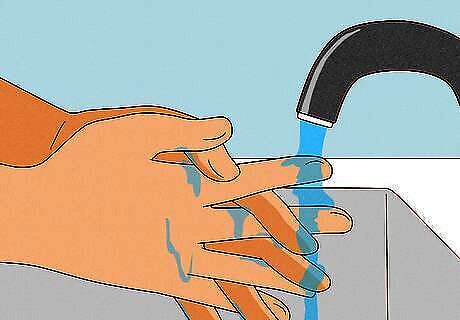
It’s always important to have clean hands before you start. You know the drill—head over to your sink and wash your hands with soap and water for at least 20 seconds (the amount of time it takes to sing “Happy Birthday” twice). Then, dry off your hands before you handle your syringe and medication.
Draw up your medication in a syringe.
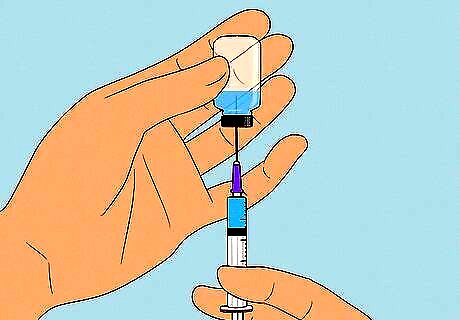
Use your normal preparation practices to get your medication ready to go. Double-check that you have the correct dose pulled into your syringe—since your medication is going straight into your vein, it’s easier to overdose by mistake. If your medication comes in a vial, use a clean syringe to draw up the medication.
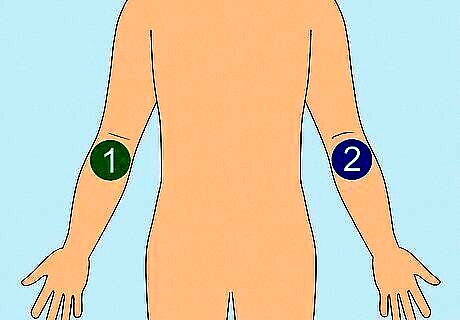
Find a good injection site.
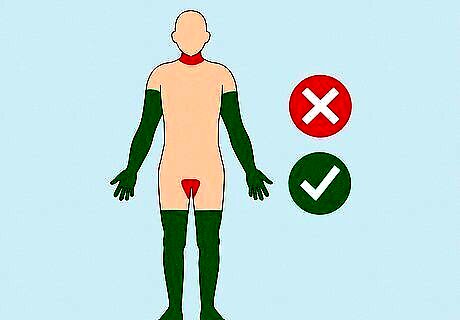
Arms are the best, followed by hands, legs, and feet. Focus on your upper forearm in particular—the vein that runs along the center of your elbow is the best option for self-injection. The 2 other veins that run along both sides of your forearm are also viable injection sites. If necessary, you can also self-inject in your hands, legs, and feet. Your hands and feet are really far from your heart, so the injection wound will take longer to heal. Leg veins have a higher chance of forming clots, which can lead to serious circulation issues and major health complications. Warning: Avoid self-injecting your medication into your neck or groin area. Both of these injection sites contain major arteries (the jugular and femoral, respectively), and it can be deadly to pierce them by mistake.
Tie a tourniquet to help you locate the vein.
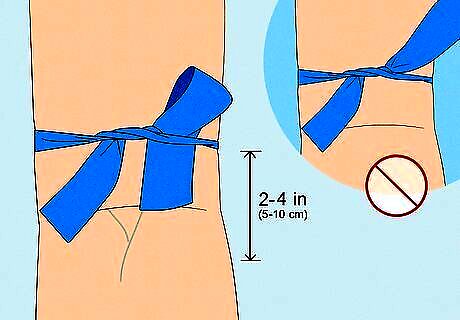
Secure the tourniquet 2-4 in (5-10 cm) above the injection site. Using both hands, wrap the tourniquet strap around the base of your upper arm. Instead of tying a knot, tuck 1 end of the strap beneath the wrapped section of the tourniquet. When you’re ready to remove the tourniquet, simply pull on the tucked-in end of the strap to undo it completely. If you’re injecting into your hand, ball your hand into a fist and roll your wrist forward so the veins are more visible. As a general rule of thumb, aim for the veins that are closer to your wrist—these are easier to inject into. Two condoms tied together can work in a pinch if you don’t have a tourniquet on hand. Tip: Before applying the tourniquet, hold out your arm and rotate it in big circles for 20-30 seconds. This helps more blood flow into your arm, which makes the vein easier to find.
Clean the injection site with an alcohol wipe.
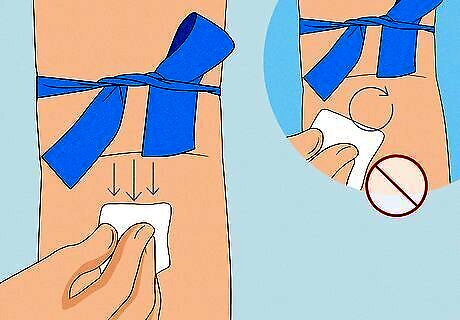
Wipe down the skin in 1 direction using smooth, vertical motions. Try not to rub the wipe in circles—this allows the germs to stick to your skin. Once you’ve cleaned off the injection site, be careful not to touch (and recontaminate) the area. Regular soap and water can work in a pinch, along with hydrogen peroxide or rubbing alcohol.
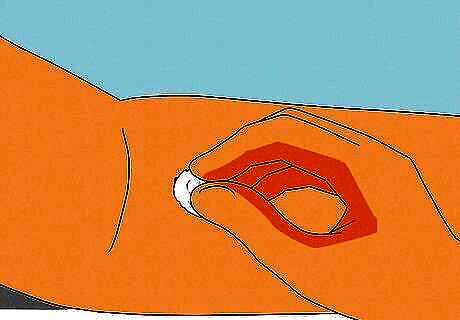
Insert the needle at a 15- to 45-degree angle.
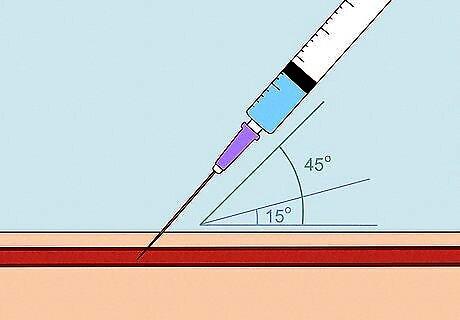
A steep angle allows the needle to go in the vein, not through it. Grip the syringe so the tip of the needle points toward your heart and the needle’s bevel (opening) faces upward. Hold the syringe at an angle so the needle can enter your vein without going completely through it.
Pull back the plunger to make sure you hit a vein.

The blood in your syringe should look dark red (not bright red). Extend the plunger slightly and watch for a little bit of blood to fill your syringe. If the blood looks dark red, you’ve successfully hit a vein and are ready to continue with the injection. This process is also known as “registering.” If no blood is in the syringe: Gently remove the needle, undo the tourniquet, and press on the injection wound with a cotton ball or tissue. Then, redo the tourniquet and try again at a different injection site. If the blood in the syringe is bright red: You’ve likely hit an artery instead of a vein—remove the needle carefully and undo your tourniquet. Then (if you can), lift the injection site so it’s above your head. At this time, press on the wound for 10 minutes with a tissue or cotton ball to stop the bleeding. If the bleeding still hasn’t stopped after this point, get medical help right away. Warning: Always make sure your needle is in a vein before you inject any medication. If you inject into tissue outside of the vein, you could develop an abscess (a severe skin infection).
Remove the tourniquet.
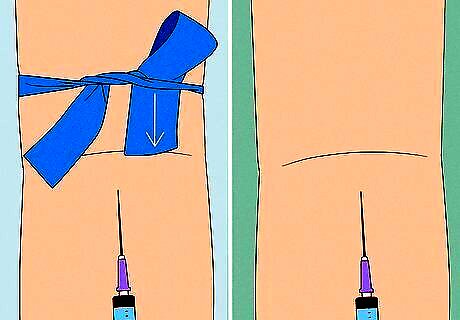
Undo the tourniquet so you don’t develop a bruise. Pull on 1 end of your tourniquet so the strap completely slips off. Leaving the tourniquet in place during the injection can lead to bruising later on, which you definitely don’t want.
Inject the medication and remove the needle.

Slowly press down the plunger before carefully sliding it out. There’s no need to rush—a slow injection makes it easier for the medication to enter your bloodstream. Once you’re finished with the injection, carefully the slide the needle out of your skin at a 15- to 45-degree angle.
Press on the injection wound.
Apply pressure for a few minutes with a cotton ball or tissue. Don’t bother wiping down the wound with an alcohol pad—this will only make the bleeding worse.
Toss out your needle in a closed container.
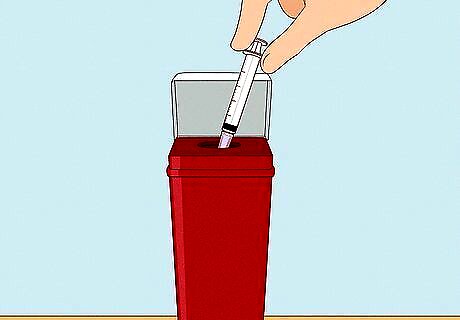
A closed container prevents any cross-contamination. Open up your secure container and slip the used needle inside. Then, secure the lid on top, tape the container shut, and toss it in the trash. Any sturdy container (made with metal or plastic) with a snug-fitting lid works well for this. If you need to inject medication a lot, wait until this container is full of old needles before tossing it out. You can also dispose of your used needles in an FDA-approved sharps disposal container.
Rotate your injection sites in the future.
Use new injection sites for future injections until your old wounds heal. Move at least 1 in (2.5 cm) away from your old injection site so that part of your vein has a chance to heal. To be extra safe, switch to a different arm or part of your body to prevent a particular vein from developing a lot of scar tissue (or even collapsing). Vitamin E oil can help with scarring while bruise creams can help cut down on bruising. Just make sure that your injection wound is closed up before applying either product, or else you could develop an infection. If you suspect that you might have a infection, visit a doctor or walk-in clinic for treatment.


Comments
0 comment