

Folding a Small Origami Sword
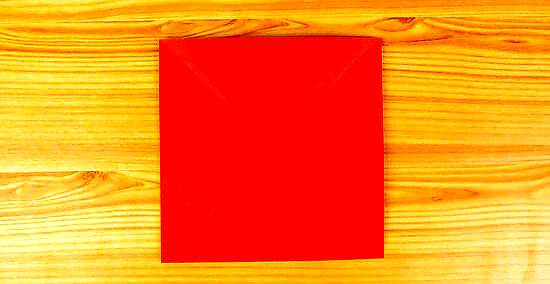
Crease a square of paper on both diagonals. Place the paper pretty-side-up. Fold the square inward along the diagonal, crease, and unfold. Repeat this for the second diagonal. You now should have two creases in the shape of an X on your square of paper. You can use origami paper that’s 10 inches by 10 inches (25cm by 25 cm). That’s the largest size of origami paper normally sold. You can also make your sword bigger by using a bigger square of paper. The bigger your paper, the bigger your sword!

Position the square paper so that it is a diamond. That is, a corner is facing down towards you, and another corner is facing away. The colored or patterned side of the origami should be face up, and the plain side should face the table. If your paper looks the same on both sides, don’t worry--you can still create the sword! It’s just a little easier when the sides look different.
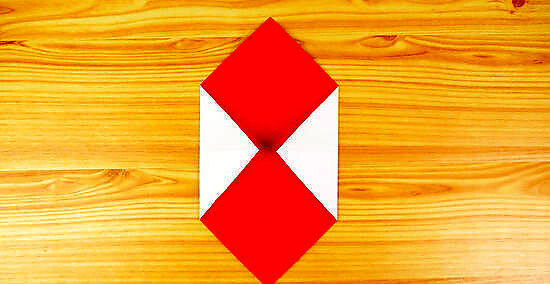
Fold the left and right corners to touch the center of the diamond. The corner tips should meet in the center of the paper. Crease both folds firmly. Once you’ve done this, flip the model over. Now your folds are facing the table. Your model should look like an elongated hexagon.
Fold the long edges of the hexagon to the center. The long edges should meet at the center. As you fold them in, a triangle of paper will pop out on either side of your model. If the triangles don't pop out, but instead bend around the back of your model, just unfold them so they stick out.
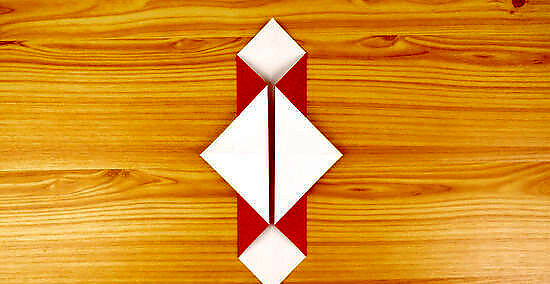
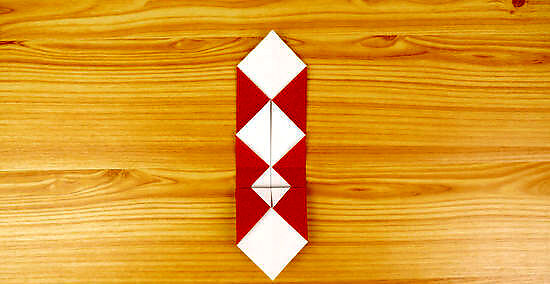
Fold the two sticking-out triangles in, to touch at the center of the model. Crease the fold firmly with your nail. Your model should now be a very long elongated hexagon, with alternating colors of triangles and diamonds. The colors will not be alternating if your paper is the same color on both sides.
Fold the entire model in half the short way and open it back up. Now you should have a crease going across the middle of your model. Your model will look like four diamonds stacked vertically, with triangles on the side. This crease will help line up later folds.
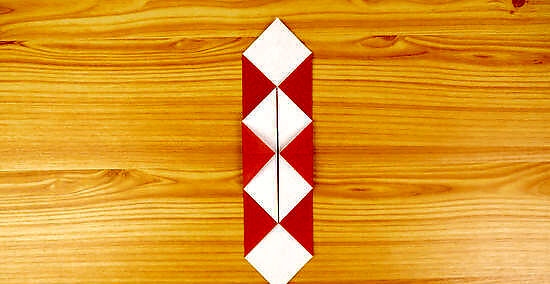
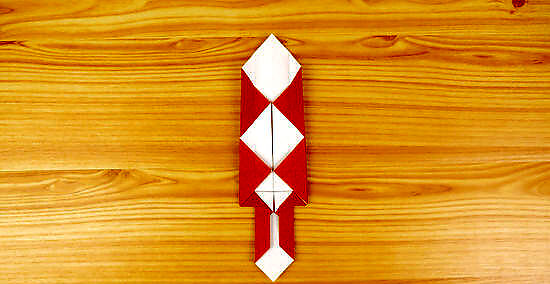
Fold the second diamond from the bottom in half, upward. The pointed tip of the paper you just folded should line up with the tip of the top diamond. Crease your fold firmly.
Crease the top paper on the centerline of the model and fold back. See where you creased the center of the whole model a few steps ago. Use that as the line to fold back your top piece of paper, which you folded up in the last step. You will now have a long part of your model and a short part of your model. The long part of your model will become the blade, and the short part will become the handle or hilt.
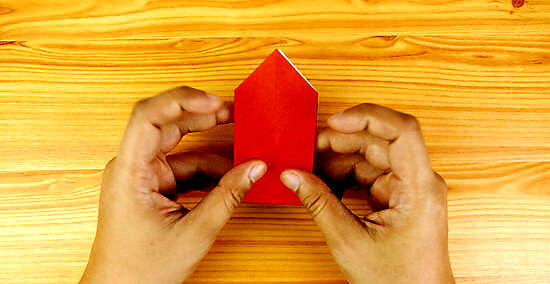
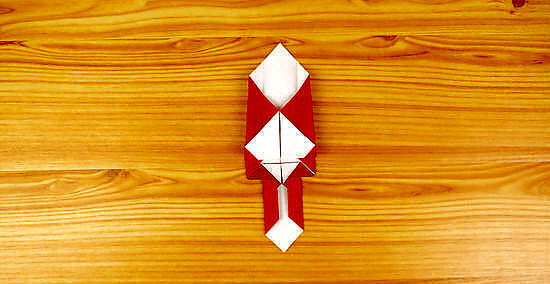
Fold inward both edges of the short part of your model to make the hilt. The edges will meet in the middle. Crease each side firmly.
Squash down the triangles of paper that form. As the edges fold inward they will make small triangles of paper form. Flatten these crisply. This is called a squash fold. You should see the hilt of the sword starting to form. The hilt has a vertical handle, and a horizontal part called the cross-guard.
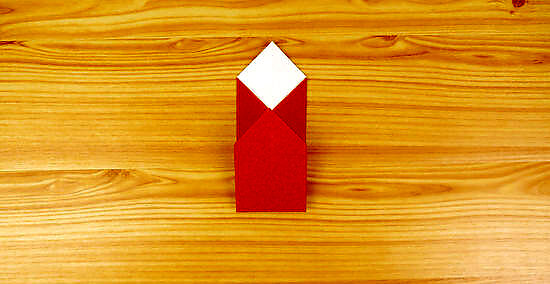
Fold the top part of your sword down and up to cover the cross-guard. First, fold the whole model down over the cross-guard. Then fold up the top so that only the cross-guard is covered. If you flip the model over you will see that you have just made what looks like a proper hilt.
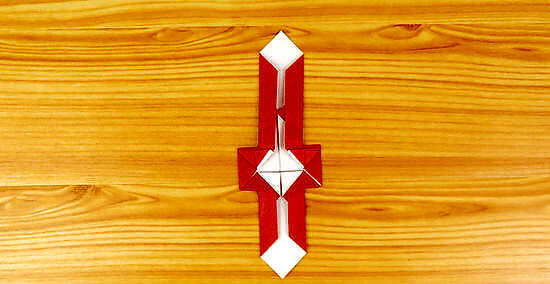
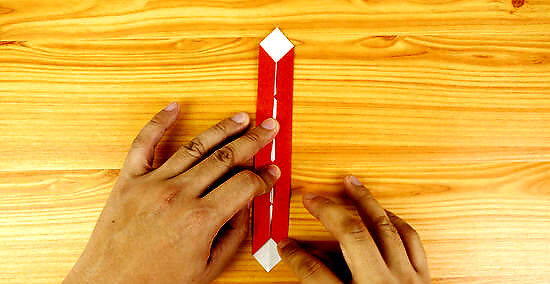
Fold in the sides of your blade, with more squash folds. You don’t want your blade to be as wide as your cross-guard. So fold in the long edges to meet at the middle. This will require more “squash folds” of squashing down the triangles of paper that form.
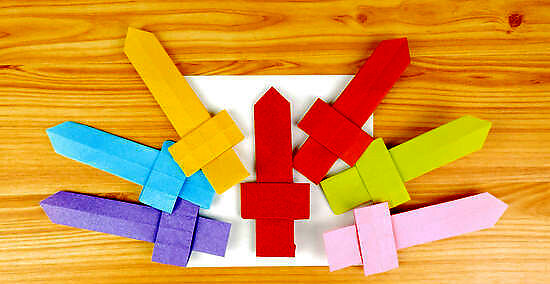
Fold the bottom tip of the handle to square it off. Keep the triangle on the top of your sword for a pointy blade. But fold up the bottom triangle for a squared-off handle. Turn your model upside down, so the side facing the table is facing you. There’s your sword! You can try making swords out of different colored paper until you have enough for all your friends.
Make a Full-Size Sword with Newspaper

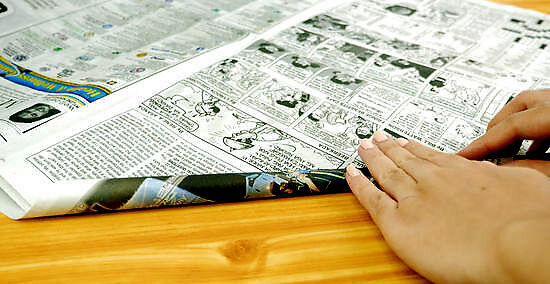
Pile together 7 or 8 sheets of newspaper. You can use any paper you like, but the newspaper is extra big and lends to a much more intimidating sword. If you're feeling rather crafty, spray paint the newspaper with silver spray paint -- or whatever color sword your ninja-self might carry!
Roll the paper diagonally. Start at the corner and roll the paper on a diagonal until you reach the other side. The tighter you make it, the sturdier it will be. Try to roll as tightly as possible so that the roll is rigid. You don’t want a floppy sword!
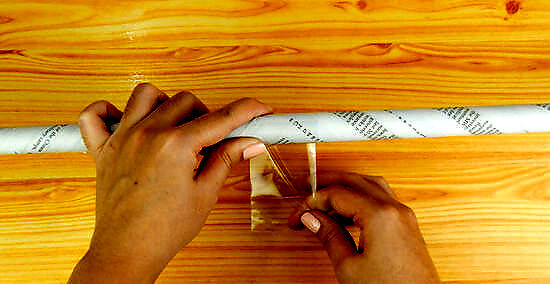
Tape the ends of the sword. Sturdy, transparent packing tape works best, but any invisible tape should do the trick. If you do have packing tape, consider taping up the entire paper blade to make it more sturdy. If the end of your sword isn't the right shape, use scissors to cut the paper into the shape of a sword tip.
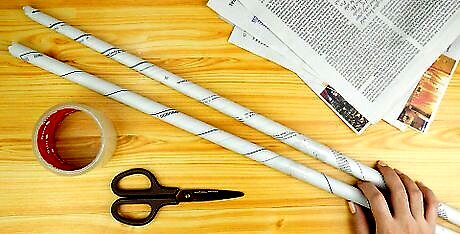
Make another pile of newspaper and roll it diagonally to make a handle. Again, pile sheets of newspaper and roll from the outer corner in. Tape the cylinder of newspaper together with transparent tape. At this point the handle will look pretty much like the blade––but not for long!
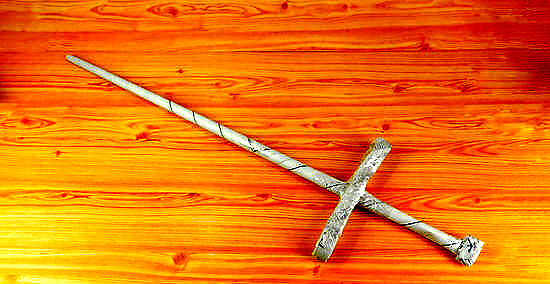
Bend the handle in half around the sword and tape it securely. The sword blade should go through the middle of the handle. Tape the handle closed and secure it to the sword blade with more tape. Congrats! You’ve made a full-size sword. Now make a few more swords you can give to your friends, and you’re ready to duel!


Comments
0 comment