

- Check your DNS settings in Control Panel for Windows.
- For Mac, your DNS settings are listed in System Preferences.
Checking DNS Settings in Windows

Swipe in from the right side of your Windows 8 device to access the “Start” screen. If you’re using a mouse, point to the lower left corner of your session to access the “Start” screen.
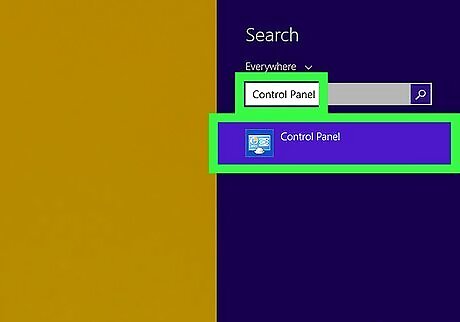
Type “Control Panel” into the search field and select the option after it displays in the search results.
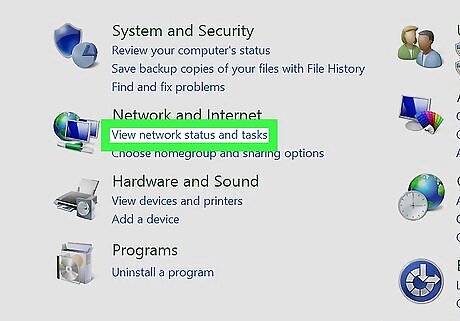
Click on “View network status and tasks” below the Network and Internet section. A list of all your active networks will display.
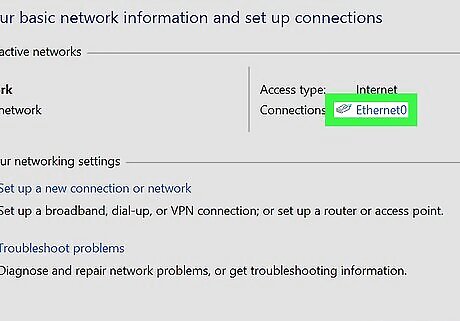
Click on the link displayed to the right of “Connections” for the network you’d like to check DNS settings for. A network status window will display.
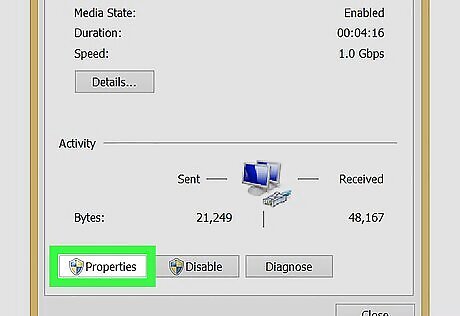
Click on the “Properties” button within the status window.
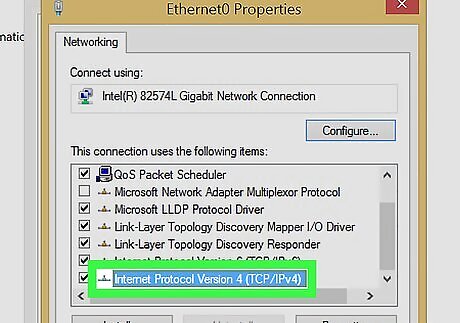
Click on “Internet Protocol Version 4 (TCP / IPv4).”
Click on “Properties.” Your computer’s current DNS settings will be located in the bottom half of the Properties window.
Checking DNS Settings in Windows 7 / Vista

Click on the “Start” button and select “Control Panel.”

Type “Network and Sharing” into the search field at the upper right corner of the Control Panel window.
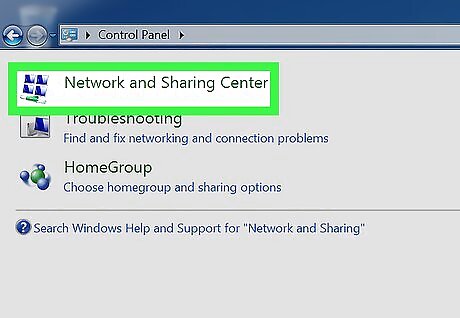
Select “Network and Sharing Center” when it displays in the search results.
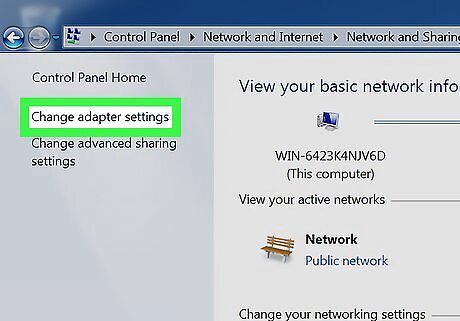
Click on “Change adapter settings” in the left pane after the Network and Sharing Center window opens.
Right-click on the network for which you want to check DNS settings.
Select “Properties” from the list of options provided.
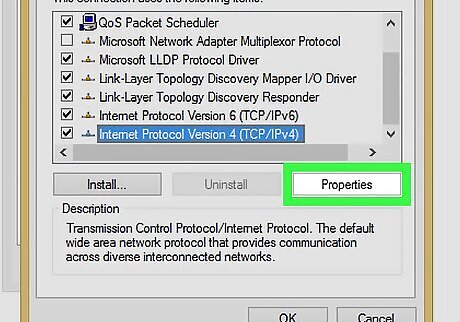
Click on “Internet Protocol Version 4 (TCP / IPv4).”
Click on the “Properties” button. Your DNS settings will display in the bottom portion of the window next to the DNS server fields.
Checking DNS Settings in Windows XP

Click on the “Start” button on your Windows XP desktop.
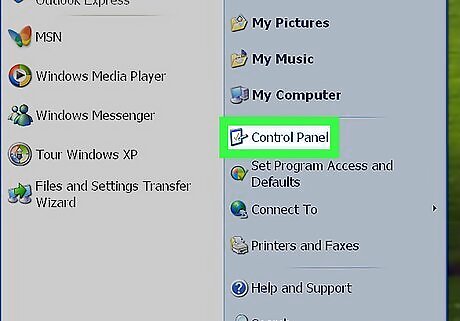
Select “Control Panel.”
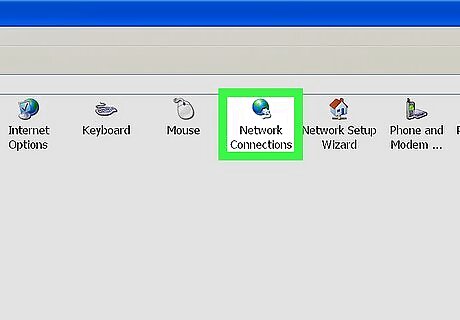
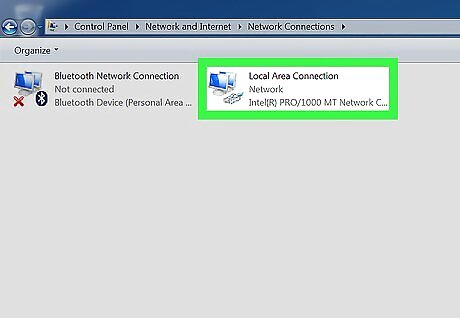
Select “Network Connections.” The Network Connections window will open.

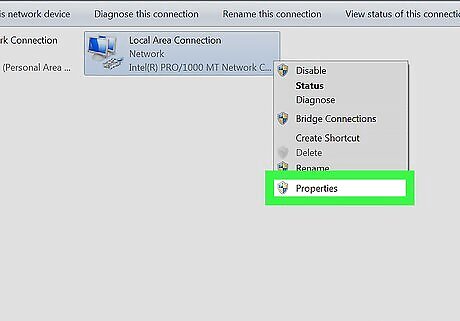
Right-click on “Local Area Connection” and select “Properties.” If you are connected to a Wi-Fi network, right-click on “Wireless Network Connection” and select “Properties.”

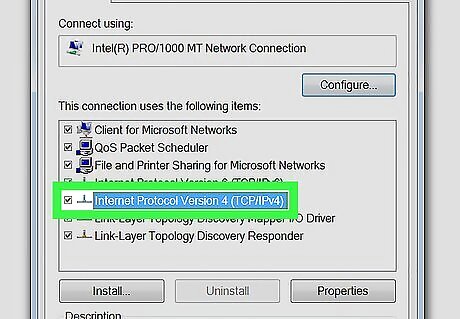
Click on “Internet Protocol (TCP / IP).”
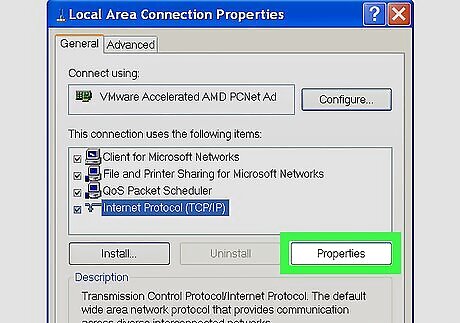
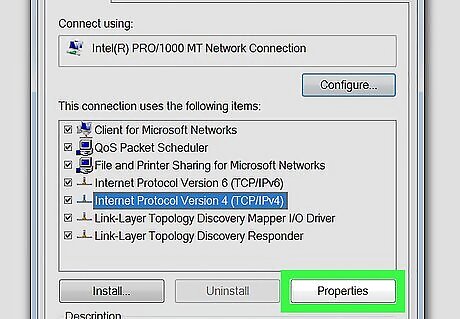
Click on the “Properties” button. Your computer’s DNS settings will be displayed at the bottom of the Properties window next to the DNS server fields.
Checking DNS Settings in Mac OS X

Click on the Apple icon at the top of your Mac desktop.
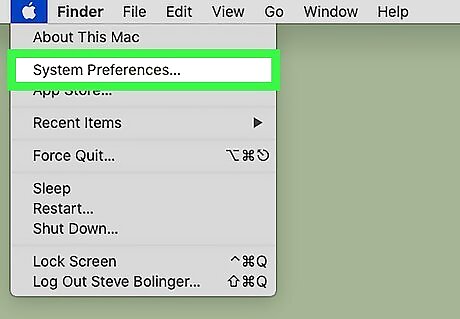
Select “System Preferences.”
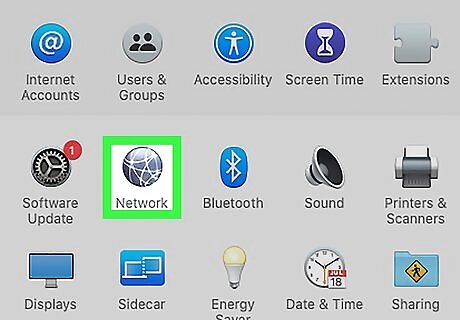
Click on the Network icon within System Preferences.
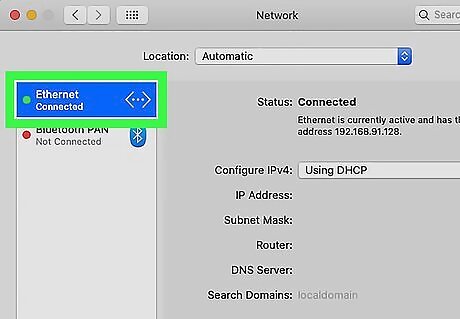
Click on the network for which you want to check DNS settings in the left pane of the Network window.
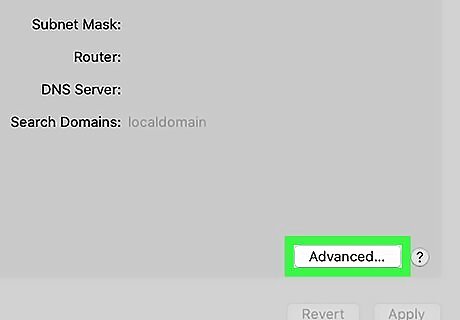
Click on the button labeled “Advanced.”
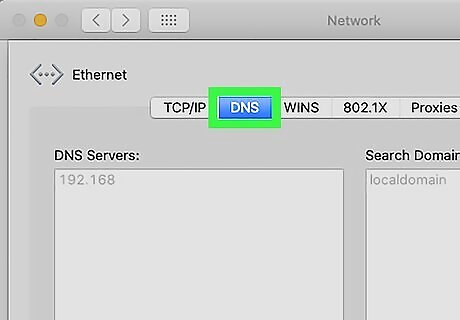
Click on the “DNS” tab. Your computer’s current DNS settings will display under the fields labeled “DNS servers” and “Search domains.”
Checking DNS Settings in Ubuntu

Click on the Network icon at the top left corner of your Ubuntu desktop. The Network icon will either resemble two arrows or a Wi-Fi symbol.
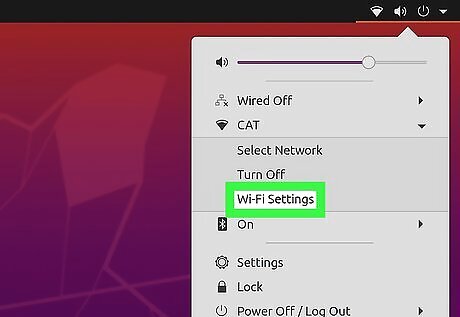
Click on “Edit Connections.” The Network Connections window will display.
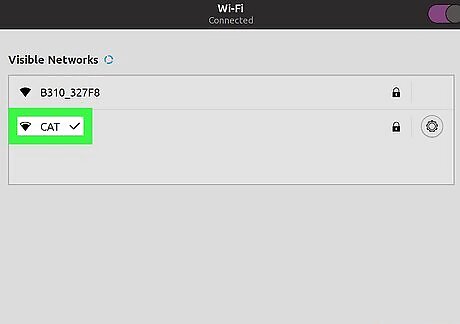
Click on the name of the network connection for which you’d like to check DNS settings.
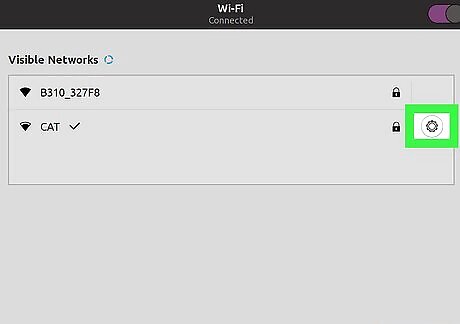
Click on the “Edit” button in the right pane of Network Connections.
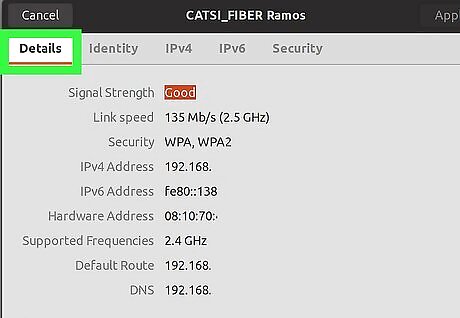
Click on the tab labeled “IPv4 Settings.”
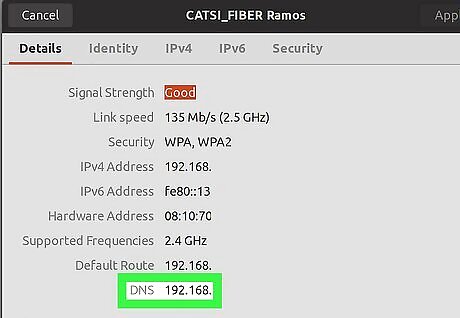
Note the information posted in the field next to “DNS Servers.” These are your computer’s current DNS settings.
Checking DNS Settings in Fedora

Click on the small arrow in the upper right corner of your Fedora taskbar.
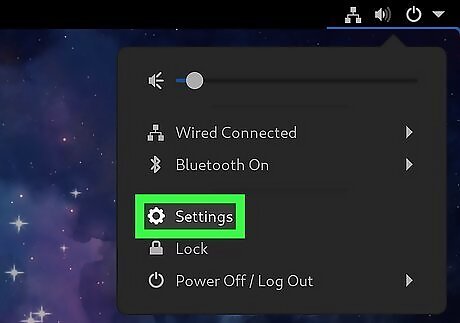
Click on the Setting icon.

Click on "Network" icon. The Network Connections window will display onscreen.
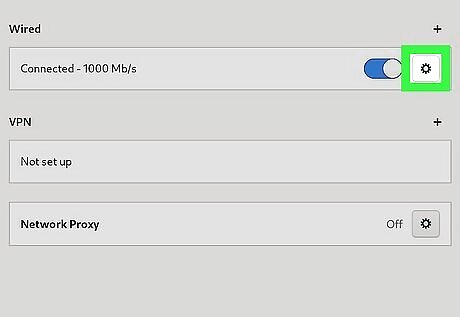
Select the name of the network you’d like to check the DNS settings for.
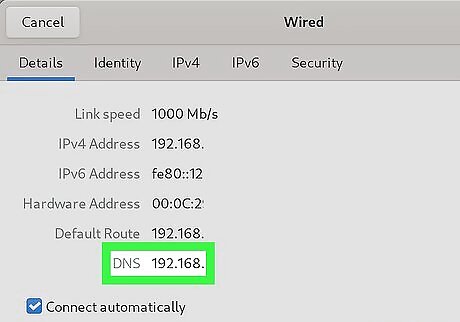
Your computer’s current DNS settings will display under "Default Route".


Comments
0 comment