
Smoothing Minor Wrinkles with a Heat Gun
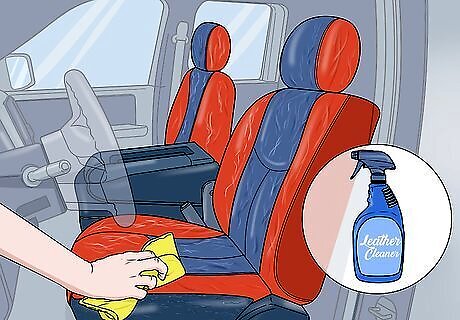
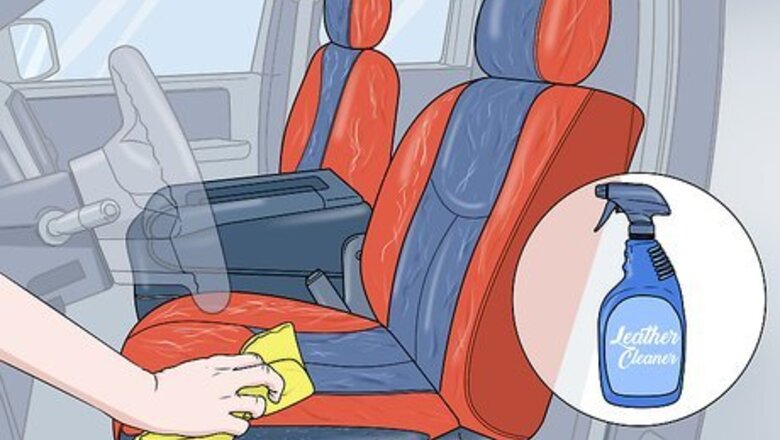
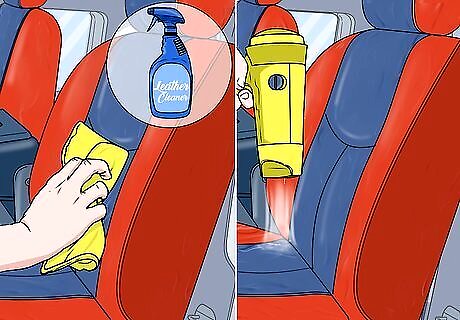
Clean and condition your seats with a specialty leather cleaner. Spray or squirt a small amount of cleaner onto a microfiber cloth or soft, lint-free towel and wipe the seats down from top to bottom. The lubricating agents in the cleaner will soften the leather and safeguard it against heat, which is how you’ll be working out the wrinkles. You can pick up a bottle of quality leather cleaner at your neighborhood auto supply store for around $10-20. There will typically be a wide selection of products available, including cleaners formulated for different styles and colors of leather.Tip: It’s good to get in the habit of conditioning your leather upholstery on a regular basis, so go ahead and apply the cleaner to the entire seat, even in areas with no visible wrinkling.
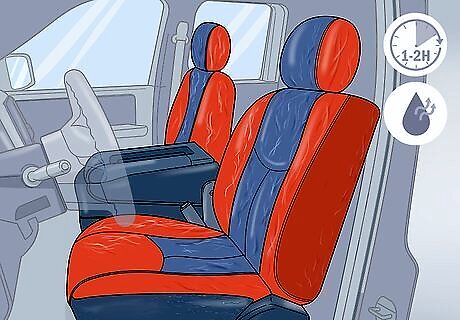
Let the cleaner sit on the seats for 1-2 hours. This will ensure that it has time to absorb fully while also giving the leather a chance to dry out. In the meantime, hold off on taking any unnecessary trips and avoid handling the leather as much as possible. Too much touching can transfer dirt and oil from your skin. If for some reason you’re in a hurry to get to work on your seats, make sure that the leather cleaner has had at least 10-20 minutes to soak in. Some cleaners have longer recommended drying times than others. Check the instructions outlined on the label of the specific product you’re using for more detailed guidelines.
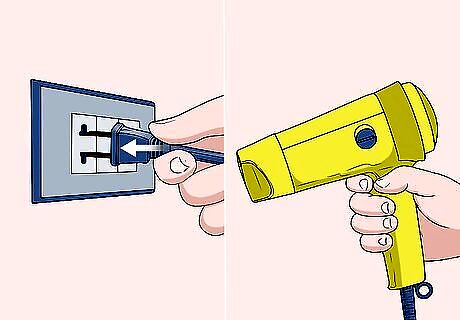
Plug in your heat gun and set it to low or medium heat. Most heat guns have a switch on the backside of the handle that controls the intensity, airflow, and other key settings. Others have more sophisticated interfaces, with digital display screens and buttons that allow you to adjust the exact temperature in small increments. You may need to park your car close to an open electrical outlet since you’ll only have about 6–8 feet (1.8–2.4 m) of power cord to work with. For a project like this, you’ll want to keep the temperature relatively low. While leather is a resilient material, it is possible for it to burn, deform, harden, or shrink when exposed to prolonged, intense heat.
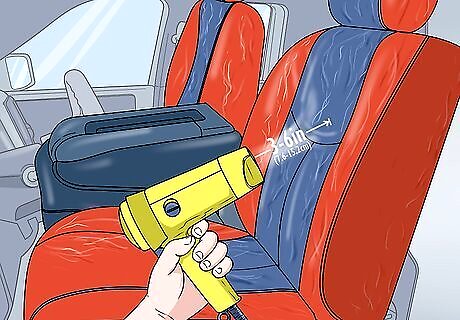
Wave the heat gun back and forth over the wrinkled section. Hold the nozzle 3–6 inches (7.6–15.2 cm) away from the surface of the seat and keep it moving constantly. As you do, watch the leather closely for any subtle movement. You may be able to actually see it changing shape as it warms up. Make sure there’s a safe amount of distance between your heat gun and seats at all times. Not only will this spare your leather any unnecessary damage, but it will also prevent the plastic components near the nozzle of the tool from melting. Try not to let the gun hover over any one spot for too long. Doing so will make burns more likely to occur.
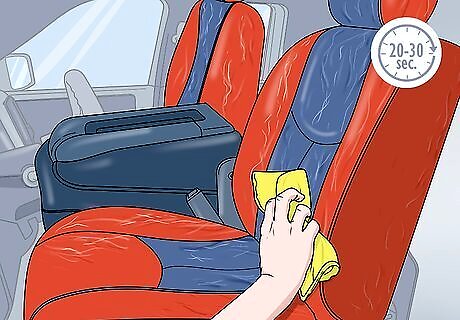
Wipe the seats down with a damp microfiber cloth every 20-30 seconds. Wet a separate cloth and keep it somewhere close at hand. That way, you’ll be able to pause periodically and go over the section you’ve been heating. In addition to cooling the leather, the moisture will create a gentle steaming effect that will help smooth out stubborn inconsistencies. Stop as soon as the wrinkles are no longer visible. The whole process might take anywhere from 1-5 minutes in total, depending on the severity of the wrinkles, as well as the thickness and texture of the leather.
Repeat the process until the wrinkles disappear completely. It may take a few passes before you see a significant improvement. After several minutes of patiently heating, wiping, and examining your seats, they should start to look just like they did the day they rolled off the assembly line at the factory. As long as you’re taking the time to cool and dampen the leather intermittently, heat damage shouldn’t be a danger. When you’re done, hit your seats with a second application of leather conditioner to protect them from future wear and tear.
Ironing out Deep Creases
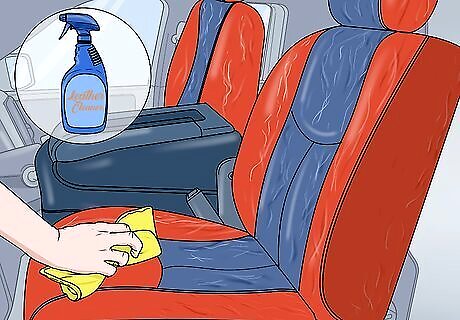
Apply a nourishing leather cleaner to every part of your seats. Squeeze or spray a conservative amount of your product of choice onto a microfiber cloth or soft towel and go over the entire seat with it. If necessary, use a separate cloth or towel to wipe off any excess cleaner. Allow the product to sit for 1-2 hours before moving on. It’s always a good idea to treat genuine leather with a quality conditioning agent before and after subjecting it to intense heat.
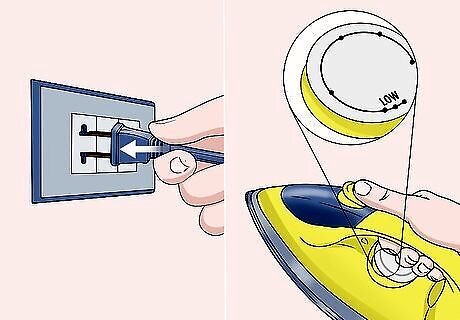
Plug in a clothes iron and set it the lowest possible heat setting. Give the iron a few minutes to reach peak temperature before getting started. While it’s warming up, go through your vehicle and make sure that the seats you’ll be restoring are completely clear of clutter and small debris. You may need to use an extension cord to get the reach you need to be able to use the iron inside your vehicle. It’s important not to let your iron get too hot. If it does, it could easily scorch the leather, leading to permanent textural changes or discoloration.
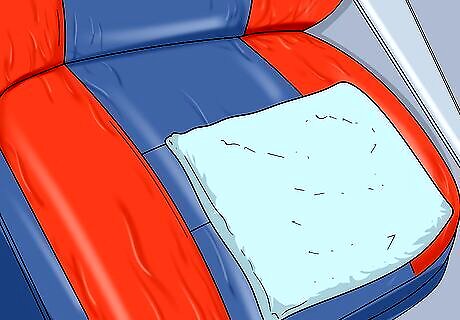
Place a large hand towel over the problem area. Center the towel over the creased section of leather, flattening it out to make sure it covers as much of the seat as possible. You can move it around later to smooth outlying wrinkles if need be, but for right now you just want to concentrate on the spot where the fold is the deepest. You also have the option of using a paper bag if you don’t happen to have a towel handy. Paper bags are readily available at any supermarket, usually for only a few cents apiece. The towel or bag will serve as a protective buffer, transferring the heat of the iron without exposing the leather to it directly.
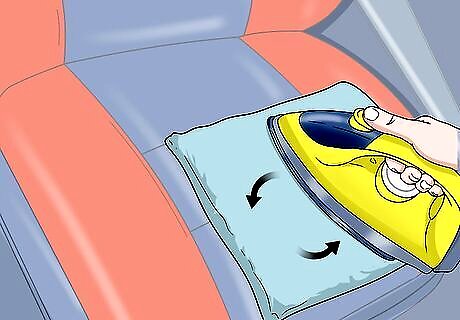
Press the iron into the towel or bag and move it around using circular motions. Hold the iron against your protective layer using a moderate amount of pressure. Let it sit there for a few seconds to warm up the leather underneath, then begin sliding it in different directions. “Massaging” the seat in this way will help to gradually work out creases, deep wrinkles, and similar defects. For best results, be sure to iron along the length of the crease as well as across it. There’s no need to get too technical here. This should feel just like you’re ironing any ordinary article of clothing.Warning: Stay away from your iron’s steam button, if it has one. In addition to making a soggy, deteriorating mess of paper bags, adding moisture to the mix could oversaturate the leather in a hurry.
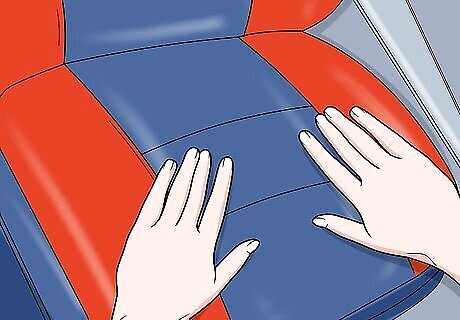
Mold the leather by hand once it gets nice and warm if necessary. After ironing for a minute or two, set your iron aside, remove the towel or bag, and check your progress. If you’re happy with the look of the leather, feel free to call it a day. If not, use both hands to gently stretch, knead, and smooth it until there’s no sign of the original crease. Don’t worry if the leather appears to be sagging a bit when you’re done. It will shrink a bit as it cools, pulling it taut over the surface of the seat. Keep in mind that severe deformations like dents and divots may be more or less permanent in places where the leather has been stretched beyond its natural elasticity. Remember to reward your seats with another application of leather conditioner to keep it strong, supple, and attractive.


Comments
0 comment