

X
Research source
While it’s not the most popular tool in the kitchen, it’s a great gadget to have if you’re trying to take your culinary skills to the next level. Not only does a grill press make it easy to get a crispy, uniform sear, but it’s also a great way to hold food down to help it cook evenly. You can also use your grill press to flatten oddly-shaped filets and make them look more elegant when it’s time to plate meals at your next dinner party.
Pressing Food
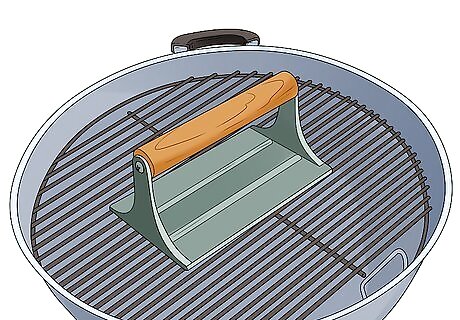
Preheat your grill press if you want to speed up the cooking time. If you want to sear the food you’re cooking from both sides and speed up the cooking process, preheat your grill press. On a grill, simply leave the grill press on top of the grate while it heats up. If you’re using a stovetop, turn on a burner to your preferred temperature and leave the press directly on top for at least 10 minutes. It may seem obvious, but you always leave the handle on top of the press. You only preheat the plate. The handle may get kind of hot while the plate preheats, so don’t touch it without an oven mitt or towel after it has warmed up. You can keep your grill press at room temperature if you’re just flattening food. You don’t have to preheat it if you want more control over the cooking time.
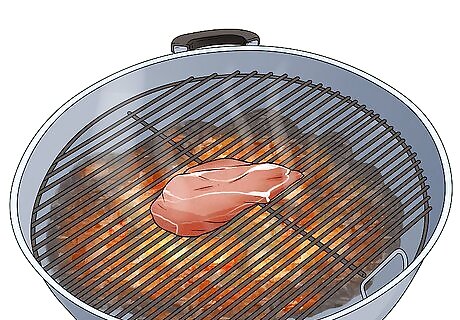
Place your food on the skillet or grill to start cooking it. Put your steak, burger, chicken, sandwich, or veggies on the cooking surface. Leave plenty of space around each individual item that you’re cooking so that you have plenty of room to press each piece down without disturbing other items around it. While you can theoretically use a grill press for anything, it’s most often used to press and sear: Bacon Chicken Smash burgers Steak (if you like medium or well-done) Sandwiches
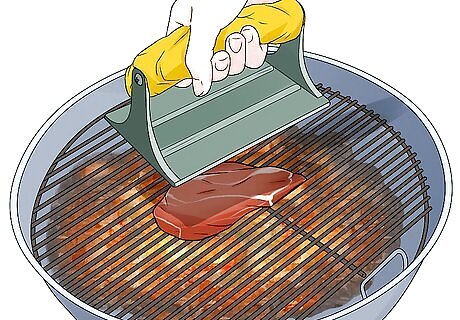
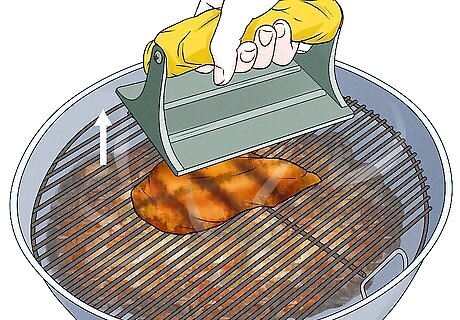
Pick the press up by the handle with a thick towel or oven mitt. If you preheated the press, the handle may be fairly hot. Even if you didn’t though, the handle will heat up once you press your food down. Lift the grill press over the food so that the plate on the bottom is over the center of your dish. Never hold the handle directly when you’re using the grill press. Try to use your press as soon as the food hits the grill or skillet if you’re cooking a filet of any kind. This way, the bottom of the food will sear evenly and smoothly before it starts to cook through. It’s okay if you use it a little later if you’re making a sandwich, bacon, or veggies.
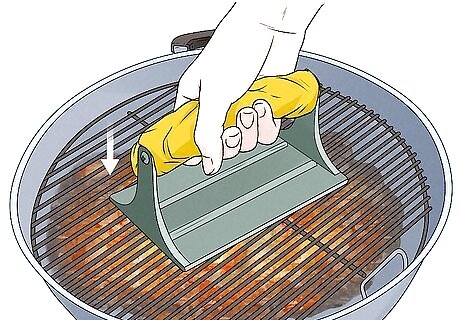
Push down gently to sear and flatten your food. Keep the press parallel to the cooking surface. Apply a light, even amount of pressure. Press the meat or veggies down as flat as you’d like the food to be and hold the press in place for a moment. This ensures that your food cooks and sears in a uniform pattern. If you preheated your press, you’ll sear the dish from both sides at the same time. If you press down from an angle, you may end up with an uneven filet. You may also send juices squirting out of the pan or grill if you don’t press down evenly. You can also simply set the press on top of the food and not apply pressure. This will help the food cook faster without pushing too much of the juice out.
Take the press off once you’ve got a beautiful sear. The longer you hold the press down, the darker the crust on your steak or burger will be. If you just want to flatten your food, press down and gently lift the press up right away. If you want a really dark crust, press and hold the grill down for a few seconds. When you flip the food over (if you’re flipping it), repeat this process on the other side for a uniform finish. You can just leave the grill press on top of the dish while it cooks if you want the food to keep its shape. You don’t have to take it off if you don’t want to.
Mastering Meals with Your Press
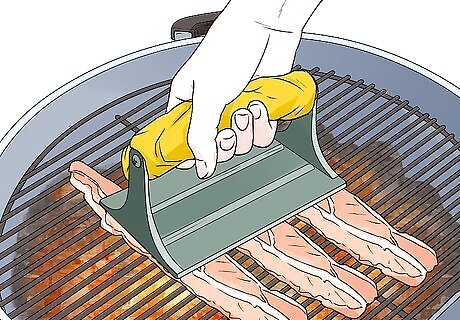
Leave the press on bacon while it cooks to get flat, uniform strips. If you hate it when bacon curls up and cooks unevenly, grab your grill press. Once you lay your bacon down in the skillet, set your grill press on top of the bacon and leave it there while it cooks. This will give you extra-flat bacon where each bite is just as crispy as the last! Your bacon will cook a lot faster when you use a grill press, too. If you tend to be impatient in the morning, a grill press is a great investment!
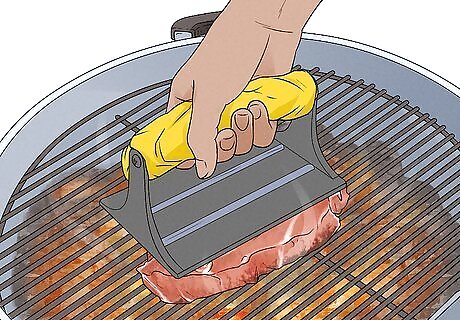
Use your press to get beautifully seared steak, chicken, and fish filets. You can use a grill press to cook meat evenly and get elegant sear marks if you’re grilling on a grate. On the stovetop, a grill press will give you give you a clean crust on each side of the filet and keep it from curling up while it cooks. Just keep in mind, the harder you push the press down, the faster your filet will cook.
Craft delicious smash burgers with your grill press. Smash burgers are those crispy, thin patties you find at diners. Instead of shaping your ground beef into a disc for those thick, juicy burgers, shape the ground beef into a sphere, like you’re making meatballs. When you set the balls of beef on top of the grill or skillet, push them down with your grill press to get crispy, flat, smash burgers! Pressing the burger down will give you that crust you normally don’t get when you just set the burger down and let it cook. You can typically cook burgers without any oil or butter since the fat keeps them from sticking to the grill. If you’re using a grill press, you probably need to use a bit of oil since pushing the beef down can make it stick to the surface.
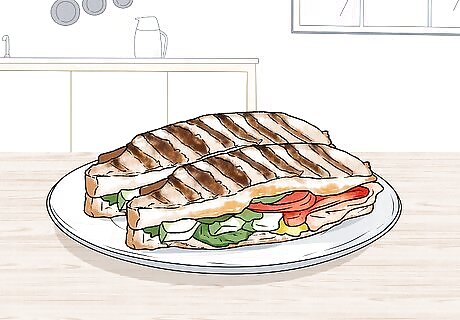
Use your grill press to turn a skillet into a panini maker. You can throw out that clunky panini maker if you have a grill press! Just cook your sandwich in a cast iron skillet or pan with a little butter or oil and leave a preheated grill press on top. This is a great way to make delicious grilled cheese sandwiches as well! Some grill presses have that grate-pattern on them to leave delicious grill marks on the bread. If you love a good sandwich, this kind of grill press is a great investment.
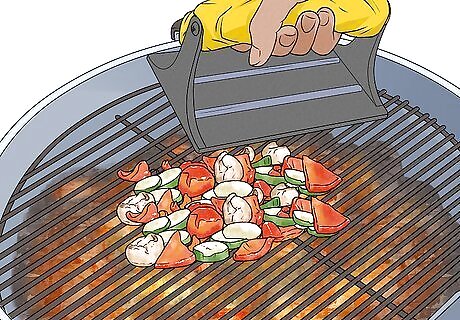
Grab your press to speed up the cooking time for browned veggies. You don’t have to use your grill press for only meat. If you’re grilling or pan-frying some veggies, set your grill press on top of the vegetables and let it be. This will make your veggies cook a lot faster and lead to some beautifully-browned asparagus, carrots, or broccoli. The grill press is really just a flat plate. You can theoretically use it to press any food down while it cooks, so feel free to get creative!

Avoid using your grill press if you’re looking for medium-rare steak. Using a grill press pushes some of the moisture out if you’re cooking meat. This is great if you’re trying to cook your food evenly or get a beautiful crust, but you are sacrificing some of the juiciness. Leave the press in your cabinet if you’re trying to make some medium-rare steaks. For similar reasons, using a grill press is not recommended if you’re looking for juicy chicken breasts.
Cleaning the Grill Press
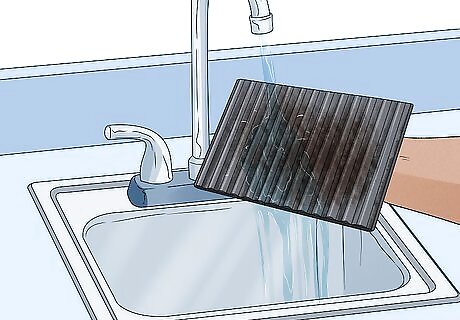
Rinse the grill press gently with some warm water. As soon you’re done with the grill press, turn on your sink and let the water warm up a little. Hold the grill press’s plate under the water and let it rinse away any scraps of food. You can rinse the handle and top of the plate as well if you’d like. Never use soap or abrasive chemicals to clean your grill press. The vast majority of the time, these presses are cast iron. Sometimes, they’re metal. In either case, it may rust over time if you use a lot detergents or cleaners.
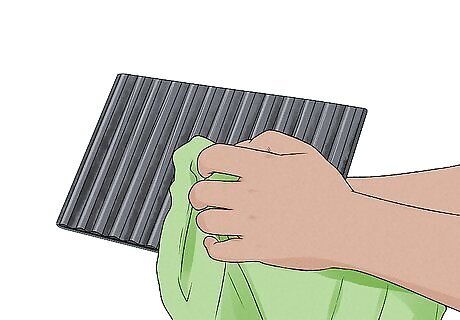
Dry the grill press by hand with a clean cloth. Grab a clean towel and give it a thorough wipe to soak up any excess water. If your grill press is cast iron, excess moisture may lead to damage. If your grill press is made out of metal, you may end up with water spots if you don’t dry it thoroughly. If something is stuck on your press, sprinkle a little bit of kosher salt on it and rub the surface with a clean towel.
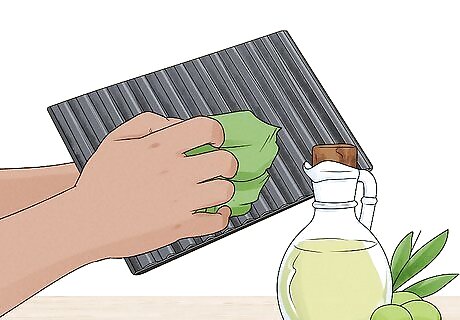
Re-season the press as needed with a little bit of oil and heat. If your cast iron grill press looks like it could use a little love, pour a little vegetable, avocado, or olive oil into a paper towel. Wipe the cast iron plate with the oily cloth to season it. Then, set the plate down in another cast iron skillet and heat it for 20 minutes over medium heat. This will keep your grill press well-oiled and ensure that it’s ready to go the next time you need it. Like regular cast iron skillets, the fat in the oil soaks into the cast iron and protects it from rust and damage. You don’t need to re-season metal grill presses. Just keep them clean and you’ll be fine.


Comments
0 comment